Tag: healthy nails

  • How to Remove Gel Polish at Home Without Damaging Your Nails

    How to Remove Gel Polish at Home Without Damaging Your Nails

    featured image showing healthy natural nails after gel polish removal

    Gel manicures are a miracle for anyone who wants chip-free, glossy nails for weeks. However, the most dangerous part of a gel manicure isn’t the application—it’s the removal. If you have ever peeled or chipped your gel polish off, you know the devastating damage it can cause to your natural nail plate. Learning how to remove gel polish safely is the ultimate secret to maintaining healthy, strong nails.

    Many people resort to scraping the polish off with their fingernails or using metal tools to pry it off. This rips off the top layers of your natural nail, leaving them thin, weak, and painfully sensitive. By mastering the correct how to remove gel polish techniques, you can transition between manicures without sacrificing your nail health. If you need visual inspiration for your next manicure after removal, be sure to explore our Pinterest boards. In this comprehensive step-by-step guide, we will teach you exactly how to safely remove gel polish at home.

    Why Safe Gel Polish Removal Matters

    understanding the importance of safe gel polish removal to prevent nail damage

    Before diving into the removal process, it is important to understand why proper removal is so crucial. Gel polish is designed to adhere tightly to the natural nail. It is cured (hardened) under a UV or LED lamp, creating a chemical bond that doesn’t just wash off with regular nail polish remover.

    When you force this bond apart by peeling, you cause structural damage to the nail bed. This can lead to white patches, peeling layers, and even permanent nail bed separation. To ensure your nails stay strong enough to support future acrylic nail designs 2026, you must use a gentle, chemical-based removal process that breaks the bond without breaking the nail.

    What You Need to Remove Gel Polish

    Having the right tools is half the battle when learning how to remove gel polish. Using the wrong tools can lead to disaster. Here is what you need:

    essential tools needed to learn how to remove gel polish at home
    • 100% Pure Acetone: Regular nail polish remover is not strong enough. You need pure acetone to break down the gel polymers.
    • Cotton Balls or Pads: You will need these to hold the acetone against your nails.
    • Aluminum Foil: Cut into small squares, this is used to wrap the fingertips and trap the heat, accelerating the removal process.
    • A Wooden Orange Stick: A cuticle pusher made of wood is the safest tool for gently scraping off the softened gel. Never use metal tools.
    • Nail Buffer and File: A coarse file to break the topcoat, and a fine buffer to smooth the natural nail afterward.
    • Cuticle Oil and Hand Cream: To replenish moisture after the drying acetone process.

    Step-by-Step Guide: How to Remove Gel Polish

    Ready to safely remove your manicure? Follow these five easy steps for a flawless, damage-free removal.

    Step 1: File Off the Topcoat

    filing off the topcoat in step 1 of how to remove gel polish

    This is the most crucial step in learning how to remove gel polish. The shiny topcoat is what protects the gel underneath from regular acetone. Take a coarse nail file and gently buff away the shiny top layer of your gel polish. You don’t need to file all the way down to your natural nail; just remove the shine. If the gel looks cloudy and matte, you have filed enough.

    Step 2: Soak the Cotton in Acetone

    soaking cotton in acetone for step 2 of how to remove gel polish

    Soak a cotton ball or pad in 100% pure acetone. Make sure it is thoroughly saturated but not dripping. Place the wet cotton directly onto your fingernail. If you have sensitive skin, you can apply a layer of petroleum jelly around your cuticles to protect it from the drying effects of the acetone.

    Step 3: Wrap in Foil

    wrapping nails in foil for step 3 of how to remove gel polish

    Take a pre-cut square of aluminum foil and wrap it tightly around your fingertip, securing the soaked cotton ball against the nail. The foil traps body heat, which helps the acetone break down the gel polymers faster. Repeat this for all your fingers on one hand.

    Step 4: Wait 10 to 15 Minutes

    waiting for the acetone to work in step 4 of how to remove gel polish

    Patience is key. Let your nails soak for at least 10 to 15 minutes. Do not try to rush the process by pulling the foil off early. If the gel hasn’t fully lifted, you will end up scraping and damaging your natural nail. While you wait, you can catch up on your favorite beauty blogs or read our guide on the best hair care routine for damaged hair to pass the time.

    Step 5: Gently Push Off the Gel

    gently pushing off softened gel with an orange stick in step 5 of how to remove gel polish

    After 15 minutes, remove the foil one finger at a time. Take your wooden orange stick and gently push the gel polish from the cuticle down toward the tip of the nail. The gel should flake off easily. If it is still stubbornly stuck, re-wrap it in foil with fresh acetone for another 5 minutes. Never force it off.

    How to Care for Your Nails After Removal

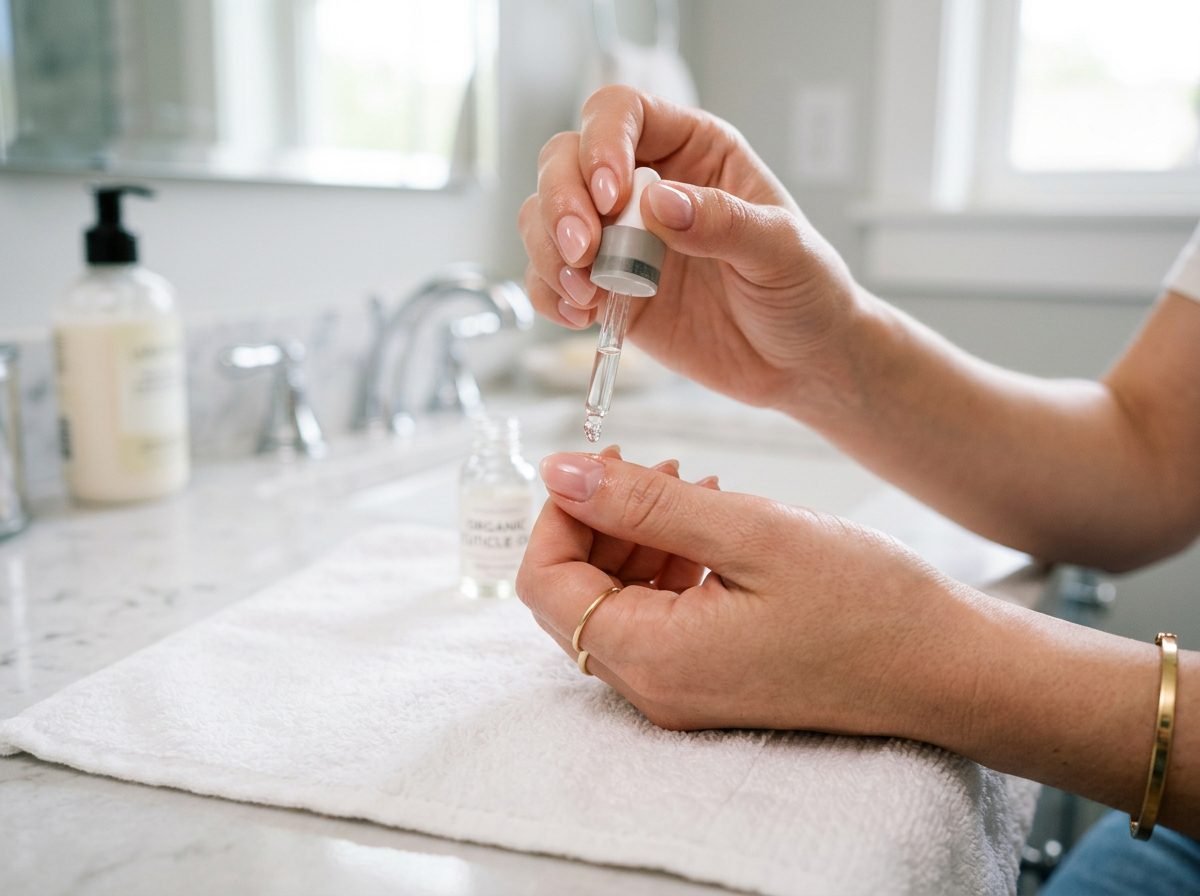
    applying cuticle oil for aftercare when learning how to remove gel polish

    Once you have successfully learned how to remove gel polish, the aftercare is just as important as the removal. Acetone is incredibly drying, and your natural nails will likely feel weak and brittle.

    1. Wash Your Hands: Wash your hands with soap and water to remove any lingering acetone or gel dust.
    2. Buff Gently: Lightly buff the surface of your natural nails to smooth out any ridges or remaining gel residue.
    3. Hydrate: Apply a generous amount of cuticle oil to your nail beds and massage it in. Follow up with a thick hand cream to restore moisture to your skin.
    4. Take a Break: Give your nails a break from gel for at least a week. Let them breathe and recover. To keep them looking polished without chemicals, follow a strict nail care routine and simply use a clear strengthening base coat.

    For more daily beauty, fashion, and lifestyle tips, be sure to follow our Facebook page where we share daily updates!

    Frequently Asked Questions (FAQs)

    1. Can you remove gel polish with regular nail polish remover?

    No, regular nail polish remover is not strong enough. To remove gel polish, you must use 100% pure acetone. Regular remover contains water and moisturizers, which prevent the acetone from breaking down the cured gel polymers.

    2. How long should I soak my nails in acetone?

    You should soak your nails in acetone for 10 to 15 minutes. If the gel polish does not slide off easily with a wooden stick after 15 minutes, you should re-wrap the nail for another 5 minutes. Never force the gel off.

    3. Is it bad to peel off gel polish?

    Yes, peeling off gel polish is incredibly bad for your nails. Gel polish bonds to the top layers of your natural nail. When you peel it off, you rip those layers off with it, causing severe thinning, peeling, and damage to the nail bed.

    4. How do I keep my nails healthy after removing gel?

    To keep your nails healthy after gel removal, apply cuticle oil daily to hydrate the nail plate. Use a strengthening clear polish, avoid using your nails as tools, and give your nails a break from gel or acrylic manicures for at least a week to allow them to recover.

    5. Can I remove gel polish without acetone?

    While there are acetone-free gel removers on the market, they are generally less effective and take much longer. Acetone is the most efficient way to break down the gel. To protect your skin from the acetone, apply petroleum jelly around your nails before soaking.

    confident women with healthy nails after mastering how to remove gel polish

    Conclusion

    Mastering how to remove gel polish safely is a vital skill for any beauty enthusiast. By filing the topcoat, using pure acetone, and gently pushing off the softened gel, you can completely avoid the damage caused by peeling or scraping. Remember to always prioritize aftercare by moisturizing your cuticles and giving your natural nails a break between manicures. With a little patience and the right technique, your nails will remain strong, healthy, and perfectly prepped for your next stunning manicure!

  • Nail Care Routine: The Ultimate Guide to Strong, Healthy Nails

    Nail Care Routine: The Ultimate Guide to Strong, Healthy Nails

    Young American woman applying cuticle oil to healthy natural nails for a nail care routine.

    Building a dedicated nail care routine is the ultimate secret to achieving long, strong, and beautiful nails. We often spend hours curating the perfect skincare and haircare regimens, but our hands and nails are frequently left as an afterthought. Beautiful manicures start with a healthy canvas. If your natural nails are weak, peeling, or brittle, no amount of polish or intricate nail art will look its best or last very long.

    Just like your skin, your nails require daily hydration, protection, and maintenance. The good news is that creating an effective nail care routine doesn’t require expensive salon treatments or a shelf full of products. By understanding the anatomy of your nails and making a few simple lifestyle tweaks, you can completely transform the health and appearance of your hands. If you are looking for visual inspiration for healthy, polished nails, be sure to explore our Pinterest boards for endless ideas. In this ultimate guide, we will walk you through everything you need to know to grow and maintain flawless nails.

    Why a Nail Care Routine Matters

    Comparison of dry peeling nails versus smooth hydrated nails showing why nail care matters.

    Before diving into the specific steps, it is important to understand why a nail care routine is so crucial. Nails are made of a protein called keratin, which is the same protein that makes up our hair. Because nails are porous, they are highly susceptible to environmental damage, moisture loss, and chemical exposure.

    Every day, our nails are subjected to hot water, harsh cleaning chemicals, typing, and temperature changes. Without proper care, the keratin layers begin to separate, leading to peeling, splitting, and breakage. Furthermore, the cuticles—the small ridge of skin at the base of the nail—act as a protective seal against bacteria and infection. Neglecting your cuticles can lead to painful hangnails and permanent damage to the nail matrix (the part of the nail that produces new cells). By committing to a daily routine, you reinforce the nail plate, lock in essential moisture, and create a resilient barrier against daily wear and tear.

    Understanding the Anatomy of the Nail

     Close up of a healthy nail showing the cuticle, nail plate, and free edge anatomy.

    To properly care for your nails, you need to know their basic anatomy. The part of the nail you see and paint is called the nail plate. It is dead tissue, which is why we can cut and file it without feeling pain. However, the nail matrix, which is hidden under the cuticles at the base of the nail, is very much alive. The matrix produces new nail cells, which push older cells forward, lengthening the nail.

    If the matrix is damaged—by aggressive cuticle pushing, biting, or trauma—the new nail will grow out with ridges, dents, or weak spots. Therefore, a large part of a good nail care routine is protecting the matrix and keeping the surrounding skin healthy so the new growth is smooth and strong.

    The Ultimate Daily Nail Care Routine

    Ready to transform your nails? Here is the ultimate daily and weekly nail care routine that guarantees stronger, healthier growth.

    Step 1: Cleanse Gently

    Gently cleaning under nails with a soft brush as the first step of a nail care routine.

    While keeping your nails clean is essential, how you clean them matters. Avoid using sharp metal tools to dig under the nail tips, as this can easily break the protective seal under the nail, allowing bacteria and water to enter, which causes fungal infections and separation of the nail plate. Instead, use a soft nail brush with gentle soap and warm water to scrub the surface and under the tips. This removes dirt and bacteria without causing trauma to the delicate skin underneath.

    Step 2: Moisturize Daily (The Most Important Step)

    Massaging jojoba cuticle oil into nail beds to moisturize and strengthen nails daily.

    If there is one step you should never skip in your nail care routine, it is moisturizing. Nails need oil to remain flexible. When they dry out, they become brittle and snap easily. Invest in a high-quality cuticle oil—preferably one containing jojoba oil or vitamin E. Jojoba oil is particularly effective because its molecular structure is very similar to human sebum, allowing it to penetrate deeply into the nail plate. Apply cuticle oil to the base of your nails and massage it into the nail bed and surrounding skin at least twice a day. Follow up with a thick hand cream to lock in the moisture.

    Step 3: Protect Your Hands

    Wearing rubber gloves while washing dishes to protect nails from water damage.

    Water is the natural enemy of strong nails. When nails absorb water, they expand; when they dry, they contract. This constant expanding and contracting causes the layers of keratin to separate, leading to peeling nails. Whenever you wash dishes or use harsh cleaning chemicals, always wear rubber gloves. This simple habit not only protects your nails from water damage but also prevents your skin from coming into contact with drying chemicals. Similarly, avoid using your nails as tools to open soda cans, scrape off labels, or pry things open.

    Step 4: File Correctly

    Filing nails in one direction using a glass nail file to prevent peeling and splitting.

    The way you file your nails can make or break their strength. Ditch the traditional emery boards (the cardboard sandpaper files), as they cause micro-tears in the nail tip, leading to peeling. Instead, invest in a glass or crystal nail file. These files seal the keratin layers together at the edge, preventing splitting. Furthermore, always file your nails in one direction rather than using a back-and-forth sawing motion. Sawing causes friction and heat, which weakens the nail structure.

    Step 5: Give Your Nails a Break

    Giving nails a break from polish and applying hand cream for natural nail recovery.

    While nail polish looks beautiful, constantly wearing it can weaken your nails. Nail polish, especially darker colors, can stain the nail plate. Furthermore, nail polish removers containing acetone are incredibly drying and strip the nail of its natural oils. Try to give your nails a polish-free weekend at least once a month to let them breathe and recover. During this break, focus heavily on applying cuticle oil and strengthening treatments.

    Weekly Nail Care Habits

    Flat lay of weekly nail care essentials including a cuticle pusher and glass file.

    In addition to your daily habits, your nail care routine should include a weekly maintenance session to keep your hands looking salon-fresh.

    1. Gentle Exfoliation

    Exfoliating hands and cuticles with a gentle sugar scrub for weekly nail care.

    Once a week, exfoliate your hands and cuticles. Just like the skin on your face, dead skin cells can build up on your hands, making them look dull. Use a gentle physical scrub or a chemical exfoliant containing lactic or glycolic acid. Gently rub the scrub over your hands, paying special attention to the cuticle area. This removes dead skin and stimulates blood flow to the nail matrix, promoting healthy new growth.

    2. Push Back Cuticles (Never Cut!)

    Gently pushing back cuticles with a wooden orange stick instead of cutting them.

    After exfoliating and showering (when your skin is soft), use a wooden orange stick wrapped in a tiny bit of cotton to gently push back your cuticles. Never cut your cuticles at home. As mentioned earlier, they are a protective barrier, and cutting them opens you up to infection. Pushing them back simply makes the nail plate look longer and cleaner without causing damage.

    3. Apply a Strengthening Treatment

    Applying a clear nail strengthening treatment to reinforce weak natural nails.

    If your nails are particularly weak, apply a strengthening treatment or a hardening base coat once a week. Look for formulas that contain keratin, calcium, or nylon to reinforce the nail plate. However, be careful not to overuse hardeners, as nails that are too hard become brittle and can snap. Balance is key.

    The Role of Diet and Nutrition in Nail Health

    Healthy foods like salmon, eggs, and biotin supplements for strong nail growth.

    Topical products can only do so much. Truly healthy nails grow from the inside out. Your diet plays a massive role in the strength and growth rate of your nails. Since nails are made of keratin, a protein-rich diet is essential. Ensure you are eating plenty of lean meats, eggs, beans, and nuts.

    Biotin (Vitamin B7) is the most famous supplement for nail and hair growth. Studies have shown that taking a daily biotin supplement can significantly increase nail thickness and reduce splitting within a few months. Additionally, Omega-3 fatty acids (found in salmon, flaxseeds, and walnuts) help keep your nails naturally lubricated and shiny. Just as a good hair care routine for women requires internal nutrition, so does your nail care. Drinking plenty of water is also non-negotiable; dehydration immediately shows up as dry, ridged nails.

    How to Transition from Acrylics to Natural Nails

    Transitioning from damaged acrylic nails to healthy natural nails over time.

    One of the most common reasons people seek out a nail care routine is to repair the damage left behind by acrylic or gel extensions. The removal process often leaves the natural nail thin, bendy, and painful. If you are transitioning from artificial nails, the first step is patience. It will take several months for the damaged portion of the nail to grow out.

    During this time, keep your nails very short to prevent them from snagging and tearing further. Apply cuticle oil multiple times a day to restore flexibility to the thinned nail plate. Avoid polishing them for a few weeks, and use a ridge-filler base coat to smooth out the bumpy texture left by the acrylics. If you must have colored nails, consider using a gentle gel polish, but always research the differences in formulations. Understanding the nuances between gel nail designs and acrylic applications will help you make safer choices for your nail beds in the future.

    Embracing the Short Nail Trend

    Chic and sophisticated short natural nails with a sheer nude polish.

    Many people think that a “good manicure” requires long, dramatic tips. However, short, natural nails are incredibly chic, professional, and modern. Short nails are much easier to maintain, less prone to breakage, and far more hygienic. If your nails are weak, embrace a shorter length while you focus on your nail care routine. You don’t need length to have beautiful nails. A neat, short nail with a sheer pink polish or a minimalist French tip looks highly sophisticated. To see how stylish shorter lengths can be, explore these trendy short nail designs 2026 that prove less length can still mean maximum style.

    Common Nail Care Mistakes to Avoid

    Common nail care mistakes to avoid including biting nails and peeling off polish.

    Even with the best intentions, certain habits can sabotage your nail health. Here are the top mistakes to eliminate from your life immediately:

    • Nail Biting: Biting not only ruins the nail shape but also transfers saliva, which breaks down the skin and causes infections. Try using a bitter-tasting polish to break the habit.
    • Using Acetone Removers: While acetone removes polish quickly, it is incredibly stripping. Opt for non-acetone removers whenever possible, especially for regular nail polish.
    • Peeling Off Polish: Peeling off chipping nail polish is incredibly satisfying, but it takes the top layer of your nail plate with it! Always use a remover.
    • Ignoring Nail Disorders: If you notice severe discoloration, green spots, or lifting of the nail from the bed, stop applying polish immediately and consult a dermatologist. These are signs of fungal or bacterial infections that require medical treatment, not cosmetic cover-ups.

    For more daily beauty, fashion, and lifestyle tips, be sure to follow our Facebook page where we share daily updates and community advice!

    Frequently Asked Questions (FAQs)

    1. What is the best daily nail care routine?

    The best daily nail care routine involves keeping your nails clean and dry, applying a jojoba-based cuticle oil twice a day to moisturize the nail plate, and wearing gloves when doing dishes or using cleaning chemicals. This prevents water damage and keeps the nails flexible to avoid breaking.

    2. How can I make my nails grow faster and stronger?

    While you cannot drastically speed up the genetic growth rate of your nails, you can ensure they grow strong without breaking. Maintain a protein-rich diet, consider taking a daily biotin supplement, and keep your nails moisturized with cuticle oil. Preventing breakage allows the nails to retain their length.

    3. Why do my nails peel and split?

    Peeling and splitting nails are usually caused by a lack of moisture or trauma to the nail tip. Soaking your hands in hot water frequently, using your nails as tools, or using harsh emery boards can cause the keratin layers to separate. Switch to a glass nail file and apply cuticle oil daily.

    4. Should I cut my cuticles?

    No, you should never cut your cuticles at home. Cuticles are a protective barrier that seals the area between your skin and your nail plate, preventing bacteria and infections from entering the nail matrix. Instead, gently push them back with an orange stick after a shower.

    5. Is it bad to wear nail polish every day?

    Wearing nail polish constantly is not inherently bad, but your nails need a break. Nail polish can stain the nail plate, and the removers used to take it off are highly drying. Try to give your nails a polish-free weekend every few weeks to let them breathe and to focus on deep hydration with oils and creams.

    Confident woman showing off strong, healthy natural nails after a consistent nail care routine.

    Conclusion

    Committing to a daily nail care routine is an investment in your overall grooming and self-care. By understanding that nails are porous and require constant hydration, you can easily prevent the peeling, breaking, and weakness that plague so many of us. Remember to protect your hands from water and chemicals, file correctly with a glass file, and never underestimate the power of a good cuticle oil. Combined with a healthy diet rich in protein and biotin, these simple habits will yield long, strong, and beautiful natural nails in a matter of weeks. Start your healthy nail journey today, and enjoy the confidence that comes with having flawless, resilient hands!