Achieving long, shiny, and healthy hair isn’t just about genetics; it is about having a solid hair care routine. We often spend hundreds of dollars on skincare products, but when it comes to our hair, we expect a single shampoo to do all the work. Just like your skin, your scalp and hair require targeted care, hydration, and protection to look their best.
A well-structured hair care routine doesn’t have to be complicated or take hours out of your day. By understanding your hair type and using the right products in the correct order, you can completely transform the health and appearance of your locks. Whether your hair is dry, oily, straight, or curly, consistency is the ultimate secret to success. If you need visual inspiration for your hair goals, be sure to explore our Pinterest boards. In this comprehensive guide, we will walk you through the ultimate step-by-step routine for healthy hair.
Why a Consistent Hair Care Routine Matters
Before diving into the steps, it is important to understand why a consistent hair care routine matters. Your scalp is an extension of the skin on your face. If your scalp is clogged with product buildup, dead skin cells, and excess sebum, it can lead to dandruff, an itchy scalp, and even hair loss.
Furthermore, the mid-lengths and ends of your hair are older and more susceptible to damage from heat styling, environmental factors, and friction. A good routine nourishes the scalp to promote healthy new growth while protecting and hydrating the older lengths to prevent breakage and split ends. If you are just starting your healthy hair journey, be sure to read our hair care tips for beginners guide for foundational knowledge.
Identifying Your Hair Type and Needs
The first step in building a hair care routine is identifying your hair type. What works for someone with fine, straight hair will not work for someone with thick, coily hair.
Straight Hair: Tends to get oily quickly because sebum travels easily down the hair shaft. Focus on lightweight products and frequent washing.
Wavy Hair: Prone to frizz and lacking volume at the roots. Use lightweight mousses and hydrating, silicone-free conditioners.
Curly Hair: Naturally dry because sebum struggles to travel down the curls. Requires heavy hydration, creams, and oils to lock in moisture.
Coily Hair: Very fragile and prone to shrinkage. Needs rich butters, deep conditioning, and protective styling to prevent breakage.
The Ultimate Step-by-Step Hair Care Routine
Ready to transform your tresses? Here is the ultimate step-by-step hair care routine to follow on your wash days and in between.
Step 1: Pre-Poo Treatment
“Pre-poo” simply means applying a treatment to your hair before you shampoo. This protects the hair from being stripped of its natural oils during the washing process. Apply a lightweight oil (like argan or jojoba oil) or a specialized pre-poo mask from the mid-lengths to the ends of your hair. Leave it on for 15 to 30 minutes before hopping in the shower. This is especially crucial for dry or damaged hair.
Step 2: Scalp Massage and Shampoo
When washing your hair, the primary focus should be your scalp, not your lengths. Apply a quarter-sized amount of shampoo to your palms and massage it gently into your scalp using your fingertips (never your nails). A scalp massage stimulates blood flow, which encourages hair growth. Let the suds run down the lengths of your hair as you rinse; this is enough to clean them without causing friction damage. If your scalp is very oily or has product buildup, you can do a “double wash” (shampooing twice).
Step 3: Condition the Mid-Lengths and Ends
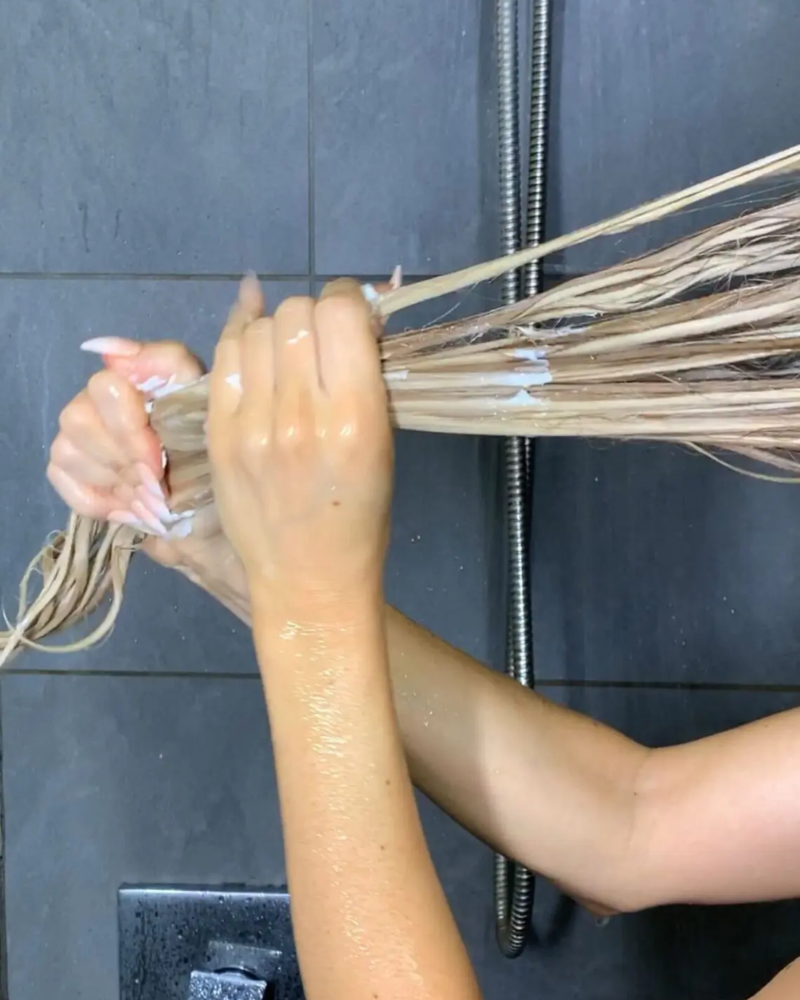
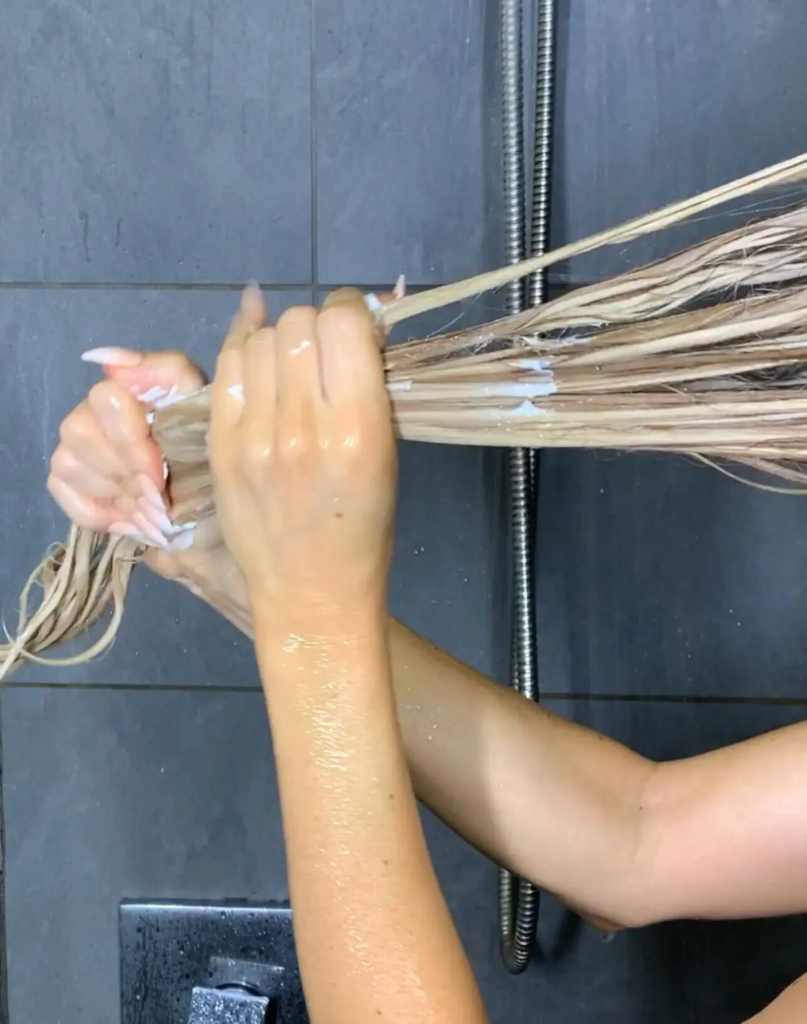
After rinsing out the shampoo, squeeze the excess water out of your hair. Apply conditioner generously from the mid-lengths down to the ends. Avoid applying conditioner directly to your scalp, as this can weigh down your roots and make them look greasy. Use a wide-tooth comb to detangle your hair while the conditioner is in; this prevents breakage. Leave it in for 2 to 3 minutes before rinsing with cool water to seal the hair cuticle and add shine.
Step 4: Weekly Deep Conditioning or Hair Mask
Replace your regular conditioner with a deep conditioning hair mask once a week. Masks are formulated with smaller molecules that penetrate deeper into the hair shaft, repairing internal damage and providing intense hydration. If your hair is extremely dry, you may need to use a mask twice a week. For the best remedies for extremely dry hair, you can check out our guide on dry hair remedies at home.
Step 5: Proper Drying Techniques
Never rub your hair vigorously with a standard cotton bath towel. This causes severe friction, leading to frizz and breakage. Instead, gently squeeze the water out of your hair using a microfiber towel or a soft cotton t-shirt. If you must use a blow dryer, always apply a heat protectant spray first and use the lowest heat setting possible. Air-drying is always the healthiest option.
Step 6: Leave-In Conditioner and Hair Oil
While your hair is still slightly damp, apply a leave-in conditioner to lock in moisture. Follow up with a few drops of hair oil (like argan or rosehip oil) focused only on the very ends of your hair. This seals the cuticle, prevents split ends, and adds a beautiful, glossy shine. If you are actively trying to grow your hair out, incorporating scalp massages with a growth oil into your daily routine is a great addition. For more tips, read our guide on how to grow hair faster.
Daily Habits for Healthy Hair
Your wash day hair care routine is only half the battle. What you do to your hair every day matters just as much.
Sleep on a Silk Pillowcase: Cotton pillowcases absorb moisture from your hair and create friction, causing tangles and breakage. Silk or satin pillowcases allow your hair to glide smoothly, keeping it hydrated and frizz-free.
Avoid Tight Hairstyles: Wearing tight ponytails or buns every day puts immense tension on the hair follicles, leading to a condition called traction alopecia (hair loss from pulling). Opt for loose styles and use silk scrunchies.
Minimize Heat Styling: Flat irons and curling wands reach extreme temperatures that literally boil the moisture out of your hair. Try to limit heat styling to once a week, and always use a heat protectant.
Protect Your Hair from the Sun: Just like your skin, your hair can get sunburned and damaged by UV rays. Wear a hat if you are going to be in the direct sun for prolonged periods.
For more daily beauty, fashion, and lifestyle tips, be sure to follow our Facebook page where we share daily updates!
Frequently Asked Questions (FAQs)
1. What is the correct hair care routine?
The correct hair care routine involves a pre-poo treatment, washing with a scalp-focused shampoo, conditioning the ends, applying a weekly hair mask, and using leave-in conditioner and hair oil to seal in moisture. The exact products should be tailored to your specific hair type.
2. How often should I wash my hair?
How often you wash your hair depends on your hair type and lifestyle. Fine, straight hair may need to be washed every 1 to 2 days, while thick, curly, or coily hair may only need washing once a week. Over-washing can strip the hair of its natural oils, leading to dryness.
3. What is a pre-poo treatment?
A pre-poo treatment is a preparatory step done before shampooing. It involves applying oils, conditioners, or masks to the hair to protect it from being stripped of moisture by the harsh detergents in shampoo. It is highly beneficial for dry, damaged, or curly hair.
4. Should I apply conditioner to my scalp?
No, you should avoid applying conditioner to your scalp. Conditioners are heavy and can clog hair follicles, leading to an oily scalp and flat roots. Focus on applying conditioner only from the mid-lengths to the ends of your hair, where moisture is needed most.
5. How can I make my hair grow faster?
To make your hair grow faster, maintain a healthy scalp by massaging it regularly to stimulate blood flow. Avoid tight hairstyles, minimize heat styling, eat a protein-rich diet, and keep your ends trimmed to prevent breakage from traveling up the hair shaft.
Conclusion
Building a dedicated hair care routine is an investment in the long-term health and beauty of your hair. By following these step-by-step instructions—from pre-pooing to proper drying and daily maintenance—you can completely transform your hair from dull and damaged to shiny and strong. Remember that consistency is key, and it may take a few weeks to see noticeable results. Listen to your hair, adjust your products as needed, and enjoy the confidence that comes with having a gorgeous, healthy mane!
Learning how to curl hair with a straightener is the ultimate beauty hack that can completely transform your hairstyling routine. While curling irons are great, a flat iron (hair straightener) is incredibly versatile. It allows you to achieve sleek, straight hair one day and bouncy, beautiful curls the next, all with a single tool. However, mastering the technique of curling with a straightener can feel a bit tricky for beginners.
Unlike a clamping curling iron, a flat iron requires a specific twisting and pulling motion to create those perfect, beachy waves or tight ringlets. The secret lies in the angle of the iron, the speed of your pull, and the temperature setting. Whether you want soft, everyday waves or glamorous, red-carpet curls, mastering how to curl hair with a straightener will save you time and money. If you are looking for visual inspiration for your hairstyles, be sure to explore our Pinterest boards. In this comprehensive step-by-step guide, we will walk you through the exact process of curling your hair flawlessly with a straightener.
Why Use a Flat Iron to Curl Your Hair?
Before diving into the application process, you might wonder why you should use a straightener instead of a traditional curling iron. The biggest advantage is versatility. If you are traveling, packing a single flat iron saves valuable luggage space compared to packing multiple styling tools.
Furthermore, flat iron curls tend to last longer and look more natural. A curling iron creates a uniform, cylindrical curl, while a flat iron creates a slightly flatter, more modern wave that mimics the natural texture of hair. Because the heat is distributed evenly on both sides of the hair strand, the curl sets faster. However, because you are applying direct heat, it is crucial to establish a solid hair care routine for women to keep your strands healthy and strong.
What You Need to Curl Your Hair
Having the right tools is half the battle when learning how to curl hair with a straightener. Using the wrong type of iron will make the process incredibly difficult. Here is what you need:
A Flat Iron with Rounded Plates: This is the most important tool. If your straightener has sharp, square edges, it will leave visible creases in your hair. You need an iron with smooth, rounded edges so the hair can glide smoothly as you twist it.
Heat Protectant Spray: Never apply a hot tool to dry, unprotected hair. A good heat protectant spray creates a barrier that prevents burning and breakage.
Hair Clips: Sectioning clips are essential for ensuring you curl every strand evenly without missing any pieces.
A Comb or Brush: To detangle your hair before styling.
Lightweight Hair Oil or Hairspray: To finish the look, smooth frizz, and lock in the curls.
Step-by-Step Guide: How to Curl Hair with a Straightener
Ready to master the technique? Follow these six easy steps for flawless, long-lasting curls.
Step 1: Prep Your Hair Completely
Your hair must be 100% dry before you use a flat iron. Applying a hot iron to damp hair will literally boil the water inside the hair shaft, causing it to snap and break. Start by brushing your hair thoroughly to remove any tangles. If your hair is oily, wash and blow-dry it first. Clean, smooth hair holds curls much better than dirty hair. If you are trying to grow your hair out while heat styling, be sure to check out our guide on how to grow hair faster to keep your length intact.
Step 2: Apply Heat Protectant
Spray a generous amount of heat protectant all over your hair, focusing on the mid-lengths and ends. Comb it through to ensure even distribution. This step is non-negotiable if you want to prevent heat damage. Next, set your flat iron to the correct temperature. Fine or thin hair should be styled at 300°F to 350°F. Medium hair can handle 360°F to 380°F. Thick or coarse hair requires 390°F to 420°F.
Step 3: Section Your Hair
This is a crucial step in learning how to curl hair with a straightener. Working in small sections ensures that every strand gets evenly curled. Use your clips to divide your hair into three horizontal sections: the bottom (nape of the neck), the middle, and the top (crown). Leave the bottom section down and clip the rest up.
Step 4: The Twisting Technique
Take a one-inch piece of hair from the bottom section. Clamp the flat iron down near the root of the hair. Then, twist the iron 180 degrees (a half-turn) away from your face. Slowly pull the iron down the length of the hair. The slower you pull, the tighter the curl will be. If you pull too fast, the curl will be loose and might fall flat. Keep the tension consistent as you pull down to the very end.
5: The Pull-Through Method (For Soft Waves)
If you want softer, beachy waves instead of tight ringlets, try the pull-through method. Clamp the flat iron near the root, twist it 180 degrees, and pull it down a few inches. Pause, un-twist slightly, and clamp again. Twist the opposite way and pull down a few more inches. Continue this zigzag motion down the hair shaft. This creates a beautiful, natural-looking wave.
Step 6: Let the Curls Cool and Set
This is where most beginners fail. When hair is hot, it is malleable. If you brush it immediately, the curl will fall out. As you finish curling each section, coil the curl into a ringlet and pin it to your head with a bobby pin, or just let it fall and cool naturally on your shoulder. Do not touch or brush the curls until your entire head is styled and the hair has completely cooled to room temperature. To ensure your new curls perfectly frame your face, be sure to consult our guide on the best haircut for your face shape.
Different Types of Curls You Can Create
The beauty of learning how to curl hair with a straightener is the variety of styles you can achieve by slightly adjusting your technique:
Tight Ringlets: Take very small sections (half-inch), twist the iron a full 180 degrees, and pull down very slowly.
Loose Beach Waves: Take larger sections (two inches), twist the iron only 90 degrees, and pull down a bit faster.
Vintage Hollywood Waves: Curl all sections in the same direction (away from the face). Once cooled, brush through the curls with a paddle brush to connect them into a single, smooth wave.
Common Flat Iron Curling Mistakes to Avoid
Even with a step-by-step guide, mistakes happen. Here are a few common pitfalls to avoid when practicing how to curl hair with a straightener:
Clamping Too Hard: If you press the iron too tightly, you will get harsh, 90-degree creases in your hair. Clamp firmly but gently.
Taking Sections That Are Too Big: If you try to curl a massive chunk of hair, the outer layers will get curled, but the hair in the middle won’t receive any heat. Stick to one-inch sections.
Using the Wrong Iron: As mentioned, an iron with sharp, square plates will snag the hair and leave dents. Always look for rounded plates.
Pulling Too Fast: If you pull the iron down too quickly, the heat doesn’t have time to penetrate the hair shaft and set the curl. Slow and steady wins the race.
For more daily beauty advice, hair tutorials, and lifestyle tips, be sure to follow our Facebook page where we share daily updates!
Frequently Asked Questions (FAQs)
1. Can you curl your hair with a flat iron?
Yes, absolutely. A flat iron is incredibly versatile and can create a variety of curls, from tight ringlets to loose beach waves. The technique involves clamping the hair, twisting the iron 180 degrees, and slowly pulling it down the length of the hair.
2. What temperature should I use to curl my hair?
The temperature depends on your hair type. Fine or thin hair should be styled at 300°F to 350°F. Medium hair can handle 360°F to 380°F. Thick or coarse hair requires 390°F to 420°F. Always use a heat protectant, regardless of the temperature.
3. Why do my flat iron curls fall out quickly?
If your curls fall out quickly, it is usually because you are touching or brushing them while they are still hot. Hair needs to cool completely to set the curl. Pin the curls to your head and let them cool before running your fingers through them.
4. Do I need a specific type of straightener to curl my hair?
Yes, you need a flat iron with rounded plates. If your straightener has sharp, square edges, it will snag the hair and leave visible creases or dents in your curls. Look for an iron with smooth, curved edges.
5. How do I prevent creases when curling with a straightener?
To prevent creases, avoid clamping the iron too tightly. Keep a consistent, gentle pressure as you twist and pull. Also, ensure you keep the iron moving continuously without pausing in the middle of the hair shaft.
Conclusion
Mastering how to curl hair with a straightener is a transformative skill that will elevate your entire hairstyling game. While it may feel a bit awkward at first, with a little practice, you will be creating gorgeous, bouncy curls in no time. Remember to always use a heat protectant, work in small sections, and let your curls cool before touching them. Whether you want tight ringlets for a night out or effortless beach waves for the weekend, your flat iron is the only tool you need. Practice these steps, avoid the common mistakes, and enjoy the stunning, versatile results of beautifully curled hair!
Finding the best haircuts for thin hair is the ultimate secret to achieving a voluminous, healthy-looking mane. If you have fine or thinning hair, you know the daily struggle of trying to add body and bounce. Thin hair tends to fall flat, look greasy quickly, and lack the texture that makes hairstyles hold their shape. However, the right haircut can completely transform your look, creating the illusion of density and fullness without needing a drawer full of styling products.
The secret lies in strategic layering, choosing the right length, and understanding how weight is distributed throughout your hair. Heavy, long hair will only weigh down fine strands, making the ends look stringy. By opting for cuts that remove excess weight and add texture, you can instantly boost your hair’s volume. If you need visual inspiration for your next salon visit, be sure to explore our Pinterest boards. In this comprehensive guide, we will break down the 15 best haircuts for thin hair that will make your locks look thicker than ever.
Why the Right Haircut Matters for Thin Hair
Before diving into specific styles, it is important to understand why choosing the best haircuts for thin hair is so crucial. Fine hair has a smaller diameter than medium or coarse hair, meaning each individual strand is physically thinner. When thin hair is left to grow long without any layers, the weight of the hair pulls it down, making the crown look flat and the ends see-through.
The right haircut removes bulk in the right places and adds internal layers that push the hair upward, creating lift at the roots. Additionally, certain cuts—like blunts bobs—create a straight, solid line at the bottom, which tricks the eye into thinking the hair is denser than it actually is. Just as it is important to find the best haircut for your face shape, finding a cut tailored to your hair density is essential for a flattering look.
The 15 Best Haircuts for Thin Hair
Ready to transform your fine locks? Here are the 15 most flattering and best haircuts for thin hair to ask your stylist for at your next appointment.
1. The Blunt Bob
The blunt bob is the holy grail for thin hair. By cutting the hair to one length (usually around the jawline or chin) with no layers, you create a solid, heavy line at the bottom. This weight prevents the ends from looking stringy and creates the illusion of maximum density. It is a chic, Parisian-inspired look that requires minimal styling.
2. The Pixie Cut
If you want to go short, a pixie cut is incredibly flattering for thin hair. By keeping the sides and back closely cropped and leaving a bit of length on top, you create natural volume. The short length means the hair isn’t weighed down, allowing it to hold texture and style effortlessly. It’s a bold, confident, and low-maintenance option.
3. The Collarbone-Length Lob
If you aren’t ready to go super short, the lob (long bob) is a fantastic option. Keep it at collarbone length with very minimal, subtle face-framing layers. This length is long enough to tie back but short enough to maintain body. Ask your stylist for a blunt cut at the bottom to keep the ends looking thick.
4. The Choppy Lob
Unlike the blunt lob, a choppy lob incorporates short, textured layers throughout the back and sides. This adds incredible movement and volume, giving the hair a “lived-in” look. The choppiness creates texture, which makes thin hair appear fuller and more voluminous.
5. The French Bob
The French bob is a vintage-inspired cut that ends right at the cheekbone or jawline, often paired with straight-cut or curtain bangs. Because it is so short and typically cut blunt, it maximizes the density of the hair. It exudes effortless, high-fashion elegance and makes fine hair look incredibly thick.
6. The Long Blunt Cut
If you insist on keeping your hair long, you must avoid heavy layers. Ask for a long, one-length cut with the ends trimmed to remove any split, see-through ends. This creates a heavy perimeter that makes the hair look thick from top to bottom. Keep the length no longer than your collarbone to prevent the weight from dragging the roots down.
7. The Modern Shag
The modern shag is one of the best haircuts for thin hair if you want volume at the crown. It features heavy, choppy layers around the face and top of the head, while keeping the ends thinner. This creates a triangular shape that adds massive volume at the roots. It looks best styled with a texturizing spray to enhance the piecey look.
8. The Asymmetrical Bob
An asymmetrical bob is cut shorter on one side and longer on the other. The steep angle of the cut draws the eye, creating an interesting visual illusion that distracts from the hair’s lack of density. The longer side can be tucked behind the ear to show off the face and add a stylish edge.
9. The Shoulder-Length Wave
Cutting your hair to shoulder length and adding loose, beachy waves is a great way to fake thickness. The waves add texture and body, making fine hair look twice as full. If your hair doesn’t hold a curl naturally, you can use a large-barrel curling iron and brush the curls out for a soft, voluminous wave.
10. The Rounded Bob
Popularized in the 90s, the rounded bob is cut with a slight curve that tucks under at the ends. When you blow-dry the hair with a round brush, the ends curl inward, creating a rounded, voluminous shape. This shape adds width to the sides of the face and makes the hair look remarkably thick.
11. The Layered Mid-Length Cut
If your hair is fine but you have a lot of it, you can pull off a layered mid-length cut. The key is to have long, blended layers that start below the chin. Shorter layers around the crown will give you lift, while the length maintains weight at the bottom. This is a versatile cut that works for both casual and formal settings.
12. The Short Stacked Bob
A stacked bob is cut shorter in the front and gradually gets longer towards the back, where the layers are heavily stacked on top of each other. This stacking technique creates a massive amount of volume at the back of the head. It is perfect for thin hair because it builds body exactly where fine hair lacks it most.
13. The V-Cut Long Hair
If you want to keep your length but remove some weight, ask for a V-cut. The hair is cut into a soft V-shape at the back, with the longest pieces in the center and slightly shorter pieces on the sides. This creates a cascading effect that adds dimension and movement without thinning out the bottom too much.
14. The Side-Swept Bangs with Bob
Adding side-swept bangs to a bob is a clever trick for thin hair. The bangs create a focal point at the front of the face, drawing attention away from the density of the rest of the hair. Pair them with a chin-length bob for a soft, face-framing, and voluminous look.
15. The Soft Curly Crop
If you have naturally wavy or curly thin hair, a short, soft crop is beautiful. By cutting the hair short and letting your natural texture shine, the curls expand, making the hair look incredibly full. It requires very little styling—just some curl cream and a diffuser.
Styling Tips to Make Thin Hair Look Thicker
Even with the best haircuts for thin hair, how you style it matters immensely. Here are a few pro tips to maximize your volume:
Blow-Dry Upside Down: Drying your hair upside down lifts the roots away from the scalp, creating instant volume. Once dry, flip your head back and smooth the top.
Use Volumizing Powder: Volumizing powders applied directly to the roots add incredible grip and lift without weighing the hair down like heavy gels do.
Avoid Heavy Oils: Skip applying heavy oils or thick conditioners to your roots. Use lightweight, volumizing mousses or foams instead.
Wash Less Frequently: Thin hair gets greasy fast, but over-washing strips natural oils. Use a dry shampoo on day two to absorb oil and add texture. To build a solid foundation, follow these hair care tips for beginners.
How to Grow Thin Hair Longer and Stronger
If you are trying to grow your thin hair out to achieve a longer style, it requires patience and the right care. Thin hair is prone to breakage, so minimizing heat styling and chemical treatments is vital. Focus on a protein-rich diet and use a gentle, sulfate-free shampoo. For a detailed roadmap on increasing your hair length and health, check out our proven guide on how to grow hair faster.
For more daily beauty, hair, and lifestyle tips, be sure to follow our Facebook page where we share daily updates!
Frequently Asked Questions (FAQs)
1. What is the best haircut for thin hair?
The best haircuts for thin hair are shorter styles that remove excess weight, such as a blunt bob, a pixie cut, or a choppy lob. These cuts create a solid line at the ends, which makes the hair look denser and fuller without requiring heavy styling.
2. Do layers make thin hair look thinner?
Yes, heavy layers can make thin hair look stringy and see-through. If you have fine hair, avoid heavily layered cuts. Instead, opt for blunt cuts with minimal, internal layers, or short textured layers like a shag that specifically add volume at the crown.
3. Is short or long hair better for thin hair?
Short to medium hair is generally better for thin hair. Long hair is heavy and pulls down on the roots, making the crown look flat and the ends look sparse. A collarbone-length cut or shorter prevents the hair from being weighed down.
4. How can I add volume to my thin hair?
To add volume, blow-dry your hair upside down, use a volumizing mousse or powder at the roots, and avoid applying heavy conditioners to your scalp. Getting a cut with blunt ends or a stacked back also creates the illusion of thicker hair.
5. Are bangs good for thin hair?
Yes, bangs can be great for thin hair, specifically side-swept bangs or curtain bangs. They create a focal point at the front of the face and add a bit of volume at the roots. However, avoid heavy, blunt straight-across bangs, as they can make the rest of the hair look sparse in comparison.
Conclusion
Having fine or thin hair doesn’t mean you have to settle for flat, lifeless styles. By choosing one of the best haircuts for thin hair—like a blunt bob, a textured lob, or a modern shag—you can instantly create the illusion of volume and density. Remember to avoid heavy layers, keep the length manageable, and use the right styling products to lift your roots. With the right cut and a few styling tricks, your thin hair can look incredibly thick, bouncy, and full of life. Book your salon appointment today and embrace the volume you deserve!
Establishing a solid winter hair care routine is the ultimate secret to maintaining soft, healthy locks when the temperature drops. Just as you swap your lightweight summer moisturizer for a thick, nourishing winter body lotion, your hair requires a similar seasonal transition. The combination of freezing, harsh winds outside and dry, artificial indoor heating inside creates the perfect storm for dry, brittle, and frizzy hair.
During winter, your hair loses moisture rapidly, leading to static, split ends, and a dull, lifeless appearance. Many people experience excessive breakage simply because they continue using their summer hair products and routines when the weather changes. By adapting your habits and implementing a targeted winter hair care routine, you can completely prevent seasonal damage. If you are looking for visual hair inspiration to keep your style fresh this season, be sure to explore our Pinterest boards. In this comprehensive guide, we will walk you through the 10 essential steps to protect your hair from the cold.
Why Your Hair Needs a Winter Hair Care Routine
Before diving into the specific steps, it is important to understand exactly why winter is so harsh on your hair. The hair shaft is porous, meaning it absorbs and loses moisture based on its environment. When you step out into the cold, dry air, the moisture inside your hair shaft evaporates, leaving the cuticle raised and brittle.
Furthermore, the dry heat from central heating systems indoors strips the natural oils from your scalp, leading to dryness, flakiness, and sometimes even dandruff. Hats and scarves, while necessary for warmth, also create friction that can cause mechanical breakage and frizz. A dedicated winter hair care routine is designed to lock in hydration, seal the hair cuticle, and protect the strands from these harsh environmental stressors. If your hair is already feeling the effects of the season, incorporating some dry hair remedies at home is a great place to start your repair journey.
10 Steps for the Perfect Winter Hair Care Routine
Ready to rescue your locks? Here are the 10 non-negotiable steps to include in your winter hair care routine for soft, hydrated, and frizz-free hair all season long.
1. Switch to a Moisturizing Shampoo
In the summer, clarifying shampoos are great for removing sweat and product buildup. However, in winter, these can be too stripping. Swap your regular shampoo for a moisturizing or hydrating formula. Look for ingredients like glycerin, argan oil, shea butter, or aloe vera, which help draw moisture into the hair shaft. Most importantly, try to wash your hair less frequently—aim for two times a week maximum—to allow your scalp’s natural oils to nourish the lengths.
2. Never Skip the Deep Conditioner
Your regular daily conditioner is no longer enough in winter. You must incorporate a deep conditioning hair mask into your routine at least once a week. A thick, rich hair mask penetrates the hair shaft, repairing internal damage and sealing the outer cuticle. Apply the mask from the mid-lengths to the ends, and leave it on for at least 15 to 20 minutes (ideally with a warm towel wrapped around your head to open the cuticle and allow deeper penetration).
3. Reduce Hot Water Showers
While a scalding hot shower feels incredible on a freezing winter morning, it is devastating for your hair and scalp. Hot water strips away the natural oils that protect and moisturize your hair, leading to severe dryness and breakage. Try to wash your hair in lukewarm water. If you can handle it, finish with a cool water rinse to seal the hair cuticle, locking in moisture and adding a brilliant shine.
4. Invest in a Microfiber Towel
Traditional cotton bath towels have a rough texture that causes friction, leading to frizz and mechanical breakage—especially when hair is wet and vulnerable. Swap your cotton towel for a microfiber towel or a soft cotton t-shirt. These materials gently absorb excess water without roughing up the hair cuticle. Simply squeeze the water out gently; never rub your hair vigorously with the towel.
5. Use a Leave-In Conditioner or Hair Oil
Because winter air lacks humidity, you need to artificially seal moisture into your hair. After towel-drying, apply a hydrating leave-in conditioner or a lightweight hair oil (like argan or jojoba oil) to the mid-lengths and ends. This acts as a protective barrier, preventing the cold wind from stripping your hair of its hydration. This is a cornerstone step of any good winter hair care routine.
6. Limit Heat Styling
Hot tools like flat irons, curling wands, and blow dryers exacerbate winter dryness. If you must use heat styling, always use a high-quality heat protectant spray or cream beforehand. Better yet, embrace heatless hairstyles like loose braids, buns, or air-dried textured looks. If you need to blow-dry, use the cool or low-heat setting and point the nozzle downward to smooth the cuticle.
7. Protect Your Hair at Night
Friction from cotton pillowcases can cause tangles and breakage while you sleep. Switch to a silk or satin pillowcase. The smooth surface allows your hair to glide without catching, preventing frizz and breakage. Alternatively, you can wrap your hair in a silk bonnet or scarf before bed. This is especially crucial if you have curly or textured hair, as it is naturally drier. If you need foundational knowledge, check out our hair care tips for beginners to perfect your nighttime routine.
8. Don’t Leave the House with Wet Hair
This is a rule you must memorize: never go outside with wet hair in winter. When hair is wet, the water inside the shaft expands. If the temperature is below freezing, that water can actually freeze and expand, causing the hair shaft to shatter and break off. Always ensure your hair is 100% dry before stepping out into the cold. If you are short on time, it is better to wear a protective style like a low bun than to rush out with damp hair.
9. Use a Humidifier Indoors
The dry heat blasting from your home’s vents is just as damaging as the cold air outside. Running a humidifier in your bedroom while you sleep adds moisture back into the air. This benefits not only your respiratory system and skin but also your hair. A humidifier helps prevent the static electricity that causes your hair to fly away and stand on end during the winter months.
10. Get Regular Trims
Dry winter air causes split ends to travel up the hair shaft faster than in summer. The only way to stop split ends from ruining the length of your hair is to trim them. Getting a small trim (about a quarter to half an inch) every 6 to 8 weeks will keep your ends looking fresh, prevent tangling, and make your hair look healthier overall. If your hair is already severely damaged, you may need to follow the best hair care routine for damaged hair to restore its health.
Common Winter Hair Problems and Solutions
Even with a strict winter hair care routine, you might face a few seasonal challenges. Here is how to tackle them:
Static Electricity: To fix static, lightly rub a dryer sheet over your hair, or apply a tiny drop of hair oil to your palms and smooth them over your hair.
Dry, Flaky Scalp: The cold can dry out your scalp, causing flakiness. Use a scalp scrub once a week to exfoliate dead skin, and massage a few drops of tea tree or peppermint oil into your scalp to stimulate circulation.
Hat Hair: To prevent your hat from leaving your hair flat, push your hair in the opposite direction of its growth before putting the hat on. Use a silk or satin-lined winter hat to reduce friction.
For more daily beauty, hair, and lifestyle tips, be sure to follow our Facebook page where we share daily updates and advice!
Frequently Asked Questions (FAQs)
1. How often should I wash my hair in winter?
You should wash your hair less frequently in winter—ideally 1 to 2 times a week. Washing too often with hot water strips the scalp of its natural oils, leading to dryness, flakiness, and brittle hair. Use a dry shampoo between washes to keep your hair looking fresh.
2. Is a hair mask necessary for a winter hair care routine?
Yes, absolutely. A regular daily conditioner only coats the surface of the hair. A deep conditioning hair mask penetrates the hair shaft to provide intense hydration and repair, which is essential for combating the dry, cold air of winter.
3. How do I stop my hair from being static in winter?
Static is caused by a lack of moisture in the air, leading to friction. To stop static, use a humidifier indoors, switch to a silk pillowcase, apply a lightweight hair oil to the ends of your hair, or lightly swipe a dryer sheet over your hair to neutralize the electrical charge.
4. Can I go outside with wet hair in winter?
No, you should never go outside with wet hair in winter. If the temperature is below freezing, the water inside your hair shaft can freeze and expand, causing the hair to break off completely. Always dry your hair thoroughly before heading out.
5. Why does my scalp get flaky in winter?
Flaky scalp in winter is usually caused by the combination of cold outdoor air and dry indoor heating, which depletes the skin of its moisture. To fix this, massage a hydrating scalp oil into your roots before washing, and avoid using hot water when shampooing.
Conclusion
Adapting your habits to include a dedicated winter hair care routine is essential for surviving the cold weather with soft, healthy, and vibrant hair. By switching to moisturizing products, reducing heat styling, using a humidifier, and protecting your strands from the elements, you can completely prevent the dryness and breakage that plagues so many people during the colder months. Remember, winter hair requires extra hydration and gentle handling. Start implementing these 10 steps today, and enjoy flawless, frizz-free hair all winter long!
Damaged hair is something almost every woman deals with at some point — and it’s rarely the result of one single thing. Highlights, heat styling, tight hairstyles, chemical treatments, and even something as simple as rough towel-drying all chip away at your hair’s health over time. The result is hair that looks dull, feels rough, breaks easily, and refuses to cooperate no matter what you put on it.
The best hair care routine for damaged hair isn’t about buying the most expensive products on the shelf. It’s about understanding what your hair actually needs — moisture, protein, protection, and gentle handling — and delivering those things consistently through a routine that repairs the damage already done while preventing more from building up.
This guide walks you through 10 essential steps for the best hair care routine for damaged hair, including how to use hair masks correctly, which treatments work for which types of damage, and the daily habits that make the biggest difference in getting your hair back to a healthy, beautiful state.
First — How to Know If Your Hair Is Actually Damaged
Before diving into the routine, it helps to understand what damaged hair actually looks and feels like — because not all hair problems are damage-related, and the wrong routine can make things worse rather than better.
Signs your hair is damaged:
Ends that split, fray, or look frayed even after a trim
Hair that feels rough or straw-like to the touch when dry
Excessive frizz that doesn’t respond to products
Hair that stretches too much when wet and doesn’t spring back
Increased breakage — noticing more hair on your brush or breaking mid-shaft rather than at the root
Dull, flat appearance with no natural shine
Color that fades unusually fast after dyeing
If several of these apply to you, the routine below is exactly what your hair needs. If your main concern is dryness without breakage, you likely have dry hair rather than damaged hair — and the dry hair remedies at home guide covers that specific scenario in detail.
The Best Hair Care Routine for Damaged Hair — Step by Step
Step 1: Start With a Gentle, Sulfate-Free Shampoo
The foundation of the best hair care routine for damaged hair is a shampoo that cleans without making the damage worse. Conventional shampoos containing sulfates (sodium lauryl sulfate, sodium laureth sulfate) strip the hair of its natural moisture — the last thing damaged hair needs when it’s already dry and weakened.
Switch to a sulfate-free shampoo that cleanses gently and preserves the moisture your hair desperately needs. When shampooing, focus entirely on the scalp and let the rinse water carry the product through the lengths — never scrub damaged ends directly with shampoo.
How often: Damaged hair does best washed 2 times per week maximum. Over-washing accelerates dryness and breakage, so reducing wash frequency is genuinely one of the most impactful changes you can make immediately.
Pro tip: On non-wash days, use a lightweight dry shampoo at the roots only. Avoid applying it to your ends — dry shampoo on damaged ends makes them feel even more brittle.
Step 2: Always Condition After Every Wash
Skipping conditioner with damaged hair is simply not an option. Conditioner smooths the hair cuticle that damage has roughened, replenishes lost moisture, reduces friction between strands that leads to breakage, and makes the hair significantly more manageable.
Apply conditioner from the mid-lengths to ends only — never on the scalp. Use a wide-tooth comb to distribute it evenly through the hair, which also gently detangles without causing breakage. Leave it on for at least 3 to 5 minutes before rinsing with cool water. Cool water seals the cuticle and adds an immediate boost of shine.
Pro tip: If your hair is severely damaged, try co-washing (washing with conditioner only, no shampoo) on one of your wash days each week. This keeps the hair clean enough without the stripping effect of even a gentle shampoo.
Step 3: Use a Hair Mask Weekly — And Use It Correctly
A weekly hair mask is the single most impactful treatment in the best hair care routine for damaged hair. Unlike regular conditioner, which sits on the surface of the hair, a well-formulated hair mask penetrates the hair shaft and delivers moisture, protein, and nourishment where the damage actually lives.
How to use a hair mask correctly:
Step 1: Wash your hair with shampoo and conditioner as normal, then gently ring out the excess water. Hair masks penetrate better when the hair is damp rather than soaking wet — this step matters more than most people realize.
Step 2: Squeeze approximately a quarter-size amount into your palm. Use slightly more for longer or thicker hair, slightly less for short or fine hair.
Step 3: Apply from mid-lengths to ends, paying particular attention to the ends — the oldest, driest, and most damaged part of the strand. Use a wide-tooth comb to distribute the mask evenly so every strand is fully saturated.
Step 4: Cover with a shower cap and leave on for 10 to 20 minutes. The shower cap traps heat that helps the mask penetrate more deeply. If you’re in the shower, the steam does the same job.
Step 5: Rinse thoroughly with cool water until the water runs completely clear. Incomplete rinsing leads to product buildup that makes hair feel heavy and greasy — make sure every trace of the mask is removed.
Pro tip: For hair that’s severely dry or damaged, try an overnight hair mask treatment. Apply the mask as above, braid or twist your hair loosely, cover with a shower cap or wrap in a silk scarf, and rinse out in the morning. Overnight treatments produce noticeably more intense results than a standard 20-minute application.
Step 4: Know the Difference Between Moisture Masks and Protein Masks
Not all hair masks work the same way, and using the wrong type for your specific damage can actually make things worse. This is one of the most important distinctions in building the best hair care routine for damaged hair.
Moisture masks focus on hydrating the hair shaft and restoring softness and flexibility. They’re ideal for hair that feels dry, frizzy, or rough but still has reasonable elasticity. Most weekly hair masks fall into this category.
Protein masks (or bond-building treatments) rebuild the internal structure of the hair shaft by filling in gaps caused by chemical treatments, heat damage, or bleaching. They’re ideal for hair that feels mushy when wet, stretches excessively without springing back, or breaks easily mid-shaft.
How to tell which one your hair needs:
Wet a strand and gently stretch it. If it stretches far and snaps without resistance — protein mask
If it feels rough and dry but stretches and returns — moisture mask
Alternate between the two once a month each for balanced repair
Recommended hair masks by damage type:
Damage Type
What to Look For
Key Ingredients
Heat damage
Antioxidant repair + moisture
Rosehip oil, B vitamins, argan oil
Color/bleach damage
Bond-building + deep hydration
Amino acids, keratin, panthenol
Breakage and split ends
Protein + moisture balance
Hydrolyzed keratin, shea butter
Frizz and roughness
Cuticle smoothing
Argan oil, coconut oil, silicones
All-over dryness
Intense moisture
Hyaluronic acid, glycerin, oils
Step 5: Apply Heat Protectant Every Single Time
Heat protectant is non-negotiable in the best hair care routine for damaged hair — and it needs to be applied every time you use any heat tool, without exception. Damaged hair is already structurally weaker than healthy hair, which means it’s significantly more vulnerable to additional heat damage. Every unprotected heat styling session makes the existing damage worse and sets your recovery back further.
Apply a heat protectant spray or cream to damp or dry hair before blow-drying, flat ironing, or curling. Make sure it’s evenly distributed from roots to ends.
And whenever possible, reduce your heat styling frequency. Embrace air-drying, heatless styling, and low-manipulation styles on the days between heat sessions. Your hair will recover noticeably faster when it’s getting consistent breaks from heat exposure.
For heatless style inspiration while your hair recovers, the hair trends 2026 women guide has plenty of beautiful low-heat options worth bookmarking.
Step 6: Be Extremely Gentle With Wet Hair
Damaged hair is most fragile when wet — the weakened protein structure becomes even more vulnerable when saturated with water, making it prone to snapping under far less tension than healthy hair can handle.
What to stop doing immediately:
Rubbing wet hair with a regular bath towel (creates massive friction and breakage)
Brushing with a regular bristle brush while wet
Pulling a comb through tangles from root to end
What to do instead:
Gently squeeze water from the hair using a microfiber towel or soft cotton t-shirt
Detangle starting from the ends and working upward in small sections using a wide-tooth comb or a brush specifically designed for wet hair
Apply a leave-in conditioner or detangling spray before combing for extra slip and protection
Step 7: Add a Hair Oil to Your Routine
Hair oils are one of the most underrated tools in the best hair care routine for damaged hair. While masks and conditioners restore moisture from inside the hair shaft, oils work on the surface — sealing the cuticle, locking in the moisture you’ve just added, and adding the shine that damaged hair loses.
How to use hair oil:
Before heat styling: Apply a small amount to damp hair before blow-drying to protect against heat and add shine
After styling: Warm 2 to 3 drops between your palms and smooth lightly over the surface of dry hair to add gloss and tame flyaways
Overnight treatment: Apply a generous amount to the mid-lengths and ends, braid loosely, and leave overnight. Shampoo out in the morning for intensely restored softness
Best oils for damaged hair: Argan oil (lightweight, all hair types), jojoba oil (most similar to natural sebum), coconut oil (deep penetrating protein, best for thick hair), and castor oil (thicker, excellent for very dry ends).
Pro tip: Less is more with hair oil. Start with 2 to 3 drops and add more only if needed — too much oil makes hair look greasy rather than healthy and shiny.
Step 8: Protect Your Hair While You Sleep
Eight hours of friction against a cotton pillowcase every night is doing quiet but consistent damage to already-fragile hair. The cotton fabric catches and pulls at each strand as you move during sleep, creating frizz, tangles, and breakage that accumulate significantly over weeks and months.
Two changes make an immediate difference:
Switch to a silk or satin pillowcase. The smooth surface allows damaged strands to glide rather than catch, dramatically reducing overnight friction. This is one of the best passive investments in the best hair care routine for damaged hair because it works while you do nothing.
Protective nighttime styling: Put hair into a very loose braid or a soft bun secured with a satin scrunchie before bed. This minimizes the tangling and rubbing that cause breakage overnight. Never sleep with hair in a tight elastic.
Step 9: Get a Trim — and Keep Trimming
This step is one women resist most because it feels counterproductive — especially when you’re trying to grow your hair back to health. But trimming damaged ends regularly is essential, not optional.
Split ends don’t stay split. They travel upward along the hair shaft, causing breakage higher and higher until a much more significant amount needs to be removed. Getting small trims of a quarter to half an inch every 6 to 8 weeks (slightly more frequent than the standard 8-12 week schedule for healthy hair) keeps the damage from spreading while your hair recovers.
Think of it this way: you’re not losing length. You’re protecting the length you have while the healthy new growth from your roots catches up.
Step 10: Be Patient and Consistent
The final and most important step in the best hair care routine for damaged hair is patience. Hair doesn’t recover overnight — and the further down the damage goes, the longer it takes to see the full results of your new routine.
Most women following a consistent repair routine report:
Weeks 1 to 3: Reduced frizz and improved manageability
Month 1 to 2: Noticeably softer texture and less daily breakage
Month 3 to 6: Visible improvement in shine and health
Month 6 and beyond: Significant length retention as healthier hair grows in from the roots
The key is doing the right things consistently rather than looking for shortcuts. For the full picture of building long-term healthy hair habits, the complete hair care routine guide covers everything in detail.
Quick Reference: Weekly Routine for Damaged Hair
Day
What to Do
Wash Day (2x week)
Sulfate-free shampoo → conditioner → hair mask (once a week)
Every Night
Loose braid + silk pillowcase
Before Heat Styling
Heat protectant always
Once a Week
Deep conditioning mask or overnight oil treatment
Every 6 to 8 Weeks
Trim at the salon
Frequently Asked Questions
What is the best hair care routine for damaged hair at home? The most effective home routine combines a sulfate-free shampoo used 2 times per week, conditioner after every wash, a weekly hair mask alternating between moisture and protein focus, consistent heat protectant use, overnight oil treatments, and a silk pillowcase for sleep. Consistency over 3 to 6 months produces real, lasting results.
How long does it take for damaged hair to recover? Visible improvement typically begins within 4 to 6 weeks of consistent care. Significant recovery — softer texture, less breakage, improved shine — generally takes 3 to 6 months. Severely damaged hair may take longer, particularly if chemical services like bleaching are involved.
Can I repair damaged hair without cutting it? You can improve the health and appearance of damaged hair through conditioning and masking treatments, but split ends cannot be permanently repaired with products — they need to be trimmed. Products temporarily seal and smooth the damage, but the structural break remains until it’s cut off.
How often should I use a hair mask for damaged hair? Once a week is the standard recommendation for damaged hair. Alternate between a moisture-focused mask and a protein or bond-building treatment monthly for the most balanced results.
Is coconut oil good for damaged hair? Coconut oil is beneficial for many types of damaged hair because it’s one of the few oils that can actually penetrate the hair shaft rather than just coating the surface. However, it can cause protein overload in some hair types — if your hair feels stiff or more brittle after coconut oil, switch to a lighter oil like argan or jojoba.
What should I avoid with damaged hair? Avoid sulfate shampoos, daily heat styling without protectant, tight hairstyles, over-washing, rough towel-drying, brushing aggressively when wet, and chemical treatments until the hair has had time to recover.
Final Thoughts
The best hair care routine for damaged hair works because it addresses the root causes of damage — stripping, heat, friction, and neglect — and replaces them with consistent habits that restore moisture, strengthen the hair structure, and protect what’s there. None of the steps in this routine are complicated or expensive. They just need to be done consistently.
Start with the basics — gentle shampoo, proper conditioning, and a weekly mask — and add the other steps as they become habits. Your hair has a remarkable ability to recover when you give it what it needs.
Starting a proper hair care routine for the first time can feel surprisingly overwhelming. Walk into any beauty store and you’re immediately faced with dozens of shampoos, conditioners, treatments, oils, and tools — each one promising to transform your hair. If you’re new to all of this, knowing where to begin is genuinely confusing.
The good news? The best hair care tips for beginners are not complicated or expensive. Healthy, beautiful hair comes down to a handful of consistent habits done correctly — not a shelf full of products. Whether your hair is fine, thick, curly, straight, dry, or oily, the foundational principles are the same. Get these basics right and everything else becomes much easier.
This beginner’s guide breaks down everything you need to know — from how often to wash your hair and which products actually matter, to the daily habits that quietly make the biggest difference over time.
1. Know Your Hair Type First
Before you buy a single product or change a single habit, the most important of all hair care tips for beginners is this: understand what type of hair you actually have. Using the wrong products for your hair type is the number one reason beginners don’t see results — even when they’re doing everything else right.
Hair is generally categorized by two qualities: texture (straight, wavy, curly, or coily) and density (fine, medium, or thick). Knowing both helps you choose the right shampoo, conditioner, and styling products for your specific needs.
Quick hair type guide:
Fine hair — individual strands are thin, hair loses volume easily, gets greasy quickly, and is easily weighed down by heavy products
Medium hair — the most common type, holds styles reasonably well, and works with a wide range of products
Thick hair — individual strands are wide, hair holds lots of volume, takes longer to dry, and benefits from richer, more moisturizing products
Curly or coily hair — naturally drier than straight hair, needs more moisture, and responds best to products specifically designed for curl patterns
Once you know your hair type, every product decision becomes clearer. If you’re not sure where to start with your routine, the hair care routine for women guide on DailyJuggar breaks it down beautifully by hair type.
2. Stop Washing Your Hair Every Day
This is one of the most important hair care tips for beginners — and one that surprises most people. Daily hair washing strips the scalp of its natural oils (called sebum) before they have the chance to travel down the hair shaft and provide moisture and protection. The result is a dry, irritated scalp, brittle ends, and hair that paradoxically gets oilier faster because the scalp overproduces oil to compensate.
For most hair types, washing two to three times per week is the sweet spot. This keeps the scalp clean without disrupting its natural balance.
Washing frequency by hair type:
Fine or oily hair: 3 times per week
Normal hair: 2 to 3 times per week
Thick, dry, or curly hair: 1 to 2 times per week
On non-wash days, use a small amount of dry shampoo at the roots only to absorb excess oil and add freshness without stripping the scalp. Within two to three weeks of reducing your wash frequency, most women notice significantly less oiliness — because the scalp has stopped overproducing oil to replace what was being stripped away daily.
3. Choose the Right Shampoo
Not all shampoos are created equal, and for beginners, choosing the wrong one can undermine every other good habit in your routine. The most important thing to look for — or avoid — is sulfates.
Sulfates (sodium lauryl sulfate, sodium laureth sulfate) are the harsh detergents that create the satisfying lather in most conventional shampoos. They clean effectively, but they’re far more aggressive than necessary for most hair types and strip the scalp of moisture alongside the dirt and oil you actually want to remove.
Switching to a sulfate-free shampoo is one of the simplest and highest-impact changes a beginner can make. Sulfate-free formulas clean the scalp gently and effectively without disrupting its natural oil balance — which means a healthier scalp environment, less dryness, and less breakage over time.
What to look for on the label:
✅ Sodium cocoyl isethionate (gentle cleanser)
✅ Decyl glucoside (plant-derived, very gentle)
❌ Sodium lauryl sulfate (too harsh for most hair)
❌ Sodium laureth sulfate (slightly gentler but still stripping)
Pro tip: When shampooing, focus entirely on the scalp — massage the shampoo into the roots with your fingertips and let the rinse water carry it through the lengths. Scrubbing shampoo into the mid-lengths and ends is unnecessary and drying.
4. Never Skip Conditioner
If shampoo is step one, conditioner is the step that most beginners either skip or do incorrectly — and it makes a huge difference. Conditioner replenishes the moisture that washing removes, smooths the hair cuticle, reduces frizz and tangles, and makes the hair significantly easier to manage and style.
The key rule beginners need to know: conditioner goes on the mid-lengths and ends only — never on the scalp. Applying conditioner to the scalp weighs the roots down and makes them greasy much faster than normal. The ends of your hair are the oldest, driest part of each strand and need the most moisture — that’s where conditioner belongs.
How to condition correctly:
After shampooing and rinsing, gently squeeze excess water from the hair
Apply conditioner from mid-lengths to ends
Use a wide-tooth comb to distribute it evenly and detangle gently
Leave on for 2 to 3 minutes (longer for dry or thick hair)
Rinse thoroughly with cool water — cool water closes the hair cuticle and adds shine
Once a week, replace your regular conditioner with a deep conditioning treatment. This provides extra moisture and protein that regular conditioner can’t fully deliver, and it makes a noticeable difference in softness, shine, and manageability over time. For more detail on building a full routine around this, check out the expert hair care routine guide on DailyJuggar.
5. Always Use a Heat Protectant
If you use a hair dryer, flat iron, or curling wand — even occasionally — a heat protectant is non-negotiable. This is one of the hair care tips for beginners that gets skipped most often, and the damage that results is both real and cumulative.
Heat styling tools damage hair by breaking down the protein bonds within the hair shaft. A flat iron at high heat can reach temperatures of 400°F or more — far beyond what hair can withstand without protection. Over time, unprotected heat styling leads to split ends, dryness, breakage, and a dull, lifeless appearance that no conditioner can fully reverse.
A heat protectant creates a thermal barrier between your hair and the tool, significantly reducing the damage caused by the heat.
How to use it: Apply heat protectant spray or cream to damp or dry hair before any heat styling — not after. Make sure it’s evenly distributed from roots to ends, then style as normal.
Heat temperature guide for beginners:
Fine hair: maximum 300°F / 150°C
Normal hair: 300 to 350°F
Thick or coarse hair: 350 to 380°F
Pro tip: Use the lowest temperature setting that achieves your desired result. Most women use far more heat than their hair actually needs.
6. Be Gentle When Your Hair Is Wet
Wet hair is at its most vulnerable. When hair is saturated with water, the hydrogen bonds within the hair shaft temporarily weaken, making each strand significantly more elastic and prone to breaking if pulled or handled roughly.
This means the way you treat your hair between washing and drying matters enormously — yet most beginners rush through this step without thinking about it.
What to avoid with wet hair:
Rubbing vigorously with a towel — this creates frizz and causes breakage
Brushing immediately with a regular bristle brush
Pulling a comb through tangles from root to end
What to do instead:
Gently squeeze (don’t rub) excess water from the hair using a microfiber towel or an old soft t-shirt
Start detangling from the ends upward, working in small sections with a wide-tooth comb or a wet brush specifically designed for detangling
Apply your leave-in conditioner or styling products before detangling for extra slip
7. Trim Your Hair Regularly
One of the most overlooked hair care tips for beginners is the importance of regular trims. A lot of women avoid trimming because they’re trying to grow their hair longer — but this is actually counterproductive.
Split ends that are left untreated don’t stay at the tip of the strand. They travel upward along the hair shaft, causing increasing breakage higher and higher up. By the time the damage becomes obvious, significantly more length needs to be removed than if the split ends had been trimmed when they first appeared.
Getting a trim of a quarter to half an inch every 8 to 12 weeks removes split ends while they’re still minimal, keeps your ends looking healthy and polished, and allows the length you’re growing to stay on your head rather than breaking off.
For everything you need to know about choosing the right haircut alongside your care routine, the best haircut for round face guide is a great starting point.
8. Handle Dry Hair With Extra Care
Dry, brittle hair is one of the most common concerns beginners bring to the conversation — and the good news is that it’s almost always fixable with the right adjustments. Dry hair typically results from a combination of over-washing, heat damage, sulfate use, and not conditioning frequently or thoroughly enough.
The fix involves addressing all of these causes together rather than just treating the symptom with heavy products. Switch to a sulfate-free shampoo, reduce wash frequency, deep condition weekly, protect from heat, and give it four to six weeks to respond.
For targeted solutions that work specifically for dry hair, the dry hair remedies at home guide on DailyJuggar covers the most effective treatments in detail — including several that use ingredients you likely already have in your kitchen.
9. Protect Your Hair While You Sleep
Most beginners don’t think about what happens to their hair during the eight hours they spend sleeping — but it matters more than you’d expect. Cotton pillowcases create friction against the hair as you move during sleep, causing frizz, tangles, and over time, real breakage that adds up significantly.
Two simple changes make a big difference:
Switch to a silk or satin pillowcase. The smooth surface allows hair to glide rather than catching and pulling, which means dramatically less friction damage and frizz by morning. It’s one of the best passive hair care investments a beginner can make.
Loosely braid or twist your hair before bed. This keeps the hair contained and prevents the tangling that leads to breakage during sleep. Use a satin scrunchie — never a tight elastic — to secure it.
10. Feed Your Hair From the Inside
No topical product can fully compensate for what’s missing from your diet. Hair is made of protein (specifically keratin), and its growth and strength depend directly on the nutrients your body has available to build and maintain it.
The most important nutrients for hair health are protein, biotin, iron, omega-3 fatty acids, and vitamin D. A diet consistently low in any of these will show up in the hair — through thinning, dullness, slow growth, or increased shedding — often before it shows up anywhere else.
For a full guide on how nutrition connects to hair growth specifically, the how to grow hair faster article covers it in detail.
11. Avoid These Common Beginner Mistakes
Understanding what not to do is just as valuable as knowing what to do. These are the most common mistakes beginners make — and the easiest ones to correct.
Common Mistake
Why It’s Harmful
The Fix
Washing hair daily
Strips natural oils, causes dryness
Wash 2-3 times per week
Skipping conditioner
Hair becomes dry, tangled, and brittle
Condition every wash
Rubbing hair dry with a towel
Causes frizz and breakage
Squeeze gently, use microfiber
Brushing wet hair aggressively
Wet hair breaks easily
Use wide-tooth comb, start at ends
Heat styling without protectant
Protein bonds break down, damage accumulates
Always apply heat protectant first
Tight ponytails every day
Causes hairline breakage and traction alopecia
Use loose styles with satin scrunchies
Skipping trims
Split ends travel up and cause more breakage
Trim every 8-12 weeks
Using heavy products on fine hair
Weighs hair down and makes roots greasy
Use lightweight formulas
12. Build a Simple Routine and Stick to It
The single most important thing about any hair care routine — especially for beginners — is consistency. A simple routine done consistently every week will always produce better results than an elaborate routine done sporadically.
Here’s a beginner-friendly weekly routine to start with:
Every wash day (2-3 times per week):
Scalp massage for 3 to 5 minutes before washing to stimulate circulation
Sulfate-free shampoo focused on the scalp
Conditioner on mid-lengths and ends, left on for 2 to 3 minutes
Cool water rinse to seal the cuticle
Gentle squeeze dry with a microfiber towel
Heat protectant before any heat styling
Once a week:
Deep conditioning treatment (leave on for 20 to 30 minutes before rinsing)
Every night:
Loose braid or bun secured with a satin scrunchie
Silk or satin pillowcase
Every 8 to 12 weeks:
Trim at the salon to remove split ends
For a more detailed version of this routine tailored to specific hair types, the complete hair care routine guide is the perfect next step.
Frequently Asked Questions: Hair Care Tips for Beginners
What are the most important hair care tips for beginners to start with? The three most impactful starting points are: switching to a sulfate-free shampoo, reducing wash frequency to two to three times per week, and never skipping conditioner. These three changes alone produce visible improvements in most hair types within a few weeks.
How do beginners know which products are right for their hair? Start by identifying your hair type — fine, medium, or thick, and straight, wavy, curly, or coily. Products are formulated for specific needs: fine hair needs lightweight formulas that don’t weigh it down, while thick or curly hair needs richer, more moisturizing options. When in doubt, start simple and add products gradually.
Can beginners damage their hair by doing too much? Yes. Over-washing, over-styling with heat, applying too many products, and using treatments too frequently can all cause damage or buildup. A simple, consistent routine is almost always better than an overcomplicated one.
How long does it take to see results from a new hair care routine? Most women notice initial improvements — less frizz, better manageability, reduced shedding — within two to four weeks. More significant changes in texture, shine, and length take three to six months of consistent care.
Is it necessary to use expensive products to have healthy hair? Absolutely not. The most important factors in hair health are routine consistency, technique, and lifestyle habits — not product price. Many affordable sulfate-free shampoos and conditioners perform just as well as expensive alternatives.
What’s the best first step for someone with damaged hair? Start by identifying and eliminating the source of damage — whether it’s heat styling, tight hairstyles, over-washing, or chemical treatments. Then begin a routine that prioritizes moisture restoration: sulfate-free washing, weekly deep conditioning, and reduced heat styling with a protectant.
Final Thoughts
The best hair care tips for beginners are always the simple ones done consistently. You don’t need twenty products, an elaborate routine, or a significant budget to have genuinely healthy hair. You need the right shampoo used the right way, conditioner applied correctly, heat protection whenever you style, gentle handling when your hair is wet, and a trim every couple of months.
Give any new routine at least six to eight weeks before evaluating whether it’s working. Hair responds slowly to change — but it always responds when the habits are right.
Follow DailyJuggar on Pinterest for daily hair inspiration and tutorials, and join the conversation on Facebook where we share the latest tips and trends for every hair type.
📌 Save this beginner’s hair care guide to Pinterest so you always have it when you need it!
Dry hair remedies at home are genuinely one of the most satisfying beauty discoveries you can make — because the ingredients that work best are often already sitting in your kitchen, they cost a fraction of what salon treatments charge, and the results, when you use the right combinations consistently, are completely real. Not marketing-real. Actually real.
If your hair has been through a difficult season — heat styling, color treatments, harsh winters, too much sun, or simply months of not getting the moisture it needed — the good news is that recovery is possible without spending a significant amount of money or time. A weekly DIY hair mask is one of the most effective dry hair remedies at home available, and the seven recipes in this guide cover every variation of dryness and damage you are likely to encounter.
Before you dive in: consistency is everything with these treatments. One mask will feel different. Seven weeks of masks will transform your hair. Commit to a weekly routine and you will be genuinely surprised by what your hair looks like two months from now.
Before You Start: What You Need to Know
Getting the most out of these dry hair remedies at home requires a few practical steps before you begin. Skipping these makes the difference between a mask that works and one that leaves you disappointed.
Always patch test first. Before applying any new mask to your full head of hair, apply a small amount to the inside of your forearm and wait twenty minutes. If you notice any redness, itching, or irritation, that specific ingredient is not right for your skin or hair — and you will want to know this before it is in your hair.
Frequency matters more than duration. These masks do not need to stay on for hours to work. For most hair types, twenty to sixty minutes is sufficient. For severely dry or heat-damaged hair, leaving a mask on overnight is an option — but use a disposable shower cap and lay a towel over your pillow. Wash it out thoroughly in the morning.
Oil-based masks on dry hair, water-based masks on damp hair. This is one of the most important practical distinctions in DIY hair masking. Oil-based masks (the ones in this guide that are primarily oils) penetrate more effectively on dry hair rather than wet hair. Try both with each recipe and see what your hair responds to best.
Section your hair before applying. Divide into roughly four sections and clip each one separately. Work from section to section, making sure to saturate the ends thoroughly — they are always the driest part and need the most attention. If your scalp tends toward oiliness, apply oil-based masks starting approximately one inch away from the scalp.
Use a wide-tooth comb or your fingers to distribute the mask. Once applied, pile your hair up and cover with a disposable shower cap to allow the ingredients to penetrate without drying out.
Rinse and shampoo thoroughly after every mask. Cool to lukewarm water is best — hot water reopens the cuticle and washes out the conditioning benefits you just spent time applying. You may need to shampoo twice to remove all residue, particularly with heavier oil-based masks.
Adjust quantities for your hair length. All recipes in this guide are written for a standard medium length. If your hair is longer or thicker, double the amounts while keeping the same ratios.
What You Will Need
Most of these dry hair remedies at home require only a few basic tools and ingredients:
Tools: Disposable shower caps, a wide-tooth comb, hair clips, a mixing bowl and brush, and optionally a blender or food processor for the avocado and banana masks.
Key ingredients: Extra virgin olive oil, coconut oil, jojoba oil, sweet almond oil, argan oil, raw honey, ripe avocados, ripe bananas, whole milk, and orange essential oil.
Quality matters with oils specifically. The difference between an extra virgin olive oil and a refined one, or between a raw unprocessed honey and a processed supermarket version, is genuinely significant in how well these masks perform. Cold-pressed, organic versions of these oils provide the most intact nutrients and produce the best results.
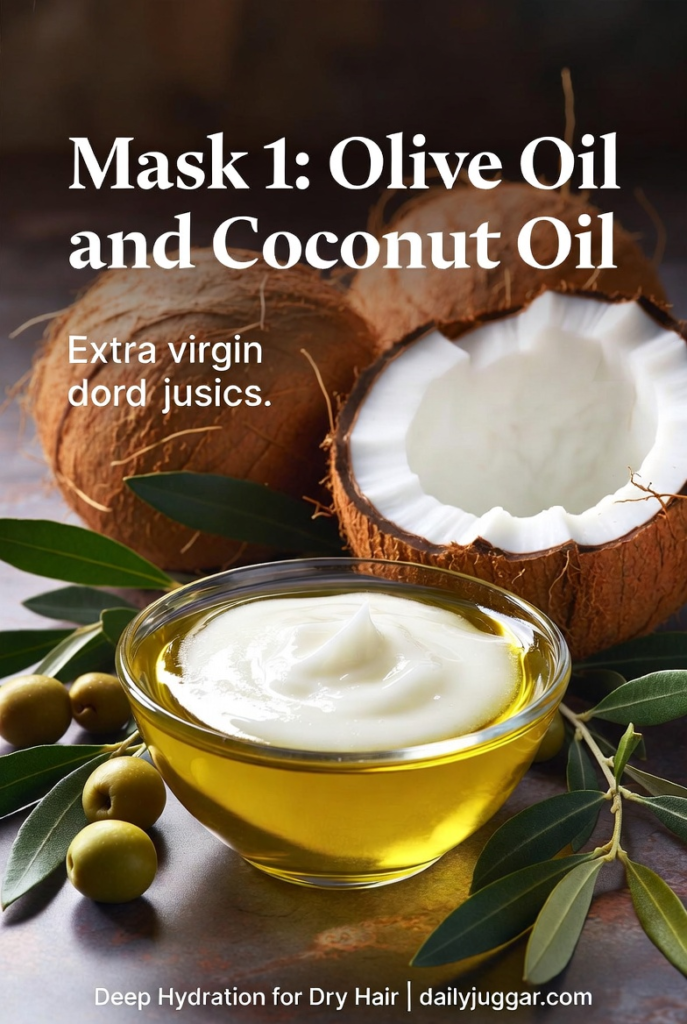
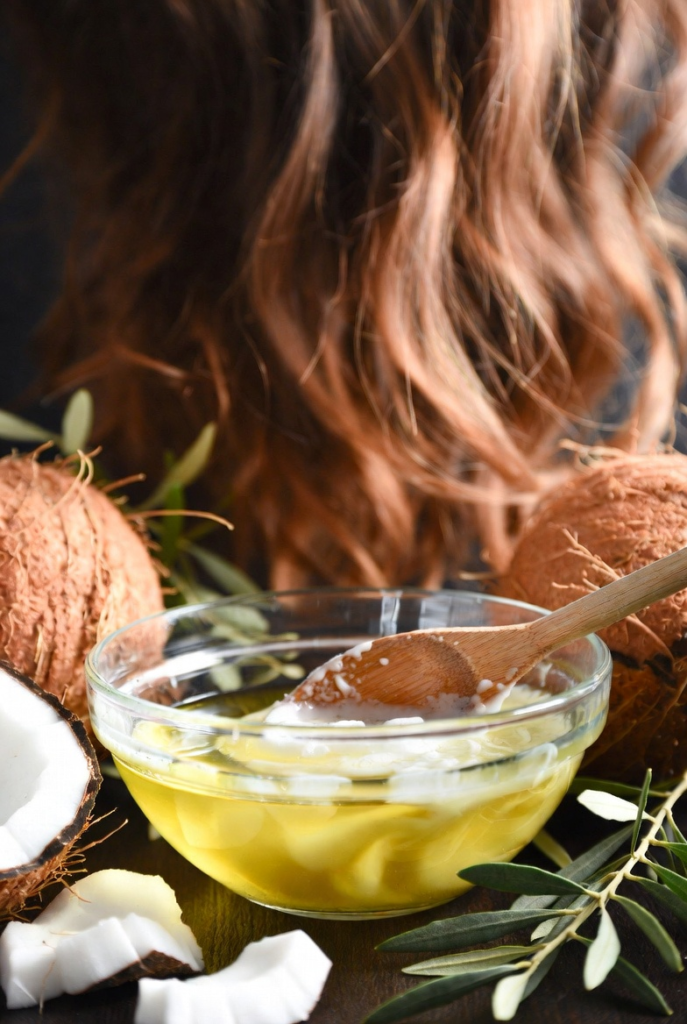
Mask 1: Olive Oil and Coconut Oil
This is the foundational recipe in the dry hair remedies at home toolkit — two oils that are both capable of penetrating the hair shaft rather than simply coating it. Most oils sit on the surface of the hair and provide a temporary shine without addressing the underlying dryness. Olive oil and coconut oil are genuinely different: they reach the cortex of the hair where structural damage actually occurs.
Why these two ingredients work:
Olive oil is rich in vitamin E and omega-3 fatty acids — a combination that deeply conditions, strengthens the hair shaft, improves elasticity, reduces breakage, and adds a shine that comes from the hair’s actual health rather than a surface coating. It protects against heat damage and is particularly effective for extremely dry hair because its weight means it penetrates deeply and stays in longer.
Coconut oil contains fatty acids and vitamin E that moisturize, nourish, and — importantly — reduce protein loss. Hair loses protein through chemical treatments, heat styling, and environmental damage, and this loss is one of the primary causes of brittleness and breakage. Coconut oil addresses this at a structural level that conditioning products typically cannot reach.
Note for coarse or thick hair: Some women with coarser or thicker hair find that coconut oil causes a protein-buildup effect that makes the hair feel drier rather than more moisturized. If this happens, replace the coconut oil with sweet almond oil or argan oil in the same quantity — both provide excellent moisture without the protein-buildup risk.
Note for fine hair: Fine hair may respond better to a reversed ratio — two parts coconut oil to one part olive oil — as the lighter coconut oil will not weigh fine hair down as much as the heavier olive oil might.
Ingredients
2 tablespoons extra virgin olive oil
1 tablespoon coconut oil
Instructions
If your coconut oil has solidified (it does this below 76°F), gently warm it. Place a small bowl of coconut oil inside a larger bowl of hot water and allow it to liquefy — do not microwave the oil directly, as this degrades some of its beneficial properties.
Combine the liquefied coconut oil and olive oil in a mixing bowl and stir together thoroughly.
Apply to sectioned hair, saturating the ends and any visibly damaged areas particularly well.
Cover with a shower cap and leave for 30 to 60 minutes.
Rinse with cool water, shampoo (you may need two rounds depending on how much oil you used), and follow with your regular conditioner.
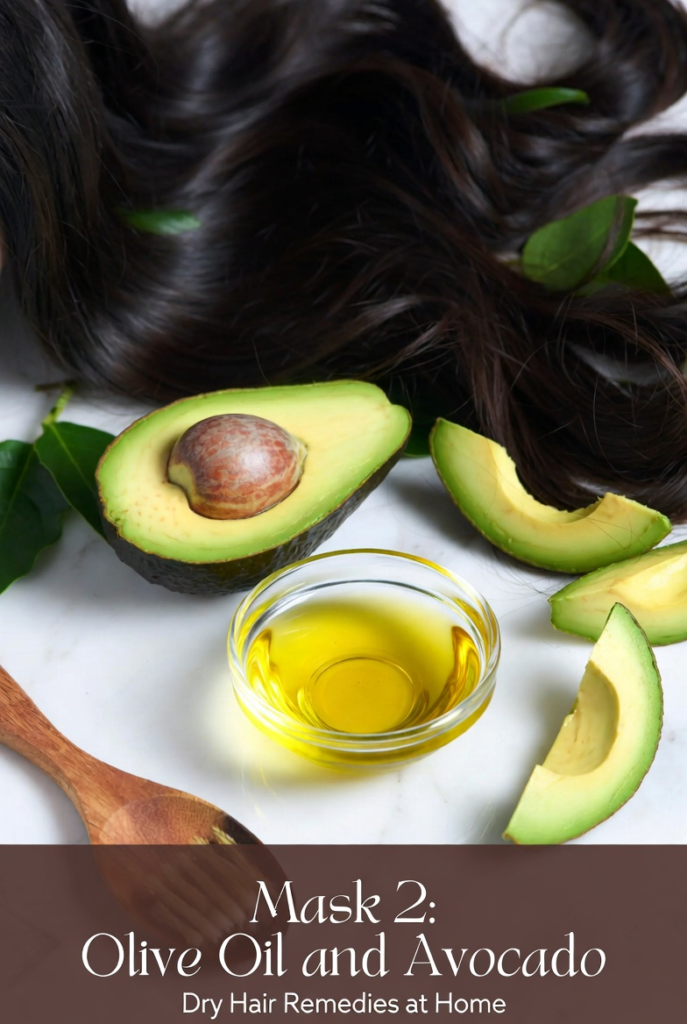
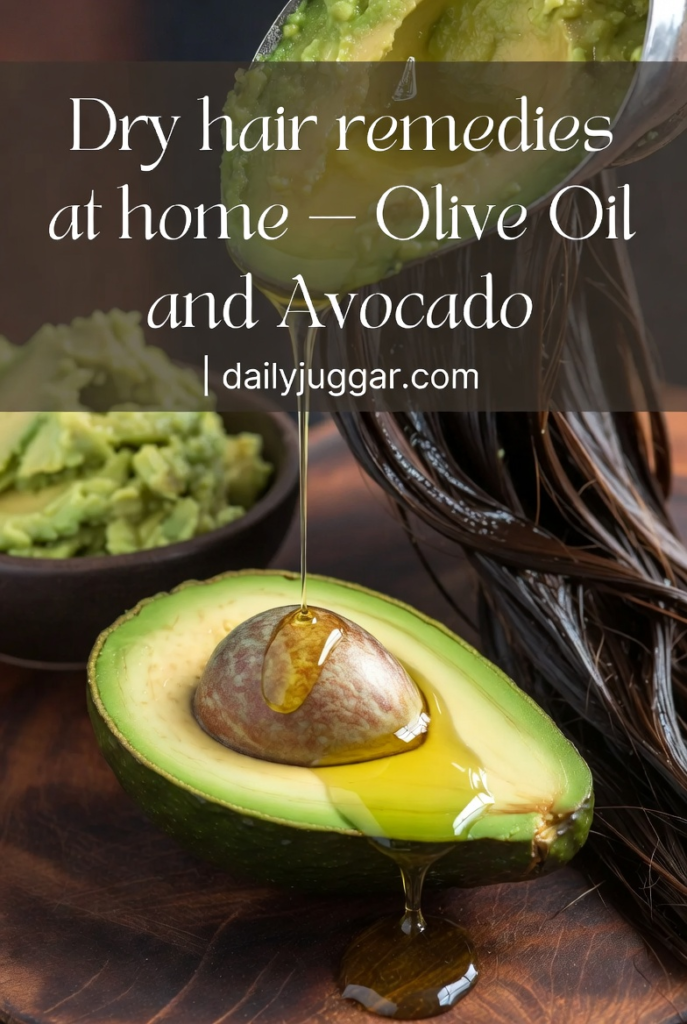
Mask 2: Olive Oil and Avocado
If the olive oil and coconut oil mask is the workhorse of dry hair remedies at home, the olive oil and avocado combination is the luxury spa treatment. Avocado brings a different dimension of nourishment to the equation — its natural fatty acids, vitamin E, and vitamin B content work together to moisturize, strengthen, repair, and — as a bonus — naturally detangle the hair.
Why these two ingredients work:
Olive oil’s deep conditioning properties are covered above. Its particular value in this combination is its weight — heavier than avocado alone, it helps the mask penetrate more deeply and remain in the hair shaft longer during the treatment period.
Avocado is genuinely extraordinary as a hair ingredient. Its essential fatty acids have an affinity for the hair shaft that makes them particularly effective at penetrating and moisturizing from within. Vitamin E repairs oxidative damage to the hair follicle. The natural oils in avocado leave hair with a genuine, lasting softness and a shine that is notably different from what synthetic conditioners produce.
The avocado also acts as a natural detangler — after rinsing this mask, you will notice immediately how much more manageable the hair is, even before applying conditioner.
Important: The avocado must be ripe. Underripe avocado will not blend smoothly and will not provide the same nutrient content. You want an avocado that is soft to the touch and dark in color — one that is at its peak ripeness.
Ingredients
1 ripe avocado
1 tablespoon extra virgin olive oil (can reduce to 2 teaspoons for shorter or finer hair)
Instructions
Scoop the avocado flesh into a blender, food processor, or mixing bowl.
Blend until completely smooth — this step is critical. Any chunks in the avocado will create a cleanup nightmare in the hair. Think baby-food smooth.
Add the olive oil and blend again until fully combined and silky.
Apply to sectioned hair and cover with a shower cap.
Leave on for 20 to 30 minutes — longer if you have time and your hair is severely damaged.
Rinse very thoroughly (avocado rinses out less easily than oils), shampoo completely, and condition.
Mask 3: Milk and Honey
The milk and honey combination is one of the oldest and most consistently effective dry hair remedies at home — and its longevity is earned. These two ingredients work through completely different mechanisms that complement each other beautifully: milk provides protein and vitamins that strengthen and add luminosity, while honey is a natural humectant that actively draws moisture from the environment into the hair shaft and locks it there.
Why these two ingredients work:
Whole milk contains protein, calcium, vitamins B6 and B12, and a fat content that softens and nourishes the hair. The protein in particular helps rebuild the structural integrity that chemical treatments and heat styling strip away. The result is hair that feels stronger as well as softer — a combination that purely moisturizing treatments sometimes miss.
Raw honey is one of the most remarkable natural humectants available. Humectants attract moisture molecules from the surrounding air and bind them to the hair shaft — maintaining hydration throughout the day rather than simply delivering moisture during the treatment period. Honey also smooths the hair cuticle, softens coarse or rough texture, and adds a warm luminosity that is noticeably different from the results of oil-only treatments.
Important: Use raw, unprocessed honey for this and all the masks in this guide. Processed honey has been heated and filtered in ways that destroy many of the beneficial enzymes and compounds that make it so effective for hair.
Ingredients
1 cup whole milk
1 teaspoon raw honey
Instructions
Warm the milk gently — lukewarm, not hot. Warm milk dissolves the honey more easily and is more comfortable to apply to the hair than cold milk.
Add the honey to the warm milk and stir until fully dissolved.
Apply to dry hair, focusing on the ends and any areas of visible damage.
Leave on for 20 minutes.
Rinse thoroughly, shampoo, and condition.
Mask 4: Coconut Oil and Honey
This combination brings together two of the most powerful individual ingredients in the dry hair remedies at home world — coconut oil’s penetrating moisture and structural protection paired with honey’s humectant and smoothing properties. Together they address dryness, brittleness, frizz, and lack of shine simultaneously.
Why these two ingredients work:
Coconut oil specifically targets the structural protein in the hair shaft. When hair is repeatedly wet and dried, styled with heat, or treated with chemicals, it loses protein that was part of its original structure — and this loss is what creates that characteristic brittle, straw-like texture that severely dry hair develops. Coconut oil reduces this ongoing protein loss while providing moisture and giving the hair a smooth, lustrous quality.
Honey adds the humectant benefit — locking in the moisture that coconut oil provides so that it lasts beyond the treatment itself. The combination of an oil that reduces protein loss and a humectant that locks in moisture addresses dry hair from two complementary angles.
Ingredients
1 tablespoon raw honey
1 to 2 tablespoons coconut oil (3 tablespoons for thicker or longer hair)
Instructions
Warm the coconut oil gently using the bowl-in-warm-water method described in Mask 1.
Add the honey to the liquefied coconut oil and mix thoroughly until fully combined.
Apply to hair, working through all sections and paying particular attention to the ends.
Cover with a shower cap and leave for 15 to 20 minutes.
Rinse, shampoo thoroughly, and condition.
Mask 5: Avocado, Olive Oil, Honey, and Orange Essential Oil
This is the most comprehensive and luxurious recipe in the dry hair remedies at home collection — a four-ingredient combination that addresses dryness, damage, frizz, breakage, and lack of shine simultaneously. It is the treatment to reach for when your hair is at its most depleted and needs everything at once.
Why these ingredients work together:
Avocado provides deep moisturization, fatty acids, and vitamins that strengthen and repair. Olive oil adds weight and penetration depth, helping the entire mask reach deeper into the hair shaft where the most significant structural damage occurs. Honey locks in the moisture that the oils deliver, extending the treatment’s effect beyond the wash itself. Orange essential oil — optional but recommended — adds a pleasant citrus scent while the limonene in citrus oils provides additional cleansing of the scalp and a brightness to the overall result.
This is the mask that works best for hair that has been through the most — repeated bleaching or coloring, months of heat styling without protection, or extended periods of neglect. Leave it on for the full hour if your schedule allows.
Ingredients
1 ripe avocado
2 tablespoons extra virgin olive oil
2 tablespoons raw honey
2 drops orange essential oil (optional)
Instructions
Scoop the avocado into a blender or food processor along with the olive oil and honey.
Blend until completely smooth with absolutely no chunks — this mask has more ingredients than the avocado-only version and requires thorough blending to fully combine.
Transfer the blended mixture to a mixing bowl and add the optional orange essential oil. Stir to incorporate.
Apply to sectioned hair, cover with a shower cap, and leave for 45 to 60 minutes.
Rinse very thoroughly, shampoo completely (two rounds may be necessary), and condition.
Mask 6: Jojoba Oil and Coconut Oil
Jojoba oil is one of the most underrated ingredients in the dry hair remedies at home toolkit — and pairing it with coconut oil creates a combination that addresses hair dryness and scalp health simultaneously. Jojoba’s unique molecular structure makes it one of the few oils that genuinely penetrates both the hair shaft and the follicle, addressing dryness at both the surface and the root.
Why these two ingredients work:
Jojoba oil is chemically similar to the sebum that the scalp naturally produces — this similarity is what allows it to penetrate so effectively and why the hair and scalp accept it so readily. It contains vitamins C, B, E, copper, and zinc, all of which nourish both the hair shaft and the follicle. It is particularly beneficial for dry scalp and dandruff — a fact that makes it the ideal choice for women dealing with both a dry scalp and dry hair simultaneously.
Coconut oil brings its protein-protection and deep moisture properties to complement jojoba’s follicle-penetrating action. Together they cover the full range from follicle health at the root to structural protection throughout the hair shaft.
Ingredients
1 tablespoon jojoba oil
2 tablespoons coconut oil
Instructions
Warm the coconut oil gently using the bowl method described earlier.
Combine the liquefied coconut oil and jojoba oil in a mixing bowl and mix thoroughly.
Apply to all sections of the hair.
Leave on for 20 to 30 minutes under a shower cap.
Rinse out completely with water, shampoo, and follow with conditioner.
Mask 7: Banana, Almond Oil, and Argan Oil
This is the frizz-fighting specialist of the dry hair remedies at home collection. For hair that is not just dry but specifically prone to frizz, brittleness, and unmanageability, the combination of banana’s softening and strengthening properties with sweet almond oil’s nourishment and argan oil’s smoothing and frizz-reducing action is genuinely remarkable.
Why these three ingredients work:
Banana is a surprisingly powerful hair ingredient. It softens, strengthens, moisturizes, and dramatically reduces frizz — all while preventing the breakage that comes from handling dry, brittle hair. The natural silica in banana also helps improve overall hair strength and shine over time with consistent use.
Sweet almond oil contains vitamin E, omega fatty acids, and magnesium — a combination that treats structural damage, reduces breakage and split ends, supports hair growth, and delivers a silky shine that lighter oils sometimes cannot provide.
Argan oil is lighter than most other oils in this guide, which makes it particularly versatile — it can be used more frequently than heavier oils without causing buildup. It is the ultimate frizz-reducing oil, smoothing the cuticle and adding a protective layer that guards against the humidity and environmental factors that make frizz worse. For split ends specifically, argan oil is one of the most consistently effective natural remedies available.
Important: Blend the banana completely smooth before adding the oils — there is no more frustrating hair mask cleanup than picking banana chunks out of the hair. A blender is strongly recommended over a fork or hand mixer for this recipe.
Ingredients
1 ripe banana
½ tablespoon sweet almond oil
½ tablespoon argan oil
Instructions
Place the banana in a blender and blend until completely smooth and creamy — no chunks whatsoever.
Add the almond oil and argan oil to the blended banana.
Blend again until fully combined into a smooth, even paste.
Apply to all sections of hair, cover with a shower cap, and leave on for 30 minutes.
Rinse fully and thoroughly (banana requires particularly thorough rinsing), shampoo, and condition.
Additional Tips for Dry and Damaged Hair
These dry hair remedies at home work most effectively when they are part of a broader approach to hair care that supports healthy moisture levels between treatments. A few additional practices that make a significant difference:
Switch to a microfiber towel for drying. Regular cotton towels create friction against the hair cuticle that causes frizz and contributes to breakage — particularly when hair is at its most vulnerable while wet. Microfiber towels absorb water more efficiently with significantly less friction.
Sleep on a satin or silk pillowcase. Cotton pillowcases absorb moisture from the hair throughout the night while also creating the friction that causes tangling and breakage. Satin or silk pillowcases maintain the moisture levels these dry hair remedies at home deliver and prevent the overnight damage that undoes your weekly mask work.
Wash with cool or lukewarm water, not hot. Hot water strips moisture from the hair shaft more aggressively than cool water — it opens the cuticle too widely and washes out natural oils along with the dirt and product buildup you are trying to remove. Lukewarm water cleanses effectively without that stripping effect. A cool final rinse seals the cuticle and adds noticeable shine.
Reduce heat styling frequency. Even the best dry hair remedies at home cannot fully overcome the damage caused by daily heat styling without heat protection. If you cannot give up heat tools entirely, always use a heat protectant spray applied to damp hair before any heat exposure, and choose the lowest effective temperature setting rather than defaulting to the highest.
For a complete guide to building a full hair care routine around these treatments, our hair care routine for women guide and hair care routine 2026 guide cover everything from washing frequency to styling technique in detail.
How to Choose the Right Mask for Your Hair
With seven options available, choosing the right starting point is simple when you match the mask to your specific concern:
Hair Concern
Best Mask
Brittle, dull, and lifeless hair
Olive Oil and Coconut Oil
Extremely dry hair needing deep repair
Olive Oil and Avocado
Hair needing protein and luminosity
Milk and Honey
Dry and brittle with loss of shine
Coconut Oil and Honey
Severely damaged from coloring or heat
Avocado, Olive Oil, Honey, and Orange Oil
Dry hair with dry scalp or dandruff
Jojoba Oil and Coconut Oil
Frizzy, brittle hair prone to breakage
Banana, Almond Oil, and Argan Oil
You do not need to commit to one mask for the entire season. Rotating between two or three that address your hair’s primary concerns keeps the routine interesting and provides a broader range of nutrients than any single mask alone.
Frequently Asked Questions
How often should I use dry hair remedies at home? Once a week is the ideal frequency for most of these masks — consistent enough to produce cumulative results, not so frequent that product buildup becomes an issue. For severely damaged hair, you can use a mask twice weekly during the first month, then drop to weekly maintenance once the hair has recovered.
Can I apply hair masks to dry hair? Yes — and for oil-based masks specifically, dry hair is often preferable. Oil penetrates dry hair more effectively than wet hair because there is no water competing for the same entry points in the hair shaft. Experiment with both dry and damp application to see which produces better results for your specific hair type.
How long should I leave a hair mask on? For most of these dry hair remedies at home, 20 to 60 minutes is sufficient. For overnight use (which is particularly beneficial for severely dry or damaged hair), use a disposable shower cap and protect your pillow with a towel.
Do I need to shampoo after a hair mask? Yes — always shampoo after an oil-based mask to remove the residue completely. Leaving oil residue in the hair does not provide additional benefit after the treatment period and will make the hair feel greasy. You may need to shampoo twice after heavier oil masks like the avocado combination.
Which mask is best for split ends? The banana, almond oil, and argan oil combination is the most targeted for split ends — argan oil in particular is one of the most consistently effective natural remedies for split end management. The olive oil and coconut oil mask is a strong alternative.
Will these masks help with hair growth? Dry hair remedies at home that restore moisture and reduce breakage indirectly support length retention by preventing the breakage that stops many women from achieving their length goals. For direct hair growth support, incorporating scalp massage during application and including rosemary oil as an addition to any of these masks provides additional follicle stimulation.
Build Your Complete Hair Health Routine
These seven dry hair remedies at home are most powerful as part of a complete, consistent approach to hair health rather than as occasional emergency treatments. Pair weekly masking with the right shampoo and conditioner for your hair type, limit heat styling and always use protection when you do, drink adequate water, and eat the nutrients your hair follicles need to produce healthy strands from the root.
Consistency over two to three months produces results that a single mask can only hint at. Your hair’s best condition is not something that happened once in the past — it is what sustained, informed care produces going forward.
For the styling inspiration to complement your healthier hair, our hair color trends 2026 guide and trending haircuts 2026 roundup show exactly where to take your restored hair next.
Visit dailyjuggar.com for more hair care guides, beauty tips, and style inspiration updated all year long.
If you’ve ever stood in front of the mirror wishing your hair would just grow already, you’re not alone. Learning how to grow hair faster is one of the most searched hair care questions in the world — and for good reason. Whether you’re recovering from a bad haircut, trying to reach a new length milestone, or simply want thicker, healthier hair, the journey can feel slow and discouraging when you’re not seeing progress.
Here’s the truth: you cannot change your genetic hair growth rate, which averages around half an inch per month for most women. But what you absolutely can do is create the ideal conditions for your hair to grow at its full potential — consistently, without breakage, and with noticeably better thickness and shine. Knowing how to grow hair faster is less about magic products and more about a combination of smart nutrition, proper scalp care, protective habits, and a few evidence-backed treatments that genuinely make a difference.
This guide covers 15 of the most effective and practical methods for faster hair growth in 2026 — everything from what to eat and how to care for your scalp, to the lifestyle changes that most women overlook completely. Let’s get into it.
Understanding How Hair Actually Grows
Before diving into the tips, a quick understanding of the hair growth cycle helps you set realistic expectations and make smarter decisions about your routine.
Hair grows in four distinct phases. The anagen phase is the active growth period, lasting anywhere from two to seven years depending on your genetics — this is the phase you want to extend and support. The catagen phase is a brief two-week transition where growth slows and stops. The telogen phase is a resting period lasting around three months where the hair stays in place before eventually shedding. The exogen phase is when the hair falls out and the follicle prepares to begin the cycle again.
At any given time, roughly 85 to 90 percent of your hair is in the anagen (growth) phase. Everything you do to support your body — through nutrition, scalp health, stress management, and protective care — directly influences how well your follicles perform during this critical growing period. That’s where all 15 of the following tips come in.
1. Prioritize Protein in Your Diet
Hair is made almost entirely of a protein called keratin. If your diet is consistently low in protein, your body will deprioritize hair growth in favor of more essential biological functions — and your hair will be the first to show it through thinning, dullness, and increased shedding.
If you want to know how to grow hair faster through nutrition, increasing your daily protein intake is the single most impactful dietary change you can make. Aim for at least 50 to 70 grams of protein per day from high-quality sources. Eggs are particularly valuable because they contain both protein and biotin — two of the most hair-essential nutrients available. Chicken, lentils, Greek yogurt, and fish are excellent additions to a hair-growth-focused diet.
What to eat: Eggs, chicken breast, salmon, lentils, Greek yogurt, quinoa, cottage cheese
Pro tip: If you find it difficult to hit your protein target through food alone, a clean whey or plant-based protein supplement added to a morning smoothie is a convenient and effective solution.
2. Add Omega-3 Fatty Acids to Your Routine
Omega-3 fatty acids are among the most powerful nutrients for hair health, yet most women don’t consume nearly enough of them. These essential fats nourish the hair follicles directly, hydrate both the scalp and the hair shaft, reduce scalp inflammation that can inhibit growth, and give the hair a natural shine and softness that no product can fully replicate.
The most hair-beneficial omega-3 sources are fatty fish like salmon, sardines, and mackerel. For plant-based alternatives, chia seeds, flaxseeds, and walnuts are excellent choices. If dietary sources are difficult to incorporate consistently, a high-quality fish oil or algae-based omega-3 supplement (look for EPA and DHA content on the label) is worth adding to your daily routine.
What to eat: Salmon, sardines, mackerel, chia seeds, flaxseeds, walnuts, hemp seeds
Pro tip: A consistent intake of omega-3s over eight to twelve weeks produces visible improvements in hair texture, shine, and reduced breakage — results that no topical product can match because they’re coming from inside the body.
3. Master the Scalp Massage
If there’s one habit that’s genuinely underrated in the conversation about how to grow hair faster, it’s the daily scalp massage. Research has found that consistent scalp massage over a 24-week period produced measurable increases in hair thickness — the mechanical stimulation appears to activate the hair follicles and improve blood circulation to the scalp, delivering more oxygen and nutrients directly to the roots.
You don’t need a special tool or product to do this effectively. Use the pads of your fingertips (never your nails) and apply firm but gentle circular pressure across your entire scalp for four to five minutes daily. You can do this on dry hair, on damp hair before shampooing, or with a hair oil during your wash routine.
How to do it: Start at the hairline, work back toward the crown, then down toward the nape of the neck. Use small, firm circles rather than scratching or rubbing motions.
Pro tip: Adding a few drops of rosemary essential oil to a carrier oil like jojoba or coconut oil before your scalp massage enhances the circulation-stimulating effect. Rosemary oil has shown promise in studies for supporting hair density — dilute it to about 2 to 3 percent (roughly 6 drops per tablespoon of carrier oil) before applying directly to the scalp.
4. Switch to a Sulfate-Free Shampoo
Most conventional shampoos contain sulfates — the harsh detergents responsible for that satisfying lather. The problem is that sulfates strip the scalp of its natural oils far more aggressively than necessary, leaving both the scalp and the hair shaft dry, weakened, and prone to breakage. Over time, this cycle of stripping and dryness significantly undermines your hair growth efforts.
Switching to a sulfate-free shampoo is one of the simplest and most impactful changes you can make in your hair care routine. Sulfate-free formulas clean effectively without disrupting the scalp’s natural oil balance, which keeps the follicle environment healthier and the hair shaft more resilient against breakage.
What to look for: Shampoos labeled “sulfate-free” or formulas listing sodium cocoyl isethionate or decyl glucoside (gentle cleansers) rather than sodium lauryl sulfate or sodium laureth sulfate.
Pro tip: Pair your sulfate-free shampoo with a weekly scalp-focused treatment — a gentle exfoliating scalp scrub used once a week removes product buildup and dead skin cells that can clog follicles and slow growth.
5. Don’t Overwash Your Hair
How often you wash your hair matters more than most women realize. Washing daily — or even every other day — strips the scalp of its natural sebum before it has the chance to travel down the hair shaft and provide moisture and protection. The result is a dry, irritated scalp and hair that’s more brittle and prone to breakage than it needs to be.
For most hair types, washing two to three times per week is the sweet spot. This frequency keeps the scalp clean without over-stripping it. Fine or oily hair types may need slightly more frequent washing, while thick, dry, or curly hair types often do best with once-a-week washing supplemented by co-washing (conditioner-only washing) on additional days.
Washing frequency guide:
Fine or oily hair: 3 times per week
Normal hair: 2 to 3 times per week
Thick, dry, or curly hair: 1 to 2 times per week
Pro tip: On non-wash days, use a lightweight dry shampoo at the roots only to absorb excess oil without disrupting the scalp’s natural environment further down the hair shaft.
6. Use a Deep Conditioning Treatment Weekly
Length retention — keeping the hair you grow rather than losing it to breakage — is just as important as the rate of growth itself. A deep conditioning treatment applied once a week replenishes the moisture and protein that daily styling, environmental exposure, and washing deplete from the hair shaft.
Look for deep conditioners that contain hydrolyzed keratin, argan oil, shea butter, or panthenol. Apply to clean, damp hair from mid-lengths to ends (not the scalp), cover with a shower cap, and leave for 20 to 30 minutes before rinsing. The heat generated under the shower cap helps the conditioning ingredients penetrate the hair shaft more deeply.
Best ingredients to look for: Hydrolyzed keratin, argan oil, shea butter, panthenol, amino acids, coconut oil
Pro tip: Once a month, do a protein treatment specifically rather than a moisturizing treatment. Signs that your hair needs protein include elasticity loss (hair stretches and doesn’t spring back), mushy texture when wet, or increased breakage on otherwise healthy hair.
7. Protect Your Hair While You Sleep
Eight hours of your hair rubbing against a cotton pillowcase every night adds up to a significant amount of friction-related breakage over time — and most women don’t realize this until they start making changes and see the difference immediately. This is one of the most underrated tips in the how to grow hair faster conversation.
Switching to a silk or satin pillowcase reduces the friction your hair experiences during sleep dramatically. The smooth surface allows the hair to glide rather than catching and pulling, which means significantly less breakage and frizz by morning. Alternatively, wrapping your hair loosely in a silk scarf or bonnet before bed achieves the same result.
Additional sleep protection tips:
Loosely braid or twist hair before bed to minimize tangling
Never sleep with hair in tight elastics or clips
Use a satin scrunchie rather than a regular hair tie if you prefer to secure your hair at night
Pro tip: Silk pillowcases also benefit your skin by reducing the moisture absorption that cotton pillowcases cause — making the switch a genuine two-for-one investment for your overall beauty routine.
8. Minimize Heat Styling
Heat is one of the most significant contributors to hair breakage, and breakage is the enemy of length. Every time you apply a flat iron at 400°F or curl with a curling wand without heat protection, you’re weakening the protein bonds within the hair shaft — making it more prone to snapping before it ever reaches the length you’re working toward.
If you’re serious about how to grow hair faster, reducing your heat styling frequency is non-negotiable. Aim to heat style no more than two to three times per week at most, always with a heat protectant applied to damp or dry hair beforehand, and use the lowest effective temperature setting rather than the highest.
Heat temperature guide:
Fine hair: maximum 300°F / 150°C
Normal hair: 300 to 350°F / 150 to 175°C
Thick or coarse hair: 350 to 380°F / 175 to 193°C
Pro tip: Embrace heatless styling on your off days. Heatless curls, braids, and buns have become genuinely beautiful styling options in 2026 — check out the hair trends 2026 women guide on DailyJuggar for styles that look stunning without any heat at all.
9. Avoid Tight Hairstyles
Consistently wearing your hair in tight ponytails, slicked-back buns, or tightly wound braids creates a type of hair loss called traction alopecia — gradual, progressive hair loss caused by sustained tension on the follicles. The hair loss typically starts at the hairline and temples, where the tension is most concentrated, and can become permanent if the tight styling continues long-term.
Switching to looser hairstyles is one of the most impactful protective changes you can make for both hair retention and growth. Loose braids, soft buns secured with satin scrunchies, low ponytails with minimal tension, and natural down styles all allow the follicles to function without the pressure that tight styles create.
Loose style alternatives:
Low loose ponytail with a satin scrunchie
Soft braids or twists
Loose low bun with bobby pins rather than tight elastics
Half-up, half-down styles with minimal tension
Pro tip: If you notice consistent soreness at the hairline after wearing a style, that’s your scalp telling you the tension is too high. Adjust immediately — the follicles are under stress.Avoid Tight Hairstyles
10. Take Care of Your Biotin Intake
Biotin — also known as vitamin B7 — is one of the most well-known nutrients in the how to grow hair faster conversation, and for good reason. Biotin plays a direct role in the production of keratin (the protein that makes up hair), and deficiency in biotin is genuinely associated with hair thinning and loss.
Most women get adequate biotin from a balanced diet that includes eggs, nuts, seeds, and leafy vegetables. However, if your diet is restrictive or you’re experiencing hair thinning, a biotin supplement in the range of 2,500 to 5,000 mcg per day is generally considered safe and well-tolerated. Always consult your doctor before starting any supplement, particularly if you take other medications.
Pro tip: Biotin supplements can occasionally interfere with certain lab test results, particularly thyroid function tests. If you have upcoming bloodwork, inform your doctor that you’re taking biotin so results can be interpreted accurately.
11. Keep Your Iron Levels in Check
Iron deficiency is one of the most common and most overlooked causes of hair loss and slow hair growth in women — particularly women of reproductive age who experience monthly blood loss. Iron is essential for producing hemoglobin, which carries oxygen to the hair follicles. When iron levels drop, the follicles are effectively starved of the oxygen they need to support active growth.
If you’ve been noticing increased shedding alongside fatigue, pale skin, or cold hands and feet, low iron is worth investigating with a simple blood test. Your doctor can check your ferritin levels (stored iron) — which need to be above 70 ng/mL for optimal hair health, not just within the broad “normal” range.
Pro tip: Pair iron-rich foods with vitamin C sources at the same meal — the vitamin C significantly enhances iron absorption. A squeeze of lemon on spinach or a glass of orange juice with a lentil dish makes a real difference in how much iron your body actually absorbs.
12. Manage Stress Consistently
Stress-related hair loss — known as telogen effluvium — is a very real and very common phenomenon. Significant physical or emotional stress causes a disproportionate number of hair follicles to shift from the growth phase into the resting phase simultaneously, resulting in noticeable diffuse shedding two to three months after the stressful event.
Managing stress is therefore a genuine hair growth strategy, not just general wellness advice. Regular physical exercise, quality sleep of seven to nine hours per night, mindfulness practices like meditation or journaling, and consistent social connection all contribute to lower cortisol levels — creating a hormonal environment that supports rather than disrupts the hair growth cycle.
Stress management practices that support hair growth:
30 minutes of moderate exercise daily
7 to 9 hours of sleep per night
Daily mindfulness or meditation practice
Limiting caffeine after 2pm to support sleep quality
Pro tip: If you’ve experienced a period of intense stress and notice increased shedding a few months later, try not to panic — the shedding is temporary and growth typically resumes once the stressor is removed and the body rebalances.
13. Try Rosemary Oil for Scalp Health
Rosemary oil has emerged as one of the most evidence-supported natural treatments for hair growth, and its popularity in 2026 is well-deserved. A clinical study comparing rosemary oil to minoxidil (the active ingredient in Rogaine) found comparable results in hair density after six months of consistent use — a remarkable finding for a completely natural ingredient.
Rosemary oil works by improving blood circulation to the scalp and inhibiting the binding of DHT (dihydrotestosterone) to scalp receptors — a process that contributes to hair follicle miniaturization and hair loss. It’s inexpensive, widely available, and well-tolerated by most scalp types.
How to use: Mix 5 to 6 drops of rosemary essential oil into one tablespoon of jojoba or coconut carrier oil. Massage into the scalp for 5 minutes, leave on for at least 30 minutes (or overnight for best results), then shampoo out. Use 2 to 3 times per week consistently.
Pro tip: Consistency is everything with rosemary oil — most studies showing measurable results used it consistently for a minimum of three to six months. Don’t expect overnight results, but do expect gradual, real improvement with regular use.
14. Get Regular Trims (Yes, Really)
This one confuses people — how can cutting your hair help it grow? The answer is that trims don’t make your hair grow faster from the root. What they do is remove split ends before they travel up the hair shaft and cause breakage higher up the strand, costing you the length you’ve been working to grow.
A split end that’s left untreated doesn’t stay at the end — it continues splitting upward, eventually requiring a much larger cut to remove the damage. Getting a trim of a quarter inch to half an inch every eight to twelve weeks removes the damage while it’s minimal, keeping your ends healthy and allowing the length you’ve grown to stay on your head rather than breaking off.
Trimming frequency guide:
Chemically treated or heat-styled hair: every 6 to 8 weeks
Normal hair: every 8 to 12 weeks
Protective styles: every 12 to 16 weeks
Pro tip: Ask your stylist for a “dusting” rather than a full trim — a dusting removes only the very tips of damaged strands without taking off significant length, keeping your ends fresh between regular trims.
15. Consider Advanced Treatments for Stubborn Cases
If you’ve implemented the nutritional and lifestyle changes in this guide consistently for three to six months and still aren’t seeing the growth results you’re looking for, it may be worth exploring more advanced clinical options with a dermatologist.
Minoxidil (topical, available over-the-counter in 2% and 5% strengths) is the most widely researched hair growth treatment available and is FDA-approved for use by women. It works by extending the anagen (growth) phase of the hair cycle and increasing blood flow to the follicles.
PRP (Platelet-Rich Plasma) therapy involves drawing a small amount of your own blood, processing it to concentrate the growth factors, and injecting it into the scalp. It’s a more intensive treatment typically performed by dermatologists or trichologists, and results from clinical studies have been promising for certain types of hair loss.
Low-level laser therapy (LLLT) devices — available as helmet-style devices, laser combs, and caps — use red light wavelengths to stimulate follicle activity. The evidence base for LLLT is growing, and several FDA-cleared devices are available for home use.
Pro tip: Before pursuing any advanced treatment, get a full blood panel including ferritin, vitamin D, thyroid hormones, and a complete blood count. Many cases of slow hair growth or excessive shedding have a straightforward nutritional or hormonal cause that’s completely addressable without clinical intervention.
Key Nutrients for Hair Growth — Quick Reference
Nutrient
What It Does
Best Sources
Protein
Builds keratin, the main hair component
Eggs, chicken, lentils, fish
Biotin (B7)
Supports keratin production
Egg yolks, almonds, spinach
Omega-3
Nourishes follicles, adds shine
Salmon, chia seeds, walnuts
Iron
Carries oxygen to follicles
Spinach, red meat, lentils
Vitamin D
Activates hair follicles
Fatty fish, mushrooms, fortified foods
Zinc
Repairs and maintains follicle health
Pumpkin seeds, oysters, beef
Vitamin E
Antioxidant scalp protection
Sunflower seeds, almonds, avocado
Common Hair Damage Habits — And How to Fix Them
Bad Habit
The Problem
The Fix
Heat styling daily
Weakens protein bonds, causes breakage
Maximum 2-3x per week with heat protectant
Tight ponytails
Creates traction alopecia at hairline
Switch to loose styles with satin scrunchies
Washing daily
Strips scalp of natural oils
Wash 2-3x per week maximum
Cotton pillowcase
Friction breakage during sleep
Switch to silk or satin
Skipping trims
Split ends travel up and break
Trim every 8-12 weeks
Chemical treatments back-to-back
Structural damage and severe breakage
Space sessions 8+ weeks apart, deep condition
How Long Will It Take to See Results?
This is the most important question to answer honestly. Hair grows approximately half an inch per month — which means six inches of new growth takes roughly a year under ideal conditions. You cannot significantly accelerate the rate beyond your genetic maximum, but you absolutely can ensure that your hair is growing at its full potential and that the growth you achieve is being retained rather than broken off.
Most women who implement the habits in this guide consistently report:
Weeks 2 to 4: Reduced shedding and improved scalp health
Months 1 to 2: Noticeably healthier texture and less breakage
Months 3 to 6: Visible length gains with improved thickness and shine
Month 6 and beyond: Significant length retention and overall hair transformation
The key word in all of this is consistency. One good week of eating well and massaging your scalp won’t produce results — but six months of sustained good habits absolutely will.
Frequently Asked Questions: How to Grow Hair Faster
Does hair really grow faster with specific products? No product can make your hair grow faster at the follicle level — growth rate is determined biologically. However, products that support scalp health, reduce breakage, and maintain moisture help you retain the length you grow, which is just as important as the growth rate itself.
How to grow hair faster if you have thin or fine hair? Fine hair benefits enormously from protein treatments, gentle sulfate-free shampoos, and avoiding heat styling. Scalp massages are particularly beneficial because they stimulate the follicles that produce fine strands. Biotin and iron levels are also worth checking, as deficiencies show up especially clearly in fine hair.
Is it true that cutting hair makes it grow faster? No — cutting hair doesn’t affect the rate of growth at the root. Regular trims do, however, prevent split ends from causing breakage higher up the strand, which means more of the hair you grow actually stays on your head.
What vitamins should I take to grow hair faster? Biotin, vitamin D, iron (if deficient), and omega-3 fatty acids are the most evidence-supported supplements for hair growth. Always consult your doctor before starting supplements, particularly for iron, which can cause issues at excessive doses.
How to grow hair faster naturally without products? Scalp massage, a protein and nutrient-rich diet, protective styling, silk pillowcases, stress management, and adequate sleep are all completely product-free strategies that have genuine, well-supported effects on hair growth and retention.
Can stress really stop hair from growing? Yes. Significant stress causes a condition called telogen effluvium, where follicles shift prematurely into the resting phase, resulting in diffuse shedding two to three months after the stressful event. Managing stress consistently is a genuine hair growth strategy with real scientific support behind it.
Final Thoughts
Learning how to grow hair faster isn’t about finding one miracle product or trick — it’s about creating consistent conditions that allow your hair to do what it’s biologically designed to do: grow. Nourish your body with the right nutrients, treat your scalp with care, protect your strands from unnecessary damage, and manage the lifestyle factors that undermine your hair’s natural growth cycle.
Every woman’s hair responds differently to different approaches, so be patient with the process and pay attention to what your specific hair is telling you. The results of consistent, intelligent hair care are always worth the effort — and they show up in ways that go far beyond just length.
For more hair inspiration while you grow, explore the latest hair trends for 2026 and start planning the style you’ll be rocking when you hit your length goal.
Hair care routine 2026 is not a one-size-fits-all formula — and that is exactly why so many women follow routines that simply do not work for them. The most common mistake is borrowing someone else’s regimen and expecting identical results on completely different hair. A routine built for fine, straight hair will actively damage thick, coily hair. A regimen designed for oily scalps will leave dry, curly hair drier and more prone to breakage.
The foundation of every effective hair care routine 2026 is identical: know your specific hair type, understand what that type actually needs, and customize every product choice and every step around those needs. That principle — personalization over prescription — is what this guide is built on.
You will find a complete, customized routine for each of the four main hair types — straight, wavy, curly, and coily — along with the foods that most directly support healthy hair growth from the inside. Whether you are building from scratch or refining what you already do, everything you need is here.
1. Why Hair Type Determines Your Entire Routine
Hair type is not just a starting point for your hair care routine 2026 — it is the entire framework around which every decision gets made. The products you use, how often you wash, the moisture your hair needs daily, how you detangle, and what you style with are all fundamentally different depending on your hair’s natural texture.
Two additional factors shape your routine beyond basic texture:
Hair porosity describes how well your hair absorbs and retains moisture. Low-porosity hair has tightly closed cuticles that resist absorption — lightweight products that penetrate easily are ideal. High-porosity hair absorbs moisture readily but also loses it fast, requiring heavier, moisture-locking formulas to maintain hydration throughout the day.
Fine versus coarse texture further defines which products perform. Fine hair is easily weighed down by heavy creams and oils — lighter formulas always work better. Coarse hair benefits from richer, denser products that provide the weight and moisture it needs.
The fastest way to understand your specific combination? Ask your hairstylist. A skilled professional can identify your type, porosity, and texture quickly and direct you toward the products most likely to produce real results for your specific hair.
For the most current cut recommendations that work beautifully with each hair type and routine, our trending haircuts 2026 guide is an excellent starting companion to this one.
2. The Four Hair Types Explained
Before diving into the specific routines, here is a clear picture of what distinguishes each type and why those differences matter so fundamentally for care:
Straight hair is the strongest of the four types. Its smooth, uniform shaft allows natural scalp oils to travel easily from root to tip — which means it tends to become greasy more quickly than other types and requires the most frequent washing.
Wavy hair has a slight S-shaped bend that becomes more pronounced toward the ends. It often experiences the frustrating combination of oily roots and dry ends simultaneously, because the slight curl pattern slows oil travel enough that it never fully reaches the tips.
Curly hair is full of character and chronically prone to dryness and frizz. The curl pattern creates physical obstructions that prevent scalp oils from traveling down the shaft effectively — meaning it requires significantly more external moisture than straight or wavy hair.
Coily and kinky hair has the tightest curl pattern and is the most fragile type. The extreme curl creates the maximum oil-travel obstruction, making this the driest and most vulnerable hair type of all. It requires the most intensive moisture approach and genuinely benefits from protective styling as a regular practice.
3. Hair Care Routine 2026 for Straight Hair
Straight hair’s primary challenge is the opposite of most other types: rather than struggling to maintain moisture, it accumulates oil and product residue faster. An effective hair care routine 2026 for straight hair manages that tendency toward greasiness and flatness while keeping the hair healthy and genuinely shiny.
How to Wash
Wash every two to three days using a sulfate-free shampoo. While sulfate formulas are sometimes recommended for very oily hair, repeated stripping of natural oils triggers the scalp to compensate by producing even more — worsening the problem over time. A gentle sulfate-free formula cleans effectively without starting that overproduction cycle.
Focus shampoo entirely at the scalp and roots. Oil and product buildup happen here — the lengths and ends need rinsing, not active cleansing.
How to Condition
Use a lightweight conditioner with coconut oil or argan oil — enough hydration to keep the hair healthy without the weight that causes flatness and greasiness. Apply from the nape downward to the ends only, never at the roots where conditioner creates buildup that makes hair greasy within hours of washing.
How to Style
Two specific challenges define straight hair styling: flatness and slipperiness. A volumizing mousse applied to damp hair before blow-drying builds the body and lift that prevents the limp, flat appearance. A texturizing spray adds grip that keeps ponytails, braids, and other styles from slipping out throughout the day.
Weekly Deep Care
A light deep conditioning treatment every three to four weeks provides additional moisture without the product buildup that more frequent applications would cause.
Wavy hair requires a hair care routine 2026 that addresses two distinct zones simultaneously — oily roots and dry ends on the same head. Getting that balance right is the defining challenge of wavy hair care, and it is entirely achievable with consistent technique.
How to Wash
Wash every three to four days. More frequent washing strips the ends of moisture they genuinely need, while waiting too long allows oil to flatten the wave pattern at the roots. After washing, use a microfiber towel rather than a regular cotton towel — the gentler fabric significantly reduces the friction that creates frizz in wavy hair.
How to Condition
Condition after every wash focusing on mid-lengths and ends. The conditioner adds definition to the wave pattern alongside moisture — skipping it produces undefined, frizzy waves rather than the soft, structured ones that make wavy hair so beautiful.
Massage coconut, olive, or pumpkin seed oil through the hair one hour before washing (or leave overnight) to provide a pre-wash moisture boost. Apply jojoba oil specifically to the ends overnight to combat the split ends that wind and sun exposure cause in wavy hair.
How to Style
Braiding overnight creates wave definition without heat. More braids produce tighter waves; fewer braids produce looser, more relaxed waves. Experimenting lets you customize the result.
Hair scrunching is the technique most specific to wavy hair. After shampooing, apply a leave-in conditioner. Flip your hair forward and use your fists to bunch sections upward toward the scalp in a scrunching motion. Do not brush after — the waves develop their definition as the hair dries in this position.
Key products: Sulfate-free shampoo, hydrating conditioner, coconut or olive oil, jojoba oil for ends, leave-in conditioner, microfiber towel.
5. Hair Care Routine 2026 for Curly Hair
Curly hair demands the most consistent moisture management of any non-coily type. The curl pattern that creates its beauty also creates its primary challenge — it prevents natural oils from traveling down the shaft effectively, making dryness, frizz, and breakage chronic concerns without a genuinely dedicated hair care routine 2026.
How to Wash
Wash only twice a week using a mild, sulfate-free shampoo. More frequent washing strips the natural oils that curly hair depends on for definition and moisture — the result is drier, frizzier hair that loses its curl pattern.
Co-washing — washing with conditioner only on alternate days — is one of the most effective techniques in curly hair care. It cleanses the hair of surface buildup without stripping oils, allowing you to refresh between shampoo days without the dryness that shampoo would cause.
How to Condition and Detangle
Condition every single wash day without exception. A thickening conditioner that coats the hair shaft entirely provides both moisture and the slip needed for manageable detangling.
The most important detangling principle for curly hair: do it in the shower with conditioner still in. Use a wide-tooth comb working from ends upward. The conditioner provides slip that minimizes breakage and preserves curl definition simultaneously. Detangling dry curly hair is one of the most common causes of significant unnecessary breakage.
Deep condition at minimum every two weeks — weekly is even better.
How to Style
Apply a curl-defining cream after washing to maintain the curl pattern throughout the day. Use a diffuser attachment on your blow dryer — it distributes airflow gently and evenly, drying curls in their natural pattern rather than disrupting them.
Layered cuts like the wolf cut and modern shag actively improve curly hair by removing weight that suppresses the natural curl pattern. Our wolf cut hair 2026 guide covers this extensively — and the response from the curly hair community has been extraordinary, as you can see in this post from our Facebook page where thousands of women shared their curly wolf cut results.
6. Hair Care Routine 2026 for Coily and Kinky Hair
Coily hair has the tightest curl pattern, the most fragile structure, and the greatest moisture requirements of any hair type. Every decision in a hair care routine 2026 for coily hair must answer one primary question: does this add moisture and protection, or does it strip and expose?
How to Wash
Wash only once a week using a mild, sulfate-free shampoo. Most conventional shampoos contain sulfates that strip moisture and natural oils from coily hair at a rate that no conditioning treatment can fully overcome if it is happening weekly.
Between wash days, wet the hair gently several times throughout the week to add moisture. This is hydration, not cleansing — simply running water through the hair and applying a leave-in spray maintains moisture without stripping.
How to Condition
Deep condition at minimum once every two weeks — weekly is the standard recommendation for 4C hair. The treatment must genuinely penetrate; ingredients like shea butter, castor oil, and honey are particularly effective for coily hair’s intense requirements.
Make a daily moisture spray: mix leave-in conditioner, castor oil, and water in a spray bottle and apply throughout the week to maintain hydration. This daily refresh is one of the most distinguishing features of an effective coily hair care routine 2026.
Apply a hot oil treatment (coconut or olive oil) twenty minutes before washing for an extra moisture boost before shampooing temporarily reduces oil levels.
How to Protect
Satin or silk pillowcase: Cotton pillowcases actively draw moisture from coily hair through absorption overnight. A satin pillowcase or satin scarf prevents this moisture loss and significantly reduces tangling and breakage.
Protective styling: Cornrows, box braids, Bantu knots, twists, and buns serve a genuine functional purpose beyond aesthetics — they protect fragile ends from environmental damage and daily manipulation, which are primary causes of length retention problems in coily hair. Protective styles typically last six to eight weeks before they need redoing.
How to Detangle
Never detangle coily hair when dry. Always detangle in the shower with conditioner providing slip, using a wide-tooth comb and working patiently from ends to roots.
No hair care routine 2026 is complete without addressing nutrition. The hair follicle is one of the most metabolically active structures in the body — it requires specific nutrients consistently to produce healthy, strong hair. When those nutrients are insufficient, growth slows, the hair that does grow is weaker, and shedding increases.
Eggs
Hair is primarily composed of keratin — a structural protein. Protein deficiency directly compromises hair growth rate, strength, and shaft integrity. Eggs provide complete protein alongside B vitamins, iron, and zinc. Specific peptides in eggs have also been shown to stimulate growth at the follicle level. Two to three eggs weekly provides meaningful contribution to your hair’s protein requirements.
Spinach
Vitamin A regulates sebum production — the natural oil that conditions and protects your scalp. Too little produces dryness and flaking; too much creates an oily scalp. Spinach is one of the richest vegetable sources of beta-carotene, which the body converts to vitamin A as needed. A daily handful in salads or cooked in meals provides substantial benefit without the excess risk that supplements carry.
Yogurt
Yogurt provides both probiotics and vitamin B5 (pantothenic acid). Probiotics support gut health, which has an increasingly documented connection to hair quality and growth rate. Vitamin B5 specifically supports hair follicle health. Plain, full-fat yogurt provides the most probiotic benefit — flavored varieties typically contain added sugars that reduce the overall nutritional value.
Red Meat
Iron deficiency is one of the most common nutritional causes of hair loss and premature greying in women, particularly during reproductive years. Red meat provides heme iron — the form most efficiently absorbed by the body compared to the non-heme iron in plant sources. For plant-based diets, pairing non-heme iron sources like lentils with vitamin C significantly improves absorption.
Soybeans and Nuts
Vitamin E is a primary antioxidant nutrient that protects hair follicles from oxidative damage — the cellular stress that contributes to follicle ageing and hair loss. Soybeans, almonds, sunflower seeds, and hazelnuts are excellent sources. A small handful of mixed nuts daily provides meaningful vitamin E without excessive caloric impact.
Water
Scalp health and hair growth are directly affected by hydration status. A dehydrated scalp produces less sebum, becomes more prone to irritation, and creates a less optimal environment for growth. Eight glasses of water daily is the widely cited baseline.
8. Universal Tips That Apply to Every Hair Type
Regardless of where your hair falls on the texture spectrum, these principles apply to every effective hair care routine 2026:
Trim every six to twelve weeks. Split ends travel upward and cause progressive damage that conditioning cannot reverse. Regular trims maintain health and — counterintuitively — support length retention by preventing breakage that would otherwise remove more length than the trim itself.
Do not wash daily. Daily washing strips natural oils from every hair type. One to three times weekly is appropriate for most women depending on hair type.
Avoid excessively tight ponytails and buns. Repeated tension on the follicles causes traction alopecia — gradual, sometimes permanent hair loss at the hairline and temples. Looser alternatives or alternating between tight and loose styles prevents cumulative follicle damage.
Protect from sun exposure. UV radiation damages the hair’s protein structure and causes color fading. A hat, scarf, or UV-protective hair product during extended outdoor time provides meaningful protection.
Use cool or lukewarm water. Hot water opens the cuticle too aggressively and strips more moisture than necessary. A cool final rinse seals the cuticle and adds noticeable shine.
Always use heat protectant. Any heat tool use — blow dryer, flat iron, curling wand — requires a heat protectant spray applied first. This is not optional; it is the barrier between the heat and your hair’s protein structure.
Rosemary oil for growth. Among essential oils with research support for hair growth, rosemary oil is consistently the most cited. Diluted in a carrier oil and massaged into the scalp regularly over three to six months produces noticeable results.
For more on how these principles connect with beautiful hair color choices, our hair color trends 2026 guide is the perfect next read — and for face-shape-specific styling that complements any routine, our best haircut for round face guide applies these principles to specific cut recommendations.
9. Your Weekly Schedule by Hair Type
Here is how a complete hair care routine 2026 looks across a full week for each hair type:
Pre-wash: Hot oil treatment 20 minutes before shampooing
Nightly: Satin pillowcase or scarf
Every 6-8 weeks: Refresh protective style
Frequently Asked Questions
What should I avoid in my hair care routine 2026? Limit heat styling and chemical treatments — both cause cumulative damage that conditioning can only partially repair. Avoid over-washing, products with harsh sulfates on dry or curly hair, and styling products formulated for a different hair type than your own.
How often should women wash their hair? Straight or oily hair: every two to three days. Wavy hair: every three to four days. Curly hair: one to two times weekly with co-washing on alternate days. Coily hair: once weekly with daily moisture refreshes between washes.
Which foods actually improve hair quality? Eggs (protein and B vitamins), spinach (vitamin A for sebum regulation), yogurt (probiotics and B5), red meat or iron-rich plant sources (iron for follicle health), and soybeans and nuts (vitamin E for antioxidant protection) have the most direct, evidence-backed impact on hair health.
Is it okay to oil hair daily? No — daily scalp oiling can clog pores and create conditions for scalp infections. Two to three times weekly is appropriate for most hair types. The daily moisture spray used for coily hair (a diluted mixture of leave-in conditioner and a small amount of castor oil in water) is different from direct oil application to the scalp.
Which essential oil is best for hair growth in 2026? Rosemary oil has the strongest evidence base. Diluted in a carrier oil and massaged into the scalp consistently over three to six months produces the most documented results.
Should I comb my hair right after oiling? No. Freshly oiled hair is more prone to breakage under the tension of combing. Detangle before applying oil, then allow it to absorb fully before any combing or styling.
The Bottom Line
The most important truth about building a hair care routine 2026 is that the best routine is not the most expensive or most complicated one. It is the one genuinely aligned with your specific hair type, applied consistently enough to show its full impact — which typically takes two to three months of honest, regular practice.
Identify your hair type. Choose products designed for it. Apply the right techniques for your category. Feed your hair from the inside. Give the routine time.
Your best hair is not behind you — it is what consistent, informed care produces over the months ahead.
Visit dailyjuggar.com for more hair inspiration, beauty guides, and expert style content updated all year long.
A great hair care routine for women is one of the most genuinely worthwhile investments you can make in yourself — and yet it is also one of the most consistently misunderstood. Most women either over-complicate it with products they do not need or under-invest by assuming that washing and occasionally conditioning is enough. The truth, as it usually is, sits somewhere between those two extremes.
The good news is that building an effective hair care routine for women does not require a bathroom shelf full of expensive products or hours of weekly styling time. It requires understanding your specific hair type, choosing the right products for that type, and applying a handful of consistently good habits. Do those things well, and healthy, shiny, strong hair follows — regardless of whether your hair is straight, curly, fine, thick, chemically treated, or completely natural.
This guide covers 13 expert-recommended steps that form the foundation of the best hair care routine for women in 2026. Whether you are starting completely from scratch or refining what you already do, these are the principles that genuinely move the needle on hair health.
Identify Your Hair Type and Specific Needs
Every effective hair care routine for women starts in the same place: understanding what type of hair you actually have. This sounds obvious, but it is genuinely the step most women skip — and skipping it means spending money on products that do not work for your hair, washing too often or not often enough, and wondering why your hair never quite looks the way you want it to.
Hair type falls along several dimensions, and each one affects your routine differently.
Hair texture — whether your hair is straight, wavy, curly, or coily — determines your hair’s relationship with moisture. Straight hair allows natural scalp oils to travel easily down the shaft, which means it tends to get greasy more quickly. Wavy hair often has oily roots and dry ends simultaneously. Curly hair struggles with dryness because its structure makes it much harder for natural oils to travel down the shaft. Coily hair is the driest and most fragile type, requiring intense moisture and protective styling approaches.
Hair porosity describes how well your hair absorbs and retains moisture — a factor that dramatically affects which products will actually work for you. Low-porosity hair resists moisture absorption, which means lightweight products that can penetrate easily are ideal. High-porosity hair absorbs moisture readily but also loses it quickly, which means heavier, moisture-locking products are necessary.
Hair length also plays a role in your routine. Longer hair tends to be drier because the natural oils from the scalp must travel further to reach the ends, spreading thinner as they go. Shorter hair often needs more frequent washing because those same oils concentrate near the scalp.
Hair texture within its category — whether it is fine or coarse — further refines your product choices. Fine hair gets weighed down by heavy creams and styling products, making lightweight formulas essential. Coarse hair typically benefits from richer formulas that help maintain smoothness and manageability.
The most efficient way to understand your specific combination? Ask your hairstylist. A skilled stylist can identify your hair type, porosity, and texture in minutes and point you toward the products and approaches most likely to work for your specific hair.
Action step: Before purchasing any new hair product, ask yourself: is this formulated for my specific hair type? If you cannot answer that question, you do not yet have enough information about your hair to make good product choices.
2. Choose the Right Shampoo for Your Hair
Shampoo is the foundation of any hair care routine for women — it is the product you use most frequently and the one with the most direct impact on scalp health. Choosing the wrong shampoo can cause dryness, greasiness, product buildup, or scalp irritation. Choosing the right one makes everything else in your routine work better.
The most important general rule is to match your shampoo to your scalp’s needs rather than to the appearance of your ends. Your scalp is where cleansing happens — your ends need moisture, not shampoo.
For straight or oily hair: Lightweight shampoos that cleanse effectively without stripping moisture completely are the best choice. Avoid heavy, creamy formulas — they deposit residue that makes straight hair feel greasy and look limp within hours of washing.
For curly or dry hair: Sulfate-free shampoos are specifically worth seeking out. Sulfates — the cleansing agents in most conventional shampoos — are highly effective at removing oil and product, which is excellent for oily hair but too aggressive for curly and dry hair types that need to retain their natural oils.
For specific concerns: Your shampoo choice should address what your scalp actually experiences. If you have dandruff, a medicated dandruff shampoo is more effective than any amount of general-purpose cleansing. If your hair is fine, a volumizing shampoo adds body and lift from the cleansing stage onward. If you are experiencing thinning, a hair-strengthening shampoo addresses that concern at the foundation.
The market is genuinely overwhelming, but the decision-making process is simpler than it appears: identify your scalp type, identify any specific concerns, and find a shampoo that addresses both.
Action step: Check the ingredient list of your current shampoo. If it contains sodium lauryl sulfate or sodium laureth sulfate and you have dry, curly, or color-treated hair, switching to a sulfate-free formula is likely to make an immediate, noticeable difference.
3. Shampoo the Right Way {#3}
Choosing the right shampoo matters — but how you use it matters equally. Most women shampoo in ways that are either too aggressive, too infrequent, or focused on the wrong part of the hair, and any of these habits undermines the health of both the scalp and the hair itself.
Where to apply shampoo: Focus on the scalp, not the ends. This is genuinely the single most important application technique in any hair care routine for women. The scalp is where oil, dirt, and product buildup accumulate — the ends simply need rinsing, not active cleansing. Concentrating shampoo through the ends causes unnecessary dryness and can contribute to breakage over time.
How to apply it: Work the shampoo into a lather at the scalp using your fingertips in small, circular massaging motions. This technique cleans the scalp thoroughly, stimulates circulation, and feels significantly better than scrubbing. A silicone scalp massager can make this step even more effective and genuinely relaxing.
How often to shampoo: This varies significantly by hair type. Straight or oily hair may need washing every two to three days to manage oil and prevent greasiness. Curly or dry hair should typically be washed only once or twice a week — more frequent washing strips the natural oils these hair types genuinely need to maintain moisture and definition. Between washes, dry shampoo is an effective tool for managing roots without stripping the hair of moisture.
Action step: If you currently shampoo your hair from roots to ends in one application, shift your technique to concentrate entirely on the scalp. Rinse thoroughly and allow the suds to flow naturally through the ends — this provides sufficient cleansing for the mid-lengths and ends without direct application.
4. Condition to Restore Moisture After Every Wash
Conditioning is the step in a hair care routine for women that separates hair that looks healthy from hair that is healthy. Shampoo opens the hair cuticle to remove dirt and oil — conditioner closes it again, restores hydration, smooths the surface of each strand, and makes the hair significantly easier to detangle and style.
Skipping conditioner, or conditioning inconsistently, produces hair that is rough, prone to breakage, difficult to style, and lacking the shine that well-conditioned hair naturally has.
Choosing the right conditioner: The same logic that governs shampoo choice applies here. Straight hair benefits from lightweight conditioners that hydrate without weighing strands down or creating buildup at the roots. Wavy, curly, and coily hair needs richer, more deeply hydrating conditioners that provide the extra moisture these hair types require and make detangling significantly easier.
How to apply conditioner correctly: Apply conditioner only to the mid-lengths and ends of the hair — where it is driest and needs the most help. Avoid applying conditioner to the roots, particularly if you have straight or oily hair, because root application causes greasiness that shortens the time between necessary washes.
How long to leave it on: Most rinse-out conditioners should be left on for two to five minutes before rinsing with cool water. The cool water rinse is important — it helps seal the cuticle that the shampoo opened, locking in the conditioner’s hydrating benefits and adding shine.
Action step: If your hair consistently feels rough or tangly after washing, your conditioner is likely either too lightweight for your hair type or not being left on long enough. Try leaving it on for an additional two minutes before rinsing.
5. Add Deep Conditioning Treatments Weekly
Regular conditioner maintains your hair’s baseline moisture level — deep conditioning treatments actively repair and restore it. In any serious hair care routine for women, particularly for dry, damaged, color-treated, or heat-styled hair, a weekly deep conditioning treatment is one of the highest-impact steps you can take.
Deep conditioning treatments and hair masks differ from regular conditioners in their formulation and their application time. They contain higher concentrations of nourishing ingredients and are designed to penetrate beyond the surface of the hair shaft — addressing damage and dehydration that surface-level conditioning cannot reach.
What to look for in a deep conditioning treatment: Ingredients worth seeking out include proteins (which repair structural damage and strengthen the hair shaft), shea butter (which locks in moisture and adds softness), avocado oil (which penetrates deeply and provides essential fatty acids), and glycerin (which draws moisture from the air into the hair).
How to apply: After shampooing and squeezing out excess water, apply the treatment generously from mid-lengths to ends. For best results, wrap your hair in a warm towel after applying — the heat helps the product penetrate more deeply and work more effectively. Leave on for ten to thirty minutes depending on the product’s instructions.
How often: Curly and dry hair types benefit most from weekly deep conditioning, which can genuinely transform the texture and health of the hair over several months of consistent use. Straight or oily hair types should limit deep conditioning to every two to four weeks — more frequent use can cause product buildup that weighs the hair down.
Action step: Add one deep conditioning session to your weekly schedule and maintain it consistently for one month. The difference in hair texture, manageability, and shine at the end of that month will be immediately visible.
6. Detangle Gently and Correctly
Detangling is one of the steps in a hair care routine for women that causes the most accidental damage when done incorrectly — and most people do it incorrectly. The two most common mistakes are detangling dry hair and working from roots to ends. Both cause unnecessary breakage that compounds over time.
The right tools: A wide-tooth comb or a detangling brush specifically designed for wet or damp hair are the most appropriate tools for this step. Fine-tooth combs and regular brushes create too much friction on tangled hair and pull out or break strands that a wide-tooth comb would simply separate.
The right technique: Always work from ends to roots — never the reverse. Starting at the ends allows you to remove tangles from the bottom of the hair first, clearing the way for the comb to move smoothly upward without dragging knots from the roots downward through the entire length of the hair.
The right timing: Detangling is significantly easier and less damaging on damp or wet hair than on dry hair. Dry hair has less elasticity and snaps more readily under tension. A leave-in conditioner or detangling spray applied before combing further reduces friction and makes the process noticeably easier.
Patience is genuinely important here: Rushing through detangling is one of the most efficient ways to cause preventable breakage, particularly in curly and coily hair types where tangles are tighter and the hair is more fragile. Working through knots slowly and methodically preserves the structural integrity of each strand.
Action step: Switch to starting your detangling at the ends rather than the roots if you currently work root-to-tip. This single change can reduce breakage significantly within the first few sessions.
7. Use Leave-In Conditioners or Oils for Extra Moisture
For many women — particularly those with dry, curly, coily, or chemically treated hair — a rinse-out conditioner is not sufficient to maintain adequate moisture levels between washes. Leave-in conditioners and hair oils bridge that gap, maintaining hydration throughout the day and protecting the hair from environmental factors that cause moisture loss.
For straight hair: Lightweight leave-in products — light sprays or thin serums — add moisture without weighing strands down or creating the greasy appearance that heavier products inevitably produce on fine or straight hair.
For curly and coily hair: Heavier creams and oils are the appropriate choice. Coconut oil, shea butter-based creams, and argan oil all provide the intense moisture retention that these hair types need. Applied to damp hair after washing and before styling, they maintain hydration throughout the day and significantly reduce frizz in humid conditions.
How to apply: Leave-in conditioners and oils are most effective when applied to slightly damp hair — not soaking wet, not fully dry. Damp hair is more porous and absorbs leave-in products more effectively. Work the product from mid-lengths to ends, avoiding the roots.
Action step: If you currently skip leave-in products entirely, start with a lightweight leave-in spray on damp hair after washing and see how your hair responds over two to three weeks. The improvement in manageability and moisture retention is usually significant enough to make it a permanent addition.
8. Protect Your Hair from Heat Damage
Heat styling tools are among the most commonly used and most consistently damaging elements in a woman’s hair care routine. Blow dryers, flat irons, curling wands, and hot rollers all work by using high temperatures to manipulate the hair’s structure — and without proper protection, repeated heat exposure causes cumulative damage that eventually manifests as dryness, breakage, split ends, and a rough, dull texture.
The first recommendation from dermatologists: Air-dry your hair whenever possible. Air-drying eliminates heat exposure entirely, which is always the safest option for hair health. On days when you need to blow-dry, using the lowest effective heat setting is significantly less damaging than defaulting to the highest setting.
Heat protectant products are non-negotiable for heat styling: A heat protectant spray applied before any heat tool use creates a barrier between the heat and the hair’s protein structure, significantly reducing the temperature-related damage that occurs. Look specifically for products that protect up to 450°F — this covers the full range of temperatures that most styling tools operate at.
Water temperature matters too: This is one of the most overlooked factors in a hair care routine for women. Showering in very hot water dries out both the scalp and the hair shaft, contributing to the same kind of moisture loss that heat tools cause. Washing hair in warm rather than hot water, and finishing with a cool water rinse, preserves the hair’s natural moisture and adds shine.
Action step: Apply a heat protectant spray as a non-negotiable step before any heat tool — not occasionally, but every single time. The investment in this product and this habit prevents the kind of cumulative damage that takes months of intensive conditioning to repair.
9. Avoid Harsh Chemical Treatments
Chemical treatments — bleaching, relaxing, chemical straightening, perming, and even frequent hair dyeing — all alter the internal structure of the hair in ways that weaken it over time. For women with already healthy hair, the occasional chemical treatment is manageable with the right aftercare. For women with already compromised hair, adding chemical treatments accelerates damage in ways that can take years to fully recover from.
The honest assessment: No chemical treatment is completely without cost to the hair’s structural integrity. Bleaching is the most aggressive, breaking down the melanin and protein structure simultaneously. Chemical relaxers and straightening treatments break and reform the disulfide bonds that give hair its natural texture. Even frequent hair dyeing causes cumulative cuticle lifting that reduces the hair’s ability to retain moisture.
If you choose chemical treatments: Space them out as much as possible, use the gentlest effective formula, and invest seriously in the aftercare. Deep conditioning treatments, protein treatments, and moisturizing products are the primary tools for repairing and strengthening chemically treated hair.
Natural alternatives: For women who want color without significant chemical processing, options like semi-permanent color, henna, and toning glosses all deposit color without the aggressive structural alteration of bleach or permanent dye.
Action step: Before scheduling any chemical treatment, honestly assess the current condition of your hair. If it is already dry, brittle, or breaking, allowing it to recover through deep conditioning and protein treatments for several months before adding chemical processing will produce significantly better long-term results.
10. Choose Styling Products That Match Your Hair Type
The styling product category is where most women’s hair care routines become either over-complicated or counter-productive. The wrong product for your hair type does not simply fail to help — it actively works against your hair’s natural behavior, creating greasiness, flatness, frizz, or buildup.
For straight hair: Lightweight serums and volumizing sprays add body, shine, and smoothness without the weight that would cause straight hair to look flat or greasy. Avoid creams and heavy oils — they deposit residue that straight hair struggles to carry without becoming limp.
For wavy hair: Mousse and light creams work well for defining the wave pattern without over-weighting the hair. The goal is to enhance the natural texture while maintaining enough volume that the wave reads as intentional rather than frizzy.
For curly and coily hair: Curl creams, gels, and mousses that provide hold and definition are the most appropriate styling products. The hold keeps the curl pattern defined throughout the day, while the moisture content keeps curls soft and bouncy rather than crunchy or dry.
The most important principle across all hair types: Apply styling products to damp hair rather than dry hair. Products distribute more evenly on damp hair, penetrate more effectively, and activate the ingredients as the hair dries rather than simply sitting on the surface.
For styling inspiration that works beautifully with a healthy hair care routine, our trending haircuts 2026 guide covers the season’s most beautiful styles with specific product advice for each texture.
Action step: Clear out any styling products that are not specifically formulated for your hair type. Using the right products consistently produces better results than rotating through many products that are not quite right for your hair.
11. Avoid Tight Hairstyles That Cause Breakage
This is one of the most frequently overlooked factors in a hair care routine for women — and it is one that causes genuinely serious, sometimes permanent, damage. Tight ponytails, ballerina buns, slicked-back styles, and certain braiding techniques all create ongoing tension on the hair follicles that the hair is not designed to sustain over time.
Traction alopecia is the medical term for the type of hair loss caused by repeated tension and pulling on the hair. It develops gradually — the follicles are stressed repeatedly until they are permanently damaged and stop producing hair. The areas most commonly affected are the hairline, temples, and the parts of the scalp under the greatest sustained tension.
Tight hairstyles also cause mechanical breakage that is separate from follicle damage — the hair shaft itself snaps under the tension, particularly at the points where elastics and ties grip the hair most tightly.
The practical adjustment: Opt for looser hairstyles whenever possible. Loose buns, soft braids, and ponytails secured with fabric-covered elastics rather than standard rubber bands all reduce the tension significantly. On days when you need a sleek, tight style for an occasion, alternating regularly with loose styles prevents the cumulative damage that daily tight styling inevitably causes.
Action step: Replace standard rubber elastics with snag-free, fabric-covered hair ties — this single change significantly reduces breakage at the points where the tie contacts the hair, and the difference in breakage over several months is genuinely noticeable.
12. Trim Regularly and Maintain Healthy Ends
Regular trims are one of the most consistently avoided steps in a hair care routine for women — particularly among women who are trying to grow their hair longer. The instinct to avoid cutting anything off when trying to grow length is understandable, but it is ultimately counter-productive.
Why regular trims matter: Split ends are not simply a cosmetic concern. They travel upward along the hair shaft, splitting further and further toward the root, causing progressive damage that eventually requires removing significantly more length than a preventative trim would have. Allowing split ends to continue unchecked means the damage accumulates faster than any conditioning treatment can repair it.
How often to trim: Dry or damaged hair benefits from a trim every six to eight weeks — the damage accumulates more quickly, making more frequent maintenance genuinely necessary. Healthier hair in good condition can typically extend to every eight to twelve weeks between trims without the split ends progressing significantly.
The counterintuitive truth about growing length: Hair that is trimmed regularly actually appears to grow faster because the ends remain healthy rather than splitting and breaking off. Women who avoid trims often find their hair maintains a similar length for years despite growth, because split ends break off at a rate that roughly matches the growth rate. Regular trims break that cycle.
Action step: Schedule your next trim now — do not wait until your ends are visibly split and damaged. Preventative maintenance at regular intervals is significantly more effective than reactive damage control.
13. Eat a Nutrient-Rich Diet for Hair Growth
The most complete hair care routine for women in the world cannot fully compensate for a diet that does not provide the nutrients the body needs to grow healthy hair. Hair growth is a biological process — the body allocates nutrients to its systems in order of priority, and hair (unlike organs essential to survival) is not at the top of that list. When nutrients are insufficient, hair growth slows, and the hair that does grow tends to be weaker, thinner, and more prone to breakage and loss.
The key nutrients hair needs:
Protein is the structural foundation of the hair shaft — hair is primarily composed of a protein called keratin, and inadequate protein intake directly compromises hair strength and growth rate.
Iron deficiency is one of the most common nutritional causes of hair loss in women, particularly during reproductive years when iron demand is higher.
Zinc supports hair follicle function and the oil glands that keep the scalp healthy.
Biotin (vitamin B7) is perhaps the most widely discussed hair nutrient — it supports keratin production and is genuinely important for hair health, though deficiency is less common than supplement marketing suggests.
Vitamins A, C, D, and E all contribute to scalp health and the hair growth environment in different ways.
The best sources: A balanced diet that includes plenty of vegetables, lean protein sources like eggs, fish, and legumes, and healthy fats from sources like avocado and olive oil provides the majority of what healthy hair requires. Staying well-hydrated supports scalp health and the overall cellular environment in which hair grows.
On supplements: While supplements can be genuinely helpful for women with identified deficiencies or dietary limitations, they work best as additions to a solid nutritional foundation rather than replacements for one. If you are experiencing significant hair loss or thinning, consulting a healthcare professional to identify any underlying deficiencies is a more targeted approach than simply adding a general hair supplement.
Action step: Before purchasing a hair supplement, track your diet for one week and honestly assess whether it consistently provides adequate protein, iron, and the key vitamins listed above. Dietary gaps are often more impactful on hair health than any topical product or treatment.
Putting Your Hair Care Routine for Women Together
Understanding these thirteen steps individually is useful — but what genuinely transforms hair health is applying them consistently as a complete, integrated routine. Here is how they fit together across a typical week:
Every wash day (2-3 times weekly for straight/oily hair, 1-2 times for curly/dry hair): Shampoo the scalp thoroughly, condition the mid-lengths and ends, detangle gently while the conditioner is in, rinse with cool water, apply leave-in conditioner or oil to damp hair, and style with heat protectant if using tools.
Once weekly: Deep conditioning treatment on the mid-lengths and ends, left on for fifteen to thirty minutes with a warm towel wrap.
Every 6-8 weeks: Salon appointment for a trim — more frequently for damaged hair, slightly less frequently for healthy hair in good condition.
Daily: Avoid tight hairstyles, minimize heat styling where possible, and drink adequate water.
Ongoing: Eat a nutrient-rich diet, choose products appropriate for your specific hair type, and consult a dermatologist if you notice significant hair loss or scalp changes that do not respond to home care.
When to See a Professional
A well-designed hair care routine for women handles the vast majority of hair health concerns effectively. But some situations genuinely warrant professional attention rather than home management.
Excessive hair shedding or noticeable thinning can have many underlying causes — hormonal imbalances, thyroid issues, nutritional deficiencies, genetics, or significant stress. A dermatologist or healthcare professional can identify the specific cause and recommend treatments that address the root issue rather than simply managing symptoms.
Scalp conditions like persistent dandruff that does not improve with medicated shampoos, seborrheic dermatitis, or scalp psoriasis all require professional diagnosis to treat effectively. Over-the-counter products manage symptoms for many people, but professional treatment provides more targeted relief for conditions that do not respond to standard approaches.
Do not hesitate to seek professional advice when home care is not producing the results you expect. The earlier underlying issues are addressed, the more manageable they typically are.
The Foundation of Great Hair Starts With Consistency
The most important truth about building a hair care routine for women is that no single step produces dramatic results in isolation — but all of them practiced consistently over weeks and months produce results that are genuinely transformative. The women with the healthiest, most beautiful hair are almost never the ones using the most expensive products. They are the ones who have found the right products for their specific hair type and applied good habits reliably over time.
Start where you are. Identify your hair type, adjust the one or two steps that are most clearly misaligned with your hair’s actual needs, and build from there. Your hair’s best condition is not behind you — it is what consistent, informed care produces over the next few months.
What is the correct order for a hair care routine for women? The correct order is: shampoo the scalp, condition the mid-lengths and ends, detangle while conditioner is in, rinse with cool water, apply leave-in product to damp hair, then style. Deep conditioning treatments replace the regular conditioner step once weekly.
How often should women wash their hair? It depends on hair type. Straight or oily hair typically needs washing every two to three days. Curly and dry hair types benefit from washing only one to two times per week to preserve natural oils that these hair types need for moisture and definition.
What is the most important step in a hair care routine for women? Conditioning is arguably the highest-impact single step because it directly affects moisture retention, manageability, and the long-term structural health of the hair. Many women shampoo correctly but under-condition, which is one of the most common causes of chronically dry, rough, or fragile hair.
Do hair supplements actually work for women? Hair supplements can genuinely help women with identified nutritional deficiencies — iron, biotin, and zinc deficiencies in particular can cause noticeable hair thinning that supplementation addresses effectively. For women with adequate nutrition, supplements provide limited additional benefit. A healthcare professional can test for deficiencies and make specific recommendations.
How can women prevent hair breakage? Gentle detangling starting from ends rather than roots, avoiding tight hairstyles, using heat protectant before styling tools, deep conditioning weekly, and regular trims all contribute significantly to preventing breakage. Consistency across all these steps produces the most noticeable results.