Tag: makeup tips

  • 25+ Soft Glam Makeup Tutorial Steps: Achieve the Perfect Flawless Look
    25+ Soft Glam Makeup Tutorial Steps: Achieve the Perfect Flawless Look

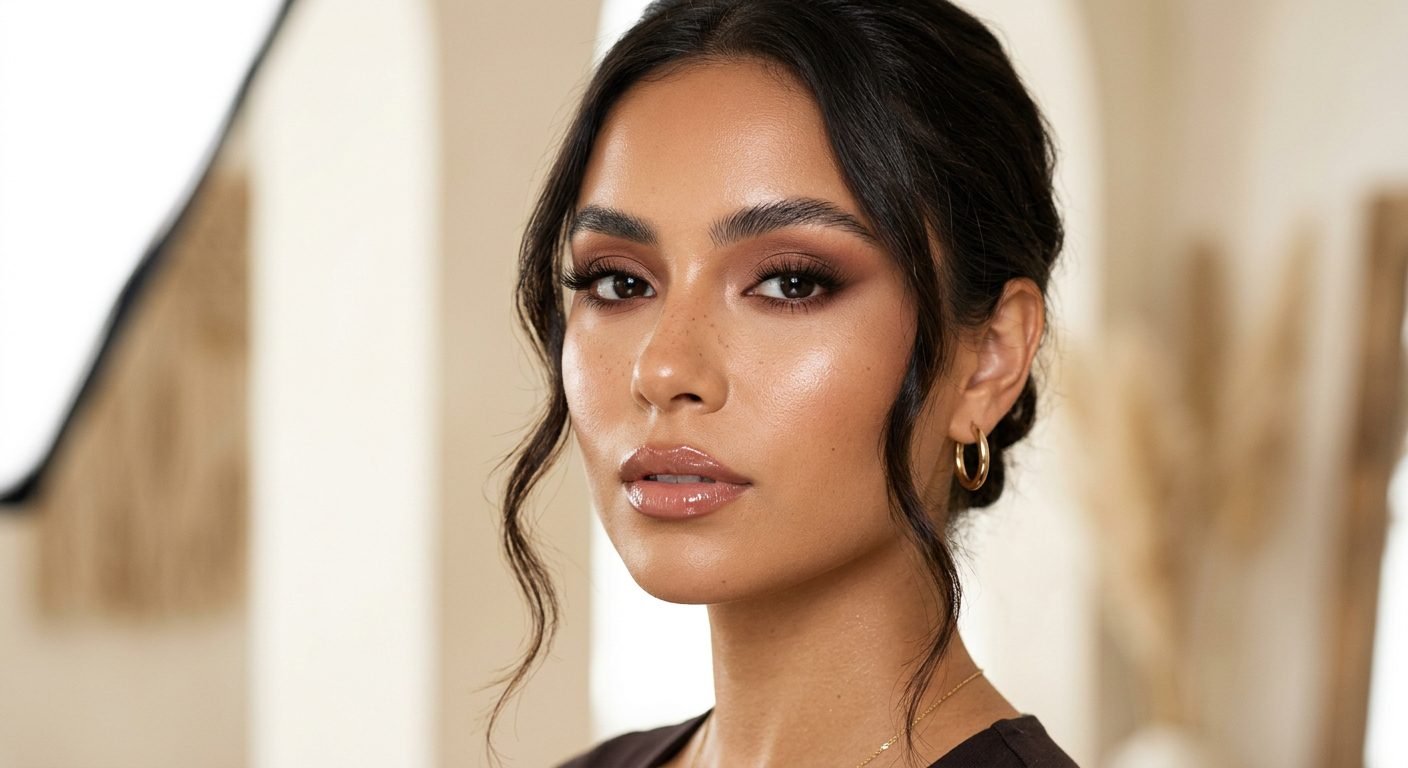
    featured image showing a flawless soft glam makeup tutorial look

    Soft glam makeup is the undisputed queen of the beauty world right now. It bridges the gap between a full-coverage, dramatic look and a natural, “no-makeup” aesthetic. Characterized by flawless, glowing skin, soft and diffused smokey eyes, fluttery lashes, and a polished nude lip, soft glam is incredibly versatile. Whether you are heading to the office, attending a wedding, or going on a romantic date night, this makeup style enhances your features without looking heavy or cakey.

    In this curated masterclass, we are diving into 25 essential soft glam makeup tutorial steps to help you achieve the perfect, flawless look from start to finish. Get ready to elevate your beauty routine! To stay updated with the latest viral beauty trends and save your favorite looks, be sure to follow our Pinterest boards.

    1. Start with Flawless Skin Prep

    step 1 flawless skin prep for soft glam makeup tutorial

    The most flawless makeup application in the world cannot survive on dry, textured skin. Soft glam requires a radiant, plump canvas. Begin by cleansing your face and applying a hydrating hyaluronic acid serum, followed by a rich moisturizer. This ensures your skin is supple and ready to absorb the products. For a complete, step-by-step guide to achieving the perfect base, follow our detailed Skin Care Routine.

    2. Don’t Skip the Primer

    step 2 applying primer for soft glam makeup

    Primer is the structural foundation of your soft glam look. Because this style relies on a smooth, flawless complexion, a gripping primer will ensure your foundation and concealer stay in place all day without settling into fine lines. If you have oily skin, opt for a mattifying primer for your T-zone. If you have dry skin, a hydrating primer will prevent your base from clinging to dry patches.

    3. Apply a Buildable Foundation

    step 3 applying buildable foundation for a soft glam base

    Soft glam is not about heavy, cakey coverage. It is about sheer to medium, buildable coverage that lets your natural skin texture show through. Use a damp beauty sponge to stipple a luminous or dewy foundation into your skin. Start from the center of your face and blend outwards. To master the exact technique of achieving a seamless, streak-free canvas, read our step-by-step How to Apply Foundation guide.

    4. Color Correct and Conceal

    step 4 color correcting and concealing for soft glam makeup

    Bridal photography and bright lights can be unforgiving. Use a peach-toned color corrector to neutralize any dark circles under your eyes before applying your concealer. Apply a creamy, hydrating concealer only where needed—under the eyes, down the bridge of the nose, and on any blemishes. Blend it out with a damp sponge for a flawless, creaseless finish. For a deeper dive into the perfect under-eye technique, explore our How to Apply Concealer tutorial.

    5. Soft Cream Contouring

    step 5 soft cream contouring technique for soft glam

    Harsh, cool-toned powders have no place in the soft glam aesthetic. Instead, use a warm cream contour to softly sculpt the cheekbones, jawline, and perimeter of the forehead. Cream products melt into the skin, creating a shadow that looks natural and diffused, rather than a harsh, painted line. For expert techniques on facial sculpting that look incredible in photos, check out our How to Contour guide.

    6. Fluff and Set the Brows

    step 6 fluffing and setting brows for soft glam makeup

    Soft glam brows should look full, fluffy, and natural—not drawn on with a sharp pencil. Use a brow gel or a fine-tipped pen to create hair-like strokes in the sparse areas. Then, use a clear or tinted brow soap to brush the hairs upward, locking them in place for a laminated, model-off-duty effect.

    7. The Neutral Transition Shade

    step 7 applying a neutral transition shade for soft smokey eyes

    The eyes are the focal point of the soft glam look. Start by applying a warm, neutral transition shade (like a soft camel or light brown) into the crease of your eyelid using a fluffy blending brush. Windshield-wiper motions will diffuse the color seamlessly, creating a soft shadow that adds depth without harsh lines. To master the exact blending techniques required for this seamless look, follow our comprehensive How to Apply Eyeshadow guide.

    8. The Shimmering Lid

    step 8 applying shimmering lid shade for soft glam eyes

    For a touch of soft glamour, apply a shimmering, neutral eyeshadow (like champagne, soft gold, or rose gold) to the center of your eyelid. Use your ring finger to press the shimmer in, as the natural warmth of your skin helps it adhere better and appear more vibrant. Keep the shimmer contained to the lid, allowing the matte transition shade to do the heavy lifting in the crease.

    9. The Soft Smokey Liner

    step 9 soft smokey liner application for soft glam

    Skip the harsh, jet-black winged liner. Soft glam calls for a soft, diffused liner. Take a brown or charcoal kohl eyeliner pencil and smudge it along your upper lash line using a small, dense pencil brush. This creates a soft, hazy halo of color that defines the eye without the sharp edge of a liquid liner. For more tips on perfecting your liner application, read our How to Apply Eyeliner tutorial.

    10. Fluttery False Lashes

    step 10 applying fluttery false lashes for soft glam

    No soft glam look is complete without a fluttery, wispy pair of false lashes. Strip lashes or individual clusters open up the eyes and provide that romantic, camera-ready flutter in photographs. Applying false lashes can be intimidating, but with practice, it becomes second nature. Read our How to Apply False Eyelashes tutorial to ensure your lashes are perfectly placed and comfortable for the whole day.

    11. Tightline the Upper Waterline

    step 11 tightlining the upper waterline for soft glam

    To make your lashes look thicker and fuller without the harshness of heavy eyeliner, tightline your upper waterline. Gently lift your eyelashes and use a waterproof black pencil to color the skin right at the base of the lashes. This fills in any gaps between the false lashes and your natural lash line, creating an incredibly seamless, natural definition.

    12. The Lower Lash Mascara

    step 12 applying lower lash mascara for soft glam

    While you want to keep the under-eye area bright and concealed, defining the lower lashes is crucial for the soft glam aesthetic. Use a lengthening, non-clumpy mascara to lightly coat the lower lashes. If you have very fair lower lashes, a light brown mascara can look softer and more natural than black.

    13. The Nude Waterline Trick

    step 13 nude waterline trick for soft glam makeup

    To make your eyes look larger, brighter, and more awake in photos, use a nude or peach eyeliner pencil on your lower waterline. This hides any redness from crying or lack of sleep and creates the illusion of more rested, youthful eyes.

    14. Blend the Lower Lash Line

    step 14 blending the lower lash line for soft glam

    Take the same warm transition shade you used in your crease and lightly sweep it along the lower lash line using a small blending brush. This creates a soft, cohesive smokey effect that ties the upper and lower eyes together, avoiding a harsh, disconnected look.

    15. Set the Base with Translucent Powder

    step 15 setting the base with translucent powder for soft glam

    To lock your cream products in place and prevent them from creasing throughout the day, lightly dust a finely milled translucent setting powder over your T-zone and under your eyes. If you know you will be crying or dancing, “baking” the under-eye area (letting the powder sit for 5 minutes before dusting off) is a lifesaver.

    16. Warm Powder Bronzer

    step 16 applying warm powder bronzer for soft glam

    To set your cream contour and add a sun-kissed glow, lightly dust a warm powder bronzer along the perimeter of your face—the hairline, temples, and jawline. This warms up your complexion and adds dimension back to the face after the flatting effect of foundation and powder.

    17. Soft, Flush Cheeks

    step 17 applying soft flush cheeks for soft glam makeup

    Soft glam blush should look like a natural, youthful flush. Opt for a soft peach, warm rose, or muted berry shade. Cream blushes are excellent for this aesthetic as they melt into the skin, but a finely milled powder applied with a fluffy brush works beautifully too. For specific techniques on placement and blending, check out our guide on How to Apply Blush.

    18. The Subtle Highlight

    step 18 applying subtle highlight for soft glam

    For a touch of elegance, apply a finely milled, champagne highlighter to the high points of your face. Focus on the tops of the cheekbones, the brow bone, the bridge of the nose, and the cupid’s bow. The soft glam aesthetic calls for a glow that looks like it comes from within, so avoid chunky, glittery highlighters.

    19. Prep the Pout

    step 19 prepping the pout for soft glam lips

    Exfoliate your lips with a gentle scrub and apply a hydrating lip balm. Let it absorb while you finish the rest of your makeup. Before applying lip color, blot the excess balm off so your lipstick has a matte surface to adhere to.

    20. The Nude Lip Liner

    step 20 applying nude lip liner for soft glam

    Line your lips with a lip liner that closely matches your natural lip color. Overline slightly at the cupid’s bow and the center of the bottom lip to create a fuller pout. Fill in the entire lip with the liner—this acts as a stain that will cling to your lips even when the topcoat wears off.

    21. The Creamy Matte Lipstick

    step 21 applying creamy matte lipstick for soft glam

    Soft glam lips are never overly glossy or starkly matte. A creamy, comfortable matte lipstick in a “your lips but better” shade (like a warm nude, soft mauve, or dusty rose) is the perfect choice. Apply it straight from the bullet and blot with a tissue. To find the exact perfect shade for your skin tone, browse our Best Lipstick Shades guide.

    22. The Center Gloss Trick

    step 22 center gloss trick for soft glam lips

    If you want a plump, voluminous pout for photos, apply a clear or lightly tinted lip gloss only to the center of your bottom lip. This creates a 3D effect that makes the lips look fuller without the gloss smudging everywhere.

    23. The Setting Spray Sandwich

    step 23 setting spray sandwich for soft glam makeup

    Instead of just spraying setting spray at the end, try the “sandwich” method. Spray your face before you apply makeup to prep the skin. Apply your cream products, set them with powder, and then spray again. This layers the products and locks them together for maximum longevity.

    24. Blot, Don’t Powder

    step 24 blotting instead of powdering for soft glam

    Throughout the day or night, you will inevitably get a little shiny. Do not reach for more powder—layering powder over sweat or oil will cause your makeup to look cakey and heavy. Instead, use oil-blotting papers. They absorb the excess oil without disturbing the makeup underneath, keeping your skin looking fresh and luminous.

    25. Match the Vibe to Your Outfit

    step 25 matching soft glam makeup vibe to outfit

    Your flawless soft glam makeup should seamlessly blend with your wardrobe. If your outfit is bold, keep the makeup soft. If your outfit is simple, let your glowing complexion and fluttery lashes be the statement. To ensure your overall style is cohesive from head to toe, coordinate this beautiful makeup look with our Date Night Outfits guide or our Casual Outfits for Women article. For more high-fashion beauty inspiration, explore the latest Beauty Trends 2026.

    Frequently Asked Questions (FAQs)

    What is the soft glam makeup tutorial? A soft glam makeup tutorial focuses on creating a flawless, polished look using sheer to medium coverage foundation, soft and diffused smokey eyes, fluttery lashes, and neutral, “your lips but better” lip colors. It bridges the gap between natural and full-glam makeup.

    How do I make my soft glam makeup last all day? To make your soft glam makeup last, focus on skin prep (avoiding heavy moisturizers right before makeup), use a grip primer, and layer cream and powder products. Set your T-zone with translucent powder, and use a long-wearing setting spray. Avoid touching your face throughout the day.

    Can I do soft glam makeup on myself? Absolutely! While professional makeup artists often do soft glam for brides, it is highly achievable at home. The key is blending thoroughly, using the right brushes, and practicing the look a few times before a big event. Following our step-by-step tutorials, like How to Apply Foundation and How to Apply Eyeshadow, will make the process seamless.

    confident women flaunting flawless soft glam makeup tutorial looks

    Conclusion

    Soft glam makeup is a true beauty staple that transcends fleeting trends. Whether you prefer a flawless bridal aesthetic or a polished, everyday office look, the secret lies in the quality of the blending and the strategic layering of products. By following this comprehensive soft glam makeup tutorial, you will achieve a flawless, budge-proof aesthetic that looks stunning in your photographs for decades to come.

    We love seeing your beauty looks! Tag us in your gorgeous soft glam makeup photos on our Facebook page so we can feature your beautiful style. Stay radiant, stay confident, and enjoy your flawless look!

  • How to Apply Blush: A Step-by-Step Guide for Every Face Shape

    How to Apply Blush: A Step-by-Step Guide for Every Face Shape

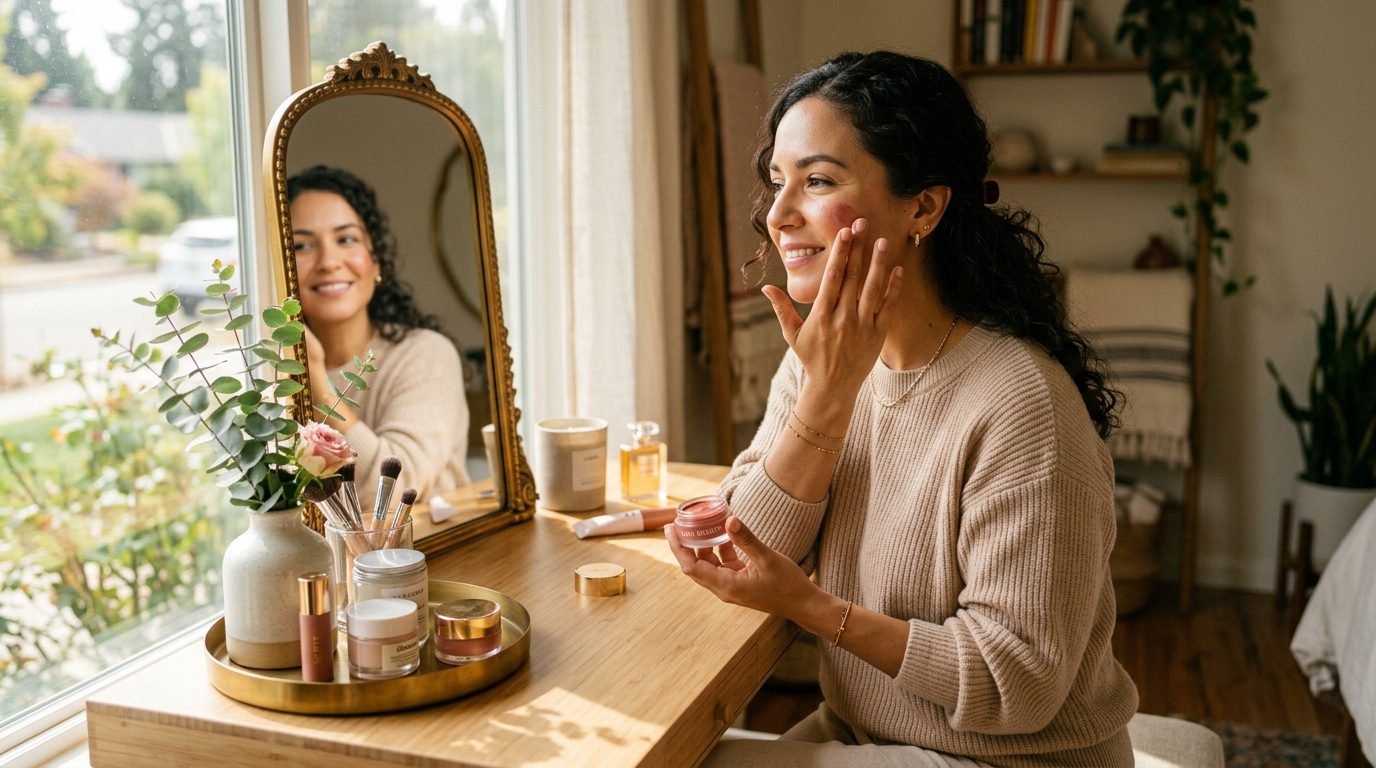
    featured image showing a woman applying blush at a vanity mirror representing how to apply blush

    Blush is the magic wand of makeup. A quick sweep of color across your cheeks can take you from looking tired and washed out to radiant, healthy, and glowing in seconds. However, learning how to apply blush correctly is an art. Applied incorrectly, it can look clownish, streaky, or drag your face downward. Applied correctly, it lifts your features and adds a beautiful, natural dimension to your complexion.

    The secret to mastering how to apply blush lies in two things: choosing the right formula for your skin type and placing it correctly for your specific face shape. Whether you prefer a dewy cream finish or a matte powder glow, this guide will help you achieve a flawless flush. If you are looking for visual inspiration for your makeup looks, be sure to explore our Pinterest boards. In this comprehensive step-by-step guide, we will walk you through the exact process of applying blush like a pro.

    Why Blush Placement Matters

    understanding why blush placement matters when learning how to apply blush

    Before diving into the application process, it is important to understand why blush placement is so crucial. Blush is not just about adding color; it is about creating an optical illusion. By strategically placing color on your cheeks, you can visually alter the shape of your face.

    For example, applying blush higher on the cheekbones can create a lifting effect, making the face look slimmer and more sculpted. Conversely, applying it too low or too close to the nose can make the face look wider and heavier. To ensure your overall makeup looks seamless, it is highly recommended to first perfect your base by reading our glass skin makeup tutorial for beginners.

    Choosing the Right Blush Formula

    The first step in learning how to apply blush is selecting the right formula for your skin type.

    choosing the right blush formula for learning how to apply blush
    • Powder Blush: Best for oily or combination skin. It is easy to control, buildable, and lasts longer on oily skin types. It should be applied with a fluffy, angled brush.
    • Cream Blush: Best for dry or normal skin. Cream formulas melt into the skin, providing a natural, dewy finish that looks like a true flush from within. They are best applied with a damp beauty sponge or your fingertips.
    • Liquid Blush: Highly pigmented and long-lasting. Liquid blush provides a seamless, skin-like finish but requires quick blending before it sets. A little goes a long way.

    How to Apply Blush Based on Your Face Shape

    determining face shape for proper blush placement in how to apply blush

    The golden rule of blush is that placement should flatter your unique bone structure. Here is how to apply blush for the four most common face shapes.

    1. Oval Face Shape

    blush placement for oval face shape in how to apply blush

    An oval face is slightly longer than it is wide with a softly rounded jawline. Because the proportions are already balanced, you have the most flexibility. The Technique: Smile to find the apples of your cheeks. Apply the blush directly on the apples and blend it slightly upward and outward toward your temples. This creates a natural, healthy flush without altering the face’s natural harmony.

    2. Round Face Shape

    diagonal blush placement for round face shape in how to apply blush

    A round face is as wide as it is long, with soft curves. The goal here is to add length and create the illusion of sharper angles. The Technique: Avoid applying blush directly on the front of the apples, as this can make the face look wider. Instead, apply the blush slightly lower on the apples and sweep it diagonally upward toward the ears. This vertical line visually elongates the face and adds subtle contouring.

    3. Square Face Shape

    circular blush placement for square face shape in how to apply blush

    A square face features a strong, angular jawline, and the forehead, cheekbones, and jawline are roughly the same width. The goal is to soften the sharp angles. The Technique: Apply blush in a soft, circular motion directly on the apples of the cheeks. Avoid sweeping it outward toward the ears, as this can emphasize the width of the jaw. Keeping the color concentrated in the center of the face softens the overall look. To balance your features further, you can check out our guide on the best haircut for your face shape.

    4. Heart Face Shape

    lower blush placement for heart face shape in how to apply blush

    A heart-shaped face is widest at the forehead and gradually narrows down to a delicate, pointed chin. The objective is to balance the width of the forehead with the narrowness of the chin. The Technique: Apply blush starting from the apples of the cheeks and blend it outward toward the ears. Avoid applying blush too high up on the cheekbones, as this can draw attention to the wider forehead. Keep the color focused on the lower cheek area to add width to the narrower part of the face.

    Step-by-Step Guide: How to Apply Blush

    step by step guide on how to apply blush perfectly

    Now that you know where to place it, here is the step-by-step process for flawless application.

    Step 1: Prep Your Skin

    prepping skin before applying blush in step 1 of how to apply blush

    Blush applies best on a smooth, hydrated base. Ensure you have applied your foundation and concealer first. If you are using a powder blush, lightly set your foundation with a translucent powder so the powder has something to grip onto. If you are using a cream or liquid blush, apply it before you set your face with powder. You can learn more about base prep in our minimalist makeup routine guide.

    Step 2: Tap Off Excess Product

    tapping off excess blush product in step 2 of how to apply blush

    Whether you are using a brush or a sponge, always tap off the excess product before touching it to your face. This prevents harsh, concentrated patches of color that are difficult to blend out.

    Step 3: Apply to the Apples of the Cheeks

    applying blush to the apples of the cheeks in step 3 of how to apply blush

    Smile slightly to locate the apples of your cheeks (the fleshy parts that pop up). If using a powder, swirl a fluffy brush into the product, tap off the excess, and lightly sweep it across the apples. If using a cream, dab a small amount onto the apples using your fingers or a damp sponge.

    Step 4: Blend Upward and Outward

    blending blush upward and outward in step 4 of how to apply blush

    This is the most crucial step in learning how to apply blush. Never leave blush as a stark circle on the front of your cheeks. Immediately blend the edges upward toward your temples and downward into the foundation. Blending creates a seamless gradient that looks natural and radiant.

    Step 5: Build Color Slowly

    building blush color slowly to avoid mistakes in step 5 of how to apply blush

    It is much easier to add more blush than it is to remove it. Start with a sheer layer and build the intensity slowly until you reach your desired level of flush. If you accidentally apply too much, take a clean, damp sponge and lightly bounce it over the area to lift off some of the pigment.

    Common Blush Mistakes to Avoid

    Even with a step-by-step guide, mistakes happen. Here are a few common pitfalls to avoid when practicing how to apply blush:

    common mistakes to avoid when learning how to apply blush
    • Applying Blush Too Low: If you apply blush below your nose line, it will drag your face down, making you look tired. Always keep blush above the nostrils.
    • Using the Wrong Brush: A dense, stiff brush will apply blush heavily and streaky. Always use a soft, fluffy, slightly angled brush for powder blush to ensure a diffused, soft application.
    • Ignoring Your Lip Color: Your blush should complement your lip color. If you are wearing a cool-toned pink lipstick, avoid a warm, orange blush, as the clash will look unnatural.
    • Not Blending the Edges: Harsh lines are the enemy of blush. Always ensure there is no visible line where the blush starts and your foundation ends. You can find more expert hacks like this in our makeup tips for beginners guide.

    For more daily beauty advice, makeup tutorials, and lifestyle tips, be sure to follow our Facebook page where we share daily updates!

    Frequently Asked Questions (FAQs)

    1. Should I apply blush before or after foundation?

    Blush should always be applied after foundation and concealer. If you apply blush first, you will wipe it away when you blend your foundation. However, if you are using a cream blush, you should apply it before you set your face with translucent powder.

    2. Where exactly should I apply blush?

    You should apply blush on the apples of your cheeks, blending upward and outward toward your temples. To find the apples of your cheeks, simply smile. However, the exact placement should be adjusted based on your face shape to ensure a flattering, lifting effect.

    3. How do I make my blush last all day?

    To make blush last all day, start with a good primer. If using powder blush, set your foundation with powder first. You can also layer formulas—apply a cream blush first, set it with a translucent powder, and then lightly dust a matching powder blush over the top for maximum longevity.

    4. Can I use lipstick as blush?

    Yes, you can! Cream or satin finish lipsticks work beautifully as cream blush. Simply dab a small amount onto the apples of your cheeks and blend it out quickly with your fingertips or a damp sponge. Just ensure the color complements your skin tone.

    5. How do I choose the right blush color for my skin tone?

    For fair skin, opt for soft pinks and peaches. Medium skin tones look great in rosy pinks and warm apricots. Deep skin tones are beautifully flattered by rich berries, plums, and vibrant terracottas. Always choose a shade that mimics your natural flush when you exercise.

    confident women with perfectly applied blush mastering how to apply blush

    Conclusion

    Mastering how to apply blush is a transformative skill that can completely breathe life into your makeup look. By understanding your face shape, choosing the right formula, and blending meticulously, you can achieve a healthy, radiant glow that looks completely natural. Remember to tap off excess product, blend upward and outward, and avoid common placement mistakes. With a little practice and patience, you will be applying blush like a professional makeup artist in no time. Grab your favorite brush and start practicing these steps today!

  • How to Apply Concealer: A Step-by-Step Guide for Flawless Skin

    How to Apply Concealer: A Step-by-Step Guide for Flawless Skin

    featured image showing a stylish woman representing how to style oversized sweaters

    Learning how to apply concealer is the ultimate beauty hack for achieving a flawless, radiant complexion. While foundation does the heavy lifting by evening out your overall skin tone, concealer is the targeted magic eraser that banishes dark circles, redness, and stubborn blemishes. However, many beginners struggle with concealer. Applied incorrectly, it can look cakey, crease into fine lines, or draw more attention to the very spots you are trying to hide.

    The secret to mastering how to apply concealer lies in choosing the right shade, prepping your skin properly, and using the correct blending technique. Whether you want a full-coverage glam look or a natural “no-makeup” makeup look, concealer is your best friend. If you are looking for visual inspiration for your makeup routine, be sure to explore our Pinterest boards. In this comprehensive step-by-step guide, we will walk you through the exact process of applying concealer flawlessly, just like a professional makeup artist.

    Why Concealer is a Makeup Bag Essential

    brightening benefits of learning how to apply concealer

    Before diving into the application process, it is important to understand why concealer is so crucial. Unlike foundation, which is applied all over the face, concealer is highly pigmented and designed to be used sparingly on specific areas. It can brighten the under-eye area, define your brow bone, highlight the high points of your face, and cover up acne scars or broken capillaries.

    When you learn how to apply concealer correctly, you can achieve a bright, awake look even if you only had three hours of sleep. Furthermore, using concealer strategically can actually mean you need less foundation, allowing your natural skin to shine through. To ensure your skin is properly hydrated and ready for makeup, it is highly recommended to first perfect your base by reading our glass skin makeup tutorial for beginners.

    What You Need to Apply Concealer

    essential tools and products needed to learn how to apply concealer

    Having the right tools and products is half the battle when learning how to apply concealer. Using the wrong shade or the wrong tool can completely ruin the look. Here is what you need:

    • The Right Concealer Shade: For under the eyes, choose a concealer that is 1 to 2 shades lighter than your foundation to brighten the area. For blemishes, choose a concealer that exactly matches your foundation.
    • A Color Corrector (Optional): If you have severe dark circles, a peach or orange color corrector will neutralize the darkness before you apply concealer.
    • A Damp Beauty Sponge: A damp sponge (like a Beautyblender) is the best tool for blending concealer seamlessly into the skin without moving the product underneath it.
    • A Fluffy Blending Brush: If you prefer brushes, a small, dense blending brush works best for precise application.
    • Setting Powder: A finely milled translucent setting powder is crucial for locking the concealer in place and preventing it from creasing.

    Step-by-Step Guide: How to Apply Concealer

    Ready to master the technique? Follow these six easy steps for a flawless, bright-eyed finish.

    Step 1: Prep and Prime Your Skin

    prepping skin in step 1 of how to apply concealer

    This is the most crucial step in learning how to apply concealer. Concealer will cling to any dry patches or fine lines if your skin is not properly hydrated. Start by applying a lightweight eye cream to your under-eye area and let it fully absorb. Next, apply your foundation or tinted moisturizer as you normally would. Concealer should always go on top of foundation, not underneath, to avoid wiping it away when you blend your base.

    Step 2: Choose the Right Shade

    choosing the right shade in step 2 of how to apply concealer

    Using the wrong shade is a common mistake. If you use a concealer that is too light for your blemishes, it will actually highlight the blemish, making it look like a white dot. Always match your blemish concealer to your foundation. For the under-eye area, use a slightly lighter shade to bring light to the face. If you want to keep your overall look very simple, you can learn how to use just concealer by reading our minimalist makeup routine guide.

    Step 3: Apply Under the Eyes (The Triangle Method)

    the triangle method for under eyes in step 3 of how to apply concealer

    Instead of just dotting the concealer directly on the dark circle, use the “triangle method.” Draw an inverted triangle under your eye, with the base pointing down toward your cheek. This shape not only covers the dark circle but also brightens the entire under-eye area and creates the illusion of lifted cheeks. Use the wand to draw this shape, ensuring you do not apply the product too close to your lower lash line, as this will cause it to crease.

    Step 4: Conceal Blemishes and Redness

    concealing blemishes in step 4 of how to apply concealer

    For blemishes, broken capillaries, or redness around the nose, use a small brush or your fingertip to apply a tiny dot of matching concealer directly onto the spot. Do not blend it immediately. Let it sit for a minute to thicken up; this allows the pigment to adhere better to the blemish, providing maximum coverage. You can find more expert hacks like this in our makeup tips for beginners guide.

    Step 5: Blend with a Damp Sponge

    blending with a damp sponge in step 5 of how to apply concealer

    Now it is time to blend. Take your damp beauty sponge and gently bounce (or stipple) it over the concealer. Never drag or swipe the sponge, as this will just move the product around and remove the coverage. Bouncing presses the product into the skin, creating a seamless, airbrushed finish. Blend the edges of the triangle under your eye so they disappear into the foundation. For blemishes, gently tap the edges of the dot until it blends into the skin, leaving the center opaque.

    Step 6: Set with Powder

    setting with powder in step 6 of how to apply concealer

    This is the step where most beginners fail. Liquid and cream concealers will inevitably crease into fine lines if they are not set with powder. Take a small, fluffy brush and dip it into a finely milled translucent setting powder. Tap off the excess. Gently press the powder over the areas where you applied concealer, focusing especially on the under-eye area and the T-zone. Pressing is better than sweeping, as it locks the makeup in place without moving it.

    How to Prevent Concealer from Creasing

    how to prevent creasing when learning how to apply concealer

    Creasing is when the concealer settles into the fine lines under your eyes, making you look older and tired. Here are a few essential tips to prevent this:

    • Use Less Product: The number one cause of creasing is using too much concealer. A little goes a long way. Start with a tiny amount and build up coverage only if needed.
    • Avoid the Lash Line: Do not apply concealer directly up to your lower lash line. Leave a tiny gap. The movement of your eyes will cause any product in that area to crease immediately.
    • Blot Excess Oil: If you have oily skin, the natural oils under your eyes will break down the concealer. Blot the area gently with a tissue before applying powder.
    • Bake (Optional): For special occasions, you can “bake” your under-eyes by applying a thick layer of translucent powder, letting it sit for 5-10 minutes, and then brushing it off. This sets the makeup completely and prevents creasing all day.

    For more daily beauty advice, makeup tutorials, and lifestyle tips, be sure to follow our Facebook page where we share daily updates!

    Frequently Asked Questions (FAQs)

    1. Do you apply concealer before or after foundation?

    Concealer should always be applied after foundation. If you apply it before, you will wipe it away when you blend your foundation over your face. Applying concealer on top of foundation allows you to see exactly where you need extra coverage.

    2. How do I choose the right concealer shade?

    For the under-eye area, choose a concealer that is 1 to 2 shades lighter than your natural skin tone to brighten the dark circles. For covering blemishes or redness, choose a concealer that exactly matches your skin tone so it blends seamlessly into the foundation.

    3. Why does my concealer look cakey?

    Concealer looks cakey when you apply too much product or fail to prep your skin. Always apply a lightweight eye cream before concealer, use a damp sponge to blend it out, and apply the product in thin layers rather than one thick layer.

    4. Should I use a brush or a sponge to apply concealer?

    A damp beauty sponge is generally the best tool for applying concealer, especially under the eyes, because it bounces the product into the skin for a seamless finish. However, a small, dense brush is better for precise blemish coverage.

    5. How do I keep my concealer from creasing?

    To prevent creasing, use less product, leave a small gap between the concealer and your lash line, and always set the area with a translucent setting powder. Baking the under-eye area with powder for 5-10 minutes is another great way to prevent creasing.

    confident women who mastered how to apply concealer

    Conclusion

    Mastering how to apply concealer is a transformative skill that can completely elevate your makeup game. By understanding the difference between brightening and covering, prepping your skin correctly, and using the right blending and setting techniques, you can achieve a flawless, radiant complexion. Remember to use the triangle method for under-eyes, match your shade for blemishes, and always set with powder to prevent creasing. With a little practice and patience, you will be concealing like a pro in no time. Grab your favorite concealer and start practicing these steps today!

  • How to Apply Eyeshadow: A Step-by-Step Guide for Beginners

    How to Apply Eyeshadow: A Step-by-Step Guide for Beginners

    featured image showing a perfectly blended smokey eye representing how to apply eyeshadow

    Learning how to apply eyeshadow is the ultimate beauty skill that can completely elevate your entire makeup look. For beginners, opening an eyeshadow palette with multiple shades and brushes can feel incredibly overwhelming. We have all been there—swiping a dark color across your eyelid, only to end up with a messy, unblended patch of color that makes your eyes look tired or bruised.

    However, mastering how to apply eyeshadow doesn’t require a professional makeup artist. Once you understand the basic anatomy of the eye and the simple rule of “light to dark,” the process becomes incredibly fun and easy. Eyeshadow adds depth, dimension, and personality to your face. Whether you want a soft, natural look for the office or a dramatic, smokey eye for a night out, the technique remains the same. If you are looking for visual inspiration for your eye makeup, be sure to explore our Pinterest boards. In this comprehensive step-by-step guide, we will walk you through the exact process of applying eyeshadow flawlessly.

    Why Applying Eyeshadow Correctly Matters

    dimension and depth benefits of learning how to apply eyeshadow

    Before diving into the application process, it is important to understand why technique matters. Unlike foundation or blush, which can be rubbed in and blended easily, eyeshadow requires precision. If applied incorrectly, dark shadows can make your eyes look smaller, while unblended edges can make your makeup look harsh and unnatural.

    When you learn how to apply eyeshadow correctly, you create the illusion of larger, more lifted eyes. Proper blending ensures there are no harsh lines, making your makeup look professional and expensive. Furthermore, prepping your eyes correctly prevents the shadow from creasing or fading throughout the day. To ensure your overall makeup looks flawless, it is highly recommended to first perfect your base by reading our glass skin makeup tutorial for beginners.

    What You Need to Apply Eyeshadow

    essential brushes and tools needed to learn how to apply eyeshadow

    Having the right tools is half the battle when learning how to apply eyeshadow. You cannot achieve a blended look with cheap, scratchy brushes. Here is what you need:

    • A Fluffy Blending Brush: This is the most important brush in your collection. It has loose, soft bristles that diffuse color seamlessly without leaving harsh lines.
    • A Packed Shader Brush: This brush is denser and flatter. It is used to pack color directly onto the eyelid for maximum opacity.
    • A Crease Brush: A smaller, slightly tapered brush used to add depth to the crease of your eye.
    • Eyeshadow Primer: Primer is non-negotiable. It creates a sticky base for the powder to hold onto, preventing the shadow from creasing or fading.
    • An Eyeshadow Palette: For beginners, a neutral palette with mattes and shimmers is the best starting point.

    Step-by-Step Guide: How to Apply Eyeshadow

    Ready to master the technique? Follow these six easy steps for a flawless, beautifully blended eye makeup look.

    Step 1: Prime Your Eyelids

    priming eyelids in step 1 of how to apply eyeshadow

    This is the most crucial step in learning how to apply eyeshadow. Take a tiny amount of eyeshadow primer and spread it evenly across your eyelid using your ring finger. Primer covers up any discoloration or visible veins on your lid, creating a smooth, even canvas. Most importantly, it stops the natural oils on your eyelids from breaking down the eyeshadow, ensuring your makeup stays vibrant all day long.

    Step 2: Apply the Transition Shade

    applying the transition shade in step 2 of how to apply eyeshadow

    The transition shade is a color that is slightly darker than your natural skin tone, usually a matte beige or soft brown. Take your fluffy blending brush and sweep this color right into the crease of your eye (the socket area above your eyelid). Use soft, circular, windshield-wiper motions. This shade acts as a bridge between your skin and the darker shadows, ensuring there are no harsh lines later.

    Step 3: Add Depth to the Crease

    adding depth to the crease in step 3 of how to apply eyeshadow

    Now, take a slightly darker matte shade—like a warm brown or taupe. Tap off the excess powder from your brush. Using the same windshield-wiper motion, apply this color slightly lower than your transition shade, focusing on the outer corner of your crease. To add even more dimension, take a clean blending brush and blend the edges of this color upward and outward. Blending is the secret to mastering makeup tips for beginners.

    Step 4: Apply the Lid Color

    packing the lid color in step 4 of how to apply eyeshadow

    Now it is time to add color to your eyelid. If you are using a shimmer or glitter, take your packed shader brush and gently press the color onto the center of your eyelid. Do not swipe—pressing packs the pigment tightly onto the primer. If you are using a matte color, you can sweep it across the lid. Ensure the lid color meets the crease color, and use your blending brush to soften the line where they meet.

    Step 5: Highlight the Brow Bone and Inner Corner

    highlighting brow bone and inner corner in step 5 of how to apply eyeshadow

    To make your eyes look larger and more awake, take a light, shimmering champagne or ivory shade. Using a small pencil brush, apply this highlighter right under the arch of your eyebrow. Then, dab a tiny amount into the inner corner of your eye (near your tear duct). This catches the light beautifully and makes your eyes look bright and fresh.

    Step 6: Blend, Blend, Blend!

    blending perfectly in step 6 of how to apply eyeshadow

    This is where most beginners fail. Blending is the most important step in how to apply eyeshadow. Take a completely clean, fluffy blending brush and sweep it back and forth across your entire eyelid to blur any harsh lines. If the color looks too dark or intense, you can take a tiny bit of a light, translucent face powder on your brush and blend it over the edges to soften the look. If you are going for a very subtle, everyday look, you can adapt this technique to fit a minimalist makeup routine.

    Different Eyeshadow Finishes Explained

    different eyeshadow finishes to choose when learning how to apply eyeshadow

    Understanding the different types of eyeshadow finishes will help you choose the right products:

    • Matte: Flat color with no shine. Mattes are perfect for the crease and transition shades because they look natural and blend easily.
    • Satin: A slight, subtle sheen. Satins are incredibly versatile and work beautifully on the eyelid for an everyday look.
    • Shimmer/Metallic: High-shine, reflective colors. These are best packed onto the center of the lid or the inner corner to catch the light.
    • Glitter: Large particles of sparkle. Glitter requires a glitter glue to prevent it from falling onto your cheeks. It is best reserved for special occasions.

    Common Eyeshadow Mistakes to Avoid

    common mistakes to avoid when learning how to apply eyeshadow

    Even with a step-by-step guide, mistakes happen. Here are a few common pitfalls to avoid when practicing how to apply eyeshadow:

    • Using Too Much Product: Always tap the excess powder off your brush before applying it to your eye. You can always add more, but removing dark shadow is difficult.
    • Skipping the Primer: Without primer, eyeshadow will crease into the fine lines of your eyelid within a few hours and fade away.
    • Using Only One Brush: Using the same brush for dark and light colors will muddy the look. Use separate brushes for the crease, the lid, and the highlight.
    • Keeping Your Eyes Closed: When applying eyeshadow, keep your eyes open and look straight into the mirror. This allows you to see exactly where the crease color is falling and ensures your makeup looks good when your eyes are open.

    For more daily beauty advice, makeup tutorials, and lifestyle tips, be sure to follow our Facebook page where we share daily updates!

    Frequently Asked Questions (FAQs)

    1. What is the correct way to apply eyeshadow?

    The correct way to apply eyeshadow is to start with a primer, apply a light transition shade in the crease, add a darker shade to the outer corner, pack a color onto the eyelid, and highlight the brow bone. Always blend the edges with a clean brush to remove any harsh lines.

    2. Do you apply light or dark eyeshadow first?

    Generally, you should apply light eyeshadow first. A light transition shade in the crease creates a base that makes it easier to blend darker shades later. If you apply dark shadow first, it can overwhelm the eye and make blending very difficult.

    3. Why does my eyeshadow look patchy?

    Patchy eyeshadow is usually caused by skipping eyeshadow primer or using a low-quality brush. Primer creates a smooth, sticky base for the powder to grip. Additionally, using a dense brush to pack on color, followed by a fluffy brush to blend, will ensure an even, seamless application.

    4. How do I make my eyeshadow look smooth and blended?

    To make eyeshadow look smooth and blended, use a large, fluffy blending brush with soft bristles. Use small, circular windshield-wiper motions across the crease. If there is a harsh line where two colors meet, take a clean brush (with no product on it) and blend the two colors together.

    5. Can I apply eyeshadow with my fingers?

    Yes, you can apply eyeshadow with your fingers, specifically for shimmer and metallic shades. The warmth of your finger melts the powder slightly, making it apply more opaquely and smoothly. However, for matte shades and crease blending, brushes are still necessary.

    confident women who mastered how to apply eyeshadow

    Conclusion

    Mastering how to apply eyeshadow is a fun and creative process that anyone can learn. By understanding the anatomy of the eye, investing in the right brushes, and following the simple step-by-step process of priming, transitioning, packing, and blending, you can create endless stunning looks. Remember to always prime your lids, work from light to dark, and take your time blending. With a little practice and patience, you will be creating flawless, beautifully blended eye makeup looks in no time. Grab your favorite palette and start practicing today!

  • How to Contour for Beginners: A Step-by-Step Guide

    How to Contour for Beginners: A Step-by-Step Guide

    featured image showing a perfectly sculpted face representing how to contour

    Learning how to contour is the ultimate beauty hack for sculpting, defining, and completely transforming the shape of your face. For beginners, the world of contouring can feel incredibly intimidating. We have all seen viral internet videos of people drawing harsh, dark lines all over their faces, only to blend them away into a flawless, chiseled masterpiece. But if you try to replicate that without the right technique, you can easily end up looking muddy, dirty, or simply unnatural.

    The secret to mastering how to contour is understanding that it is essentially an optical illusion. By using shadows (dark tones) and highlights (light tones), you can manipulate the way light hits your face, making your nose look slimmer, your cheekbones look higher, and your jawline look sharper. Whether you want a dramatic, sculpted look or just a soft, everyday definition, contouring is a skill anyone can learn. If you are looking for visual inspiration for your makeup, be sure to explore our Pinterest boards. In this comprehensive step-by-step guide, we will walk you through the exact process of contouring flawlessly, just like a professional makeup artist.

    What is Contouring and Why Do We Do It?

    before and after effects of learning how to contour

    Before diving into the application process, it is important to understand what contouring actually is. Contouring is the art of using matte, cool-toned powders or creams that mimic the natural shadows of your face. When you apply a shade slightly darker than your skin tone to the areas you want to push back or minimize (like the hollows of your cheeks or the sides of your nose), it creates the illusion of depth.

    Conversely, highlighting uses lighter, luminous tones on the areas you want to pull forward and emphasize (like the tops of your cheekbones and the bridge of your nose). Together, contour and highlight create a three-dimensional, sculpted effect on a flat canvas. Before you even think about contouring, it is essential to have a smooth, well-prepped base. If you struggle with skin texture or dullness, you should first read our glass skin makeup tutorial for beginners to ensure your foundation is flawless before you start sculpting.

    What You Need to Contour

    essential tools and products needed to learn how to contour

    Having the right tools and products is half the battle when learning how to contour. Using the wrong shade or the wrong brush can completely ruin the look. Here is what you need:

    • Contour Product: For beginners, a matte powder is the easiest to use because it is buildable and forgiving. Stay away from bronzers! Bronzers are warm and orange-toned, meant to mimic a sun-tan. Contour should be cool-toned (slightly grey or taupe) to mimic a real shadow.
    • Highlighter: A lighter powder or liquid highlighter for the high points of your face.
    • Contour Brush: You need a densely packed, angled brush. The angle fits perfectly into the hollows of your cheeks and along the jawline.
    • A Fluffy Blending Brush: A large, soft brush to blend everything out seamlessly.

    Step-by-Step Guide: How to Contour

    Ready to sculpt your face? Follow these six easy steps for a flawless, natural-looking contour.

    Step 1: Find Your Cheekbones

    finding and contouring cheekbones in step 1 of how to contour

    This is the most crucial step in learning how to contour. Suck your cheeks in like a fish face. Feel for the hollow area right beneath your cheekbone. This sunken-in area is exactly where your contour should go. Place your angled brush at the top of your ear, and sweep it diagonally down toward the corner of your mouth. Stop about two fingers away from your mouth to avoid looking like a drag queen. The key is to keep the line concentrated near your ear and fade it out as it reaches your cheek.

    Step 2: Sculpt the Jawline

    sculpting the jawline in step 2 of how to contour

    To define your jawline and make your face look slimmer, apply the contour powder directly along the underside of your jawbone. Blend it downward into your neck. This creates a sharp shadow that separates your face from your neck, making the jawline look incredibly sharp and chiseled.

    3. Define the Nose

    defining the nose in step 3 of how to contour

    Contouring the nose is the easiest way to make it look slimmer and straighter. Take a small, precise eyeshadow brush. Draw two parallel lines down the sides of your nose, starting from the inner corner of your eyebrow down to the tip of your nostril. Keep these lines very close together. Then, take your fluffy blending brush and blend them out vigorously. The goal is to soften the lines completely so only a subtle shadow remains. If you want more makeup hacks like this, be sure to check out our makeup tips for beginners guide.

    Step 4: Frame the Forehead

    framing the forehead in step 4 of how to contour

    To make your forehead appear smaller or to soften a prominent hairline, apply contour along the top of your forehead, right at the hairline. This pushes the hairline back visually. If you have a wider forehead, you can also apply a tiny bit of contour to the temples. This creates a beautiful oval shape and adds warmth to the perimeter of your face.

    Step 5: Blend, Blend, Blend!

    blending contour seamlessly in step 5 of how to contour

    This is where most beginners fail. Contour should look like a natural shadow, not a visible, harsh line. Take your large, fluffy blending brush and sweep it back and forth over the contour lines. Use circular motions to buff the edges into your foundation. If you applied cream contour, use a damp beauty sponge and bounce it to melt the product into the skin. If you are following a minimalist makeup routine, a light blend is all you need for a subtle effect.

    Step 6: Highlight the High Points

    highlighting high points in step 6 of how to contour

    Now that you have created shadows, you need to bring the light back to the high points of your face. Apply your highlighter to the tops of your cheekbones (right above the contour line), down the bridge of your nose, on your cupid’s bow, and on the center of your chin. The contrast between the dark contour and the light highlighter is what creates the 3D, sculpted effect.

    How to Contour Different Face Shapes

    how to contour for different face shapes guide

    The beauty of contouring is that it is not one-size-fits-all. The way you apply your contour should be tailored to your unique face shape.

    • Oval Face: Oval faces are naturally balanced. You can contour the hollows of your cheeks and along the hairline for a simple, everyday definition.
    • Round Face: The goal is to add length and angles. Apply contour to the temples, the hollows of the cheeks, and right under the jawline. This creates the illusion of a sharper, more structured bone structure.
    • Square Face: To soften a strong, angular jawline, apply contour to the corners of your forehead and the corners of your jaw. Blend well to round out the sharp edges.
    • Heart Face: To balance a wider forehead and a pointed chin, apply contour along the temples and the sides of the lower chin.

    Common Contour Mistakes to Avoid

    common mistakes to avoid when learning how to contour

    Even with a step-by-step guide, mistakes happen. Here are a few common pitfalls to avoid when practicing how to contour:

    • Using Bronzer Instead of Contour: Bronzer is warm and orange; contour is cool and grey. Using bronzer will give you a sun-kissed look, not a sculpted shadow.
    • Contouring Too Low on the Cheek: If you apply contour below the hollow of your cheek, it drags your face down. Keep it high and concentrated near your ear.
    • Using Too Much Product: Always tap off the excess powder from your brush before applying. You can always build up the intensity, but removing heavy contour is difficult without ruining your foundation.
    • Forgetting to Blend the Neck: If you contour your jawline, ensure you blend it down into your neck. A harsh line between your face and neck looks unnatural and messy.

    For more daily beauty advice, makeup tutorials, and lifestyle tips, be sure to follow our Facebook page where we share daily updates!

    Frequently Asked Questions (FAQs)

    1. What is the basic rule of contouring?

    The basic rule of contouring is to apply a cool-toned, matte powder or cream that is one to two shades darker than your skin tone to the areas you want to recede (like the hollows of the cheeks, jawline, and sides of the nose). Then, apply a lighter highlighter to the areas you want to bring forward (like the tops of the cheekbones).

    2. Should I contour before or after foundation?

    Contouring should always be done after you have applied your foundation and concealer. Contouring is a sculpting step that goes on top of your base. If you contour before foundation, you will simply wipe away all your hard work when you blend your foundation out.

    3. What is the difference between contour and bronzer?

    Contour is cool-toned (slightly grey or taupe) and matte. It is designed to mimic natural shadows and sculpt the face. Bronzer is warm-toned (orange or brown) and is designed to mimic a sun-kissed tan. Bronzer is applied where the sun naturally hits the face, while contour is applied to the shadows.

    4. Is cream or powder contour better for beginners?

    Powder contour is generally better for beginners. It is highly buildable, meaning you can apply a little bit at a time without going overboard. It is also easier to blend and fix if you make a mistake. Cream contour is more intense and requires a bit more skill to blend seamlessly.

    5. Can contouring make my nose look smaller?

    Yes, contouring is a fantastic way to make your nose look slimmer and straighter. By drawing two parallel lines down the sides of your nose with a contour powder and blending them out, you create the illusion of a narrower bridge. Adding a highlighter down the center of the nose enhances the effect.

    confident women who mastered how to contour

    Conclusion

    Mastering how to contour is a transformative skill that can completely elevate your makeup game. While it may feel intimidating at first, understanding that contouring is simply the art of creating light and shadow makes the process approachable. Remember to choose a cool-toned product, invest in a good angled brush, and take your time blending. Whether you want to slim your nose, define your jawline, or heighten your cheekbones, the power is in your hands. Practice these steps, avoid the common mistakes, and enjoy the stunning, sculpted results of a beautifully contoured face!