Tag: makeup tips for beginners

  • How to Apply Eyeliner: A Step-by-Step Guide for Beginners
    How to Apply Eyeliner: A Step-by-Step Guide for Beginners

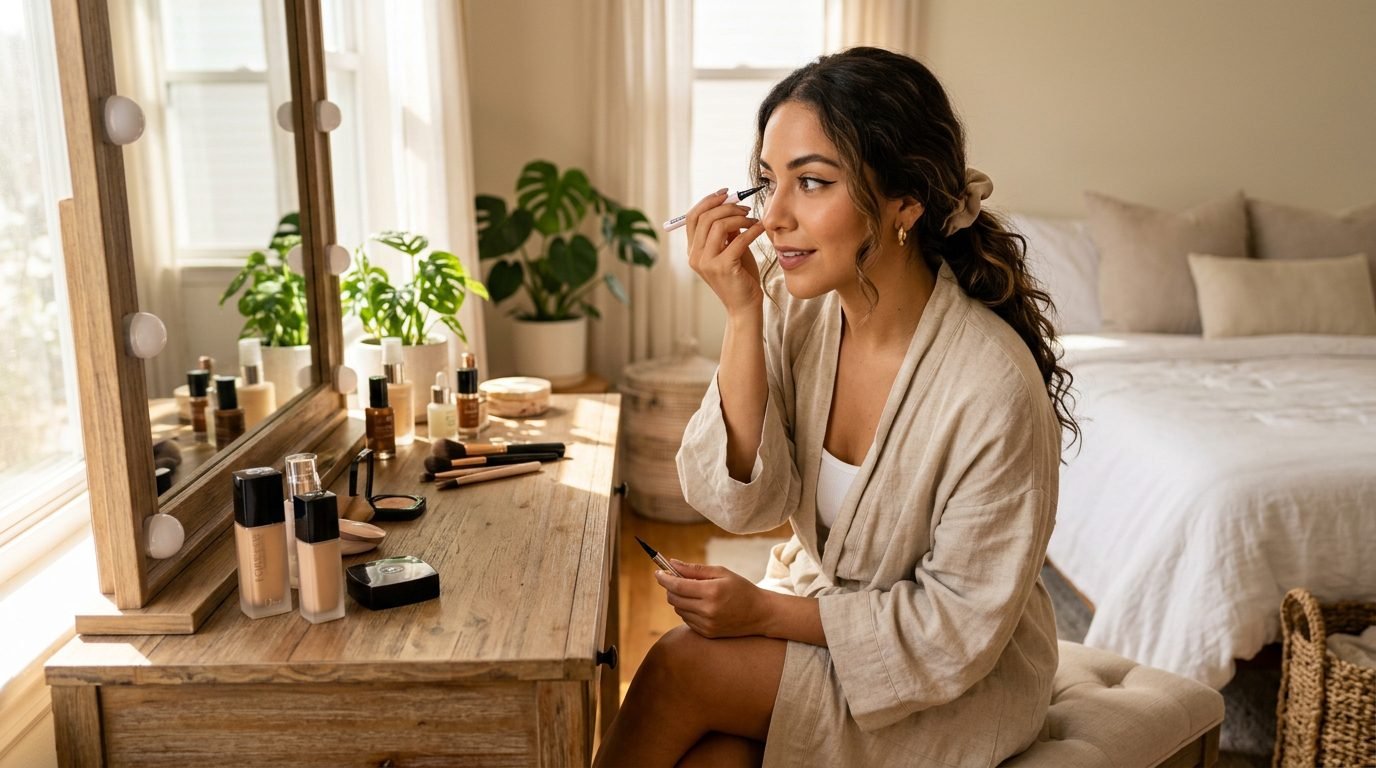
    featured image showing a woman applying eyeliner at a vanity mirror representing how to apply eyeliner

    For many makeup beginners, learning how to apply eyeliner feels like trying to paint a masterpiece with your non-dominant hand. One wrong move, and suddenly your wings are uneven, or you have smudged black lines all over your eyelids. It is notoriously one of the trickiest makeup skills to master, but it is also the most transformative. A simple stroke of liner can make your lashes look thicker and your eyes look instantly wider and more awake.

    The secret to a flawless feline flick isn’t just about having a steady hand; it is about using the right formula, understanding your eye shape, and following a foolproof technique. Whether you want a subtle, tight line or a dramatic, bold wing, this guide will help you achieve it. If you need visual inspiration for your eye makeup, be sure to explore our Pinterest boards. In this comprehensive step-by-step guide, we will walk you through exactly how to apply eyeliner like a pro.

    Why Eyeliner Technique Matters

    understanding why eyeliner technique matters when learning how to apply eyeliner

    Before diving into the application process, it is important to understand why your eyeliner technique matters so much. Eyeliner is meant to define the lash line and create the illusion of thicker lashes. If applied incorrectly, it can make your eyes look small, droopy, or heavy.

    By learning the correct how to apply eyeliner techniques, you ensure that the liner enhances your natural eye shape rather than hiding it. A good technique also prevents the liner from transferring to your upper eyelid or smudging halfway through the day. To ensure your overall makeup looks seamless, it is highly recommended to first perfect your base by reading our glass skin makeup tutorial for beginners.

    Choosing the Right Eyeliner Formula

    The first step in mastering how to apply eyeliner is selecting the right formula for your skill level and desired look.

    choosing the right eyeliner formula for learning how to apply eyeliner
    • Pencil Eyeliner: Best for beginners. Pencils are the most forgiving and easiest to control. They are perfect for creating a soft, smudged, smokey look or for tightlining (applying liner right at the base of the lashes). Choose a creamy pencil that glides easily without tugging the skin.
    • Gel Eyeliner: Gel liners come in small pots and are applied with a fine, angled brush. They offer the precision of a liquid liner but are slightly creamier and easier to control. They are perfect for creating a bold, retro wing.
    • Liquid Eyeliner: Best for sharp, dramatic wings. Liquid liners usually come with a felt-tip or a fine brush tip. They dry quickly and provide an intense, opaque black line. However, they leave very little room for error, making them better suited for those who have practiced with pencils or gels first.

    Step-by-Step Guide: How to Apply Eyeliner

    Ready to draw the perfect line? Follow these five easy steps for a flawless application every time.

    Step 1: Prep Your Eyes

    prepping the eyes with primer in step 1 of how to apply eyeliner

    Start with clean, dry eyelids. If you have oily eyelids, apply a small amount of eyeshadow primer to prevent the liner from smudging. You can also dust a light layer of translucent powder over the primer to set it. This creates a smooth, dry canvas for the liner to grip onto.

    Step 2: Draw the Wing (Optional)

    drawing the wing in step 2 of how to apply eyeliner

    If you want a winged look, start by drawing the wing before you line the rest of your eye. Look straight ahead into the mirror and find the end of your lower lash line. Imagine that line extending outward toward the end of your eyebrow. Draw a small, diagonal flick from the outer corner of your eye up toward that imaginary point. Doing this first ensures both wings are even before you commit to lining the whole eye. To make your eyes stand out even more, you can pair this look with the techniques in our how to apply eyeshadow guide.

    Step 3: Connect the Line to the Lash Line

    connecting the line to the lash line in step 3 of how to apply eyeliner

    Once the wing is drawn, it is time to connect it. Starting from the outer corner, draw short, small dashes or dashes right at the base of your upper lash line. Do not try to draw one long, continuous line, as this often leads to mistakes. Working in small dashes gives you much more control.

    Step 4: Fill in the Gaps

    filling in the gaps between lashes in step 4 of how to apply eyeliner

    Now, take your liner and connect those small dashes into one smooth, solid line. Gently press the liner into the roots of your lashes to ensure there is no visible gap of skin between the liner and your lash line. If you are using a pencil, you can gently smudge it with a small brush for a softer look.

    Step 5: Clean Up the Edges

    cleaning up the edges with a cotton swab in step 5 of how to apply eyeliner

    This is the ultimate secret to learning how to apply eyeliner perfectly. Nobody draws a flawless line on the first try. Dip a fine, pointed cotton swab into a tiny bit of makeup remover or micellar water. Gently swipe it along the edges of the liner to sharpen the wing and clean up any mistakes. This one step takes your eyeliner from “messy” to “professional.”

    Popular Eyeliner Looks to Try

    Once you have mastered the basic technique, you can experiment with different styles.

    popular eyeliner looks to try after learning how to apply eyeliner
    • The Classic Wing: A thin line along the lash line that extends into a sharp, upward flick at the outer corner. It is universally flattering and adds instant glamour.
    • The Tightline: Applying a pencil liner directly to the upper waterline and the roots of the lashes. This defines the eyes and makes the lashes look thicker without looking like you are wearing obvious eyeliner. It is perfect for a minimalist makeup routine.
    • The Smudged Smokey Eye: Apply a black or brown pencil liner to the upper and lower lash lines. Take a smudging brush and blend the liner outwards until it is soft and smoky. It is the ultimate effortless, cool-girl look.
    • The Graphic Liner: For the bold and creative. Use a liquid liner to draw geometric shapes, floating crease lines, or double wings. This is a high-fashion, artistic look.

    Common Eyeliner Mistakes to Avoid

    Even with a step-by-step guide, mistakes happen. Here are a few common pitfalls to avoid when practicing how to apply eyeliner:

    • Pulling the Skin: Many people pull their eyelids taut to apply liner. While this seems easier, it distorts the skin. When you let go, the line will look bumpy or uneven. Try to apply the liner while looking straight ahead into the mirror.
    • Closing Your Eye: If you close your eye completely while applying liner, you cannot see how the line will look when your eye is open. Keep your eye relaxed and slightly open so you can check the shape as you go.
    • Using the Wrong Formula: If you are a complete beginner, do not start with a highly pigmented liquid liner. Start with a soft pencil. Once you build confidence and a steady hand, graduate to gel and liquid.
    • Skipping Mascara: Eyeliner without mascara can look harsh and unfinished. Always curl your lashes and apply a coat or two of mascara to blend the liner into your lashes. You can find more expert hacks like this in our makeup tips for beginners guide.

    For more daily beauty advice, makeup tutorials, and lifestyle tips, be sure to follow our Facebook page where we share daily updates!

    Frequently Asked Questions (FAQs)

    1. Should I apply eyeliner before or after eyeshadow?

    Eyeliner should generally be applied after eyeshadow. If you apply liner first, blending your eyeshadow will smudge the liner. However, if you are doing a smudged, smokey eyeliner look, you can apply the pencil liner after the eyeshadow and then blend them together.

    2. How do I stop my eyeliner from smudging?

    To stop eyeliner from smudging, start with an eyeshadow primer to create a dry base. Set the primer with a thin layer of translucent powder. Additionally, avoid applying moisturizer too close to your lash line, as the oils will break down the liner.

    3. What is the easiest eyeliner to apply?

    Pencil eyeliner is the easiest to apply because it is highly forgiving and easy to control. A felt-tip liquid liner is the second easiest because the pen-like grip feels natural in the hand. Gel liner requires a separate brush, making it slightly more advanced.

    4. How do I make my winged eyeliner even on both sides?

    To make winged eyeliner even on both sides, draw the outer flick first before lining the rest of the eye. Look straight ahead into the mirror and use the bottom lash line as a guide for the angle of the wing. If one side is thicker than the other, use a cotton swab with makeup remover to trim the edges until they match.

    5. Can I use eyeliner on my waterline?

    Yes, you can use eyeliner on your waterline, but you must use a pencil liner specifically formulated for the waterline. Liquid and gel liners should never be used on the waterline as they can irritate the eye. A nude or white pencil on the waterline can also make your eyes look bigger and more awake.

    confident women with perfectly applied eyeliner mastering how to apply eyeliner

    Conclusion

    Mastering how to apply eyeliner is a journey of practice and patience. By choosing the right formula, working in small dashes, and cleaning up your edges, you can achieve a flawless, professional look every time. Remember not to pull your skin, keep your eyes slightly open while applying, and always finish with mascara to tie the look together. Whether you are going for a subtle tightline or a dramatic graphic wing, these steps will give you the confidence to create stunning eye makeup looks. Grab your favorite liner and start practicing today!

  • How to Apply Foundation: A Step-by-Step Guide for Beginners

    How to Apply Foundation: A Step-by-Step Guide for Beginners

    featured image showing a flawless foundation base representing how to apply foundation

    Learning how to apply foundation is the ultimate beauty hack for achieving a flawless, radiant complexion. For many beginners, foundation can feel intimidating. We have all experienced the disappointment of a cakey, mask-like finish or a foundation shade that simply does not match our neck. However, once you understand the correct technique, applying foundation becomes a quick and effortless part of your daily routine.

    The secret to a perfect base is not about buying the most expensive product; it is about proper skin preparation, using the right tools, and applying the product in thin, buildable layers. Whether you want a full-coverage glam look or a natural “no-makeup” makeup look, mastering how to apply foundation is the first step. If you are looking for visual inspiration for your makeup routine, be sure to explore our Pinterest boards. In this comprehensive step-by-step guide, we will walk you through the exact process of applying foundation flawlessly.

    Why Foundation Application Technique Matters

    smooth and seamless foundation finish showing the importance of technique in how to apply foundation

    Before diving into the application process, it is important to understand why your technique matters so much. Foundation is designed to even out your skin tone, conceal redness, and create a smooth canvas for the rest of your makeup. If applied incorrectly, it can settle into fine lines, emphasize dry patches, or look incredibly unnatural.

    By learning the correct how to apply foundation techniques, you ensure that the product melts seamlessly into your skin. A good application makes the makeup look like your skin, but better. Furthermore, using the right technique means you actually use less product, which prevents your face from looking heavy or overdone. To ensure your skin is properly hydrated and ready for makeup, it is highly recommended to first perfect your base by reading our glass skin makeup tutorial for beginners.

    What You Need to Apply Foundation

    essential tools needed to learn how to apply foundation

    Having the right tools is half the battle when learning how to apply foundation. Using the wrong tools can lead to streaky, uneven application. Here is what you need:

    • A Damp Beauty Sponge: A damp sponge (like a Beautyblender) is the best tool for a natural, seamless finish. It presses the product into the skin without absorbing too much.
    • A Dense Foundation Brush: If you prefer a brush, look for a dense, flat-top kabuki brush. This is great for buffing the product into the skin for full coverage.
    • Primer: Primer creates a smooth barrier between your skincare and your makeup, helping the foundation last longer.
    • Setting Powder: A finely milled translucent setting powder is crucial for locking the foundation in place and preventing it from creasing.

    Step-by-Step Guide: How to Apply Foundation

    Ready to achieve a flawless base? Follow these six easy steps for a perfect application every time.

    Step 1: Prep and Prime Your Skin

    prepping and priming skin in step 1 of how to apply foundation

    This is the most crucial step in learning how to apply foundation. Foundation will cling to dry, flaky skin if it is not properly hydrated. Start by cleansing your face and applying a lightweight moisturizer. Allow the moisturizer to fully absorb for about five minutes. Next, apply a pea-sized amount of primer all over your face, focusing on areas where your makeup tends to wear off quickly, like the T-zone.

    Step 2: Choose the Right Shade and Formula

    choosing the right foundation shade for the jawline in how to apply foundation

    Using the wrong shade is a common beginner mistake. To find your perfect match, test the foundation along your jawline in natural daylight. It should blend seamlessly into your neck and chest. If you are between shades, always opt for the slightly lighter one—you can warm up your face later with bronzer.

    Step 3: Dispense and Dot the Product

    dotting foundation on the face in step 3 of how to apply foundation

    Less is definitely more when it comes to foundation. Dispense a small amount (about a pea size) onto the back of your hand. Using your ring finger or a small brush, dot the foundation onto the center of your face—your forehead, nose, cheeks, and chin. Avoid applying it to your neck initially; it is much easier to blend downwards towards the jawline later. If you want to keep your overall look very simple, you can learn how to use just concealer and foundation by reading our minimalist makeup routine guide.

    Step 4: Blend, Blend, Blend!

    blending foundation with a damp beauty sponge in step 4 of how to apply foundation

    Now it is time to blend. Take your damp beauty sponge and gently bounce (or stipple) it over the dotted foundation. Never drag or swipe the sponge, as this will just move the product around and leave streaks. Bouncing presses the foundation into the skin, creating an airbrushed finish. Start from the center of your face and blend outwards towards your hairline and jawline. Ensure there are no harsh lines where the foundation ends and your bare skin begins.

    Step 5: Build Coverage Where Needed

    building coverage under the eyes in step 5 of how to apply foundation

    Once you have blended the first layer, assess your coverage. If you have specific blemishes, redness, or dark under-eye circles that need more coverage, do not apply a thick layer of foundation all over. Instead, take a tiny amount of product on your sponge and press it directly onto the specific area. Building coverage in targeted areas prevents the face from looking cakey while still covering imperfections.

    Step 6: Set Your Makeup

    setting makeup with translucent powder in step 6 of how to apply foundation

    This is the step where most beginners fail. Liquid and cream foundations will inevitably crease into fine lines if they are not set with powder. Take a small, fluffy brush, dip it into a finely milled translucent setting powder, and tap off the excess. Gently press the powder over the areas where you applied foundation, focusing especially on the T-zone (forehead, nose, and chin) and directly under the eyes. Pressing is better than sweeping, as it locks the makeup in place without moving it. You can find more expert hacks like this in our makeup tips for beginners guide.

    Common Foundation Mistakes to Avoid

    common mistakes to avoid when learning how to apply foundation

    Even with a step-by-step guide, mistakes happen. Here are a few common pitfalls to avoid when practicing how to apply foundation:

    • Skipping Skincare: Applying foundation without moisturizer is a recipe for disaster, especially if you have dry skin. Always hydrate first.
    • Using Too Much Product: Applying a thick layer of foundation will emphasize pores and texture. Start with a small amount and build it up only where needed.
    • Matching Foundation to Your Hand: The skin on your hand is a different color and texture than the skin on your face. Always test foundation on your jawline.
    • Forgetting the Neck: If you apply foundation to your face but forget to blend it down into your neck, you will end up with a harsh, unnatural line. Always blend outwards and downwards.

    For more daily beauty advice, makeup tutorials, and lifestyle tips, be sure to follow our Facebook page where we share daily updates!

    Frequently Asked Questions (FAQs)

    1. Do you apply foundation before or after concealer?

    Foundation should always be applied before concealer. By applying foundation first, you even out your overall skin tone and cover a significant amount of redness. This means you will need to use less concealer, resulting in a more natural, less cakey finish.

    2. Should I use a brush or a sponge to apply foundation?

    It depends on the finish you desire. A damp beauty sponge is best for a natural, dewy, and seamless finish because it presses the product into the skin. A dense foundation brush is better for full coverage, as it buffs the product onto the skin. However, brushes can sometimes leave streaks if not used properly.

    3. Why does my foundation look cakey?

    Foundation usually looks cakey for three reasons: you applied too much product, you did not prep your skin with enough moisturizer, or you used the wrong shade. To avoid cakeiness, always start with a thin layer of foundation and build coverage only in areas where it is needed.

    4. How do I keep my foundation from creasing under my eyes?

    To prevent foundation from creasing under the eyes, ensure the area is well-hydrated with an eye cream. Apply a very thin layer of foundation under the eyes, and immediately set it with a small amount of translucent setting powder using a pressing motion. “Baking” the under-eye area with powder for 5-10 minutes before dusting it off is another great way to prevent creasing.

    5. Can I apply foundation with my fingers?

    Yes, you can apply foundation with your fingers, especially if you are using a liquid or cream formula. The warmth of your fingers helps to melt the product into the skin for a natural finish. However, for a more precise and airbrushed look, a damp sponge or a brush is highly recommended. Always wash your hands thoroughly before touching your face.

    confident women who mastered how to apply foundation

    Conclusion

    Mastering how to apply foundation is a transformative skill that will elevate your entire makeup routine. By prioritizing skin prep, choosing the right shade and tools, and using the correct blending techniques, you can achieve a flawless, natural-looking base every time. Remember to apply thin layers, set your makeup with powder, and avoid common mistakes like skipping moisturizer. With a little practice and patience, you will be applying foundation like a professional makeup artist in no time. Grab your favorite sponge and start practicing these steps today!

  • Makeup Tips for Beginners: 10 Essential Rules for a Flawless Face

    Makeup Tips for Beginners: 10 Essential Rules for a Flawless Face

    Starting your beauty journey can feel overwhelming, but learning the best makeup tips for beginners can make the process incredibly fun and rewarding. We have all been there—staring at a massive collection of foundations, eyeshadows, and brushes, completely unsure of what goes where. It is completely normal to feel intimidated by complex tutorials and endless product options. However, mastering makeup doesn’t require a professional certification; it simply requires understanding a few foundational rules.

    When you know the right techniques, you can enhance your natural beauty, boost your confidence, and get out the door in under ten minutes. The secret to a flawless face isn’t about piling on heavy products; it is about prep, placement, and blending. If you are looking for visual step-by-step guides, be sure to explore our Pinterest boards for endless beauty inspiration. In this comprehensive guide, we will walk you through the top 10 essential makeup tips for beginners that will completely transform your daily routine.

    Why Mastering Makeup Basics Matters

    Comparison of makeup on unprepped versus prepped skin showing why makeup basics matter for beginners.

    Before diving into the specific makeup tips for beginners, it is important to understand why mastering the basics is crucial. Without a solid foundation, advanced techniques will never look right. Think of your face as a canvas; if the canvas is cracked and dry, the paint won’t apply smoothly. Similarly, if you try to apply highlighter over un-prepped skin, it will look chalky and uneven.

    By learning the basics, you save yourself time, money, and frustration. You will learn which products are actually worth investing in and which ones you can skip. You will also avoid common beginner mistakes, such as using the wrong shade of foundation or applying blush too high on the cheeks. A strong foundation allows you to create a range of looks, from a minimalist makeup routine for the office to a glamorous evening look, with ease and confidence.

    Top 10 Makeup Tips for Beginners

    Here are the ten golden rules every beginner needs to know to achieve a flawless, natural-looking face.

    1. Skincare Comes First

    American woman applying moisturizer as first step in makeup tips for beginners skincare routine.

    The most important of all makeup tips for beginners is this: makeup looks best on well-cared-for skin. Before you even touch a foundation, ensure your face is freshly cleansed and moisturized. Apply a lightweight moisturizer and let it fully absorb into your skin for about five minutes before starting your makeup. This prevents your foundation from clinging to dry patches and gives it a smooth, hydrated base to grip onto. If you skip skincare, your makeup will look cakey and unnatural, no matter how expensive your products are.

    2. Always Use a Primer

    Applying facial primer as essential makeup tip for beginners to make makeup last longer.

    Many beginners skip primer, thinking it is an unnecessary extra step. However, primer is the secret to long-lasting makeup. Think of primer as double-sided tape for your face—it holds onto your skincare underneath and gives your foundation something to stick to on top. If you have oily skin, opt for a mattifying silicone primer. If you have dry skin, choose a hydrating, glow-boosting primer. Apply a pea-sized amount all over your face, focusing on areas where your makeup tends to wear off quickly, like the T-zone.

    3. Find Your Exact Foundation Shade

    Testing foundation shades on jawline to find perfect match for makeup tips for beginners.

    Wearing the wrong foundation shade is the most common beginner mistake. A foundation that is too light will make you look ghostly, while one that is too dark will leave a harsh line along your jaw. To find your perfect match, test the foundation along your jawline in natural daylight. It should blend seamlessly into your neck and chest. If you are between shades, always opt for the slightly lighter one—you can warm up your face later with bronzer.

    4. Apply Foundation in Thin Layers

    Using damp beauty sponge to apply thin layer of foundation as beginner makeup tip.

    When it comes to foundation, less is definitely more. A common beginner error is applying a thick layer of foundation all over the face to achieve full coverage. This actually highlights texture and pores. Instead, apply a small amount of foundation to the center of your face (nose, cheeks, and forehead) and blend it outwards using a damp beauty sponge or a dense foundation brush. Build up the coverage gradually only in areas where you need more coverage. If you want a completely sheer, glowing base, you can learn how to achieve it with our glass skin makeup tutorial for beginners.

    5. Use Concealer Correctly

    Applying concealer under eyes in triangle shape as part of makeup tips for beginners.

    Concealer is not meant to be applied all over the face; it is meant to target specific areas. For under-eye circles, choose a concealer that is one to two shades lighter than your foundation to brighten the area. Apply it in a upside-down triangle shape under your eyes and blend it out with a damp sponge. For blemishes or redness, use a concealer that exactly matches your foundation and dab it directly onto the spot. Let it sit for a minute before blending to allow the product to thicken, providing better coverage.

    6. Blend Downward on the Face

    Blending foundation downward on face following hair growth direction for smooth finish.

    When blending foundation, concealer, or powder, always blend in downward strokes. Why? Because the tiny hairs on our faces (often called peach fuzz) grow downward. If you blend upward, you push the makeup against the hair follicles, making the makeup look textured and obvious. Blending downward ensures the makeup lays flat against the skin, creating a smooth, airbrushed finish.

    7. Set Your Makeup with Powder

    Setting makeup with translucent powder on T-zone as essential makeup tip for beginners.

    To prevent your hard work from creasing or sliding off, setting your makeup with powder is essential. However, you don’t need to powder your entire face, especially if you have dry skin. Focus only on areas that tend to get oily or where makeup creases, such as the T-zone (forehead, nose, and chin) and directly under the eyes. Use a small, fluffy brush to press a finely milled translucent powder into the skin. Pressing is better than sweeping, as it locks the makeup in place without moving it around.

    8. Don’t Forget the Eyebrows

    Filling in eyebrows with pencil using hair-like strokes for natural makeup tips for beginners.

    Eyebrows frame the face and instantly make you look more polished, even if you aren’t wearing any other makeup. For beginners, a brow pencil or brow gel is the easiest product to use. Choose a shade that matches your natural hair color. Use short, light, hair-like strokes to fill in any sparse areas, focusing on the arch and the tail of the brow. Avoid drawing a heavy, solid line, which looks unnatural. Brush the hairs upward with a spoolie to blend the product and create a fluffy, textured look. If you want to keep your overall look simple, check out these natural makeup looks for beginners for inspiration.

    9. Place Blush Correctly

    Applying cream blush on apples of cheeks as correct placement tip for makeup beginners.

    Blush adds life and dimension back to the face after you have applied foundation, but applying it in the wrong place can drag your features down. A great tip for beginners is to smile to find the apples of your cheeks. Apply the blush slightly above the apples, sweeping it back towards your hairline. Avoid applying blush too close to your nose or too low on your cheeks, as this can make your face look droopy. Cream blushes are highly recommended for beginners because they are incredibly easy to blend and give a natural, dewy finish.

    10. Always Remove Your Makeup Before Bed

    Removing makeup with micellar water before bed as crucial makeup tip for beginners.

    The final and most crucial rule of all makeup tips for beginners is proper removal. Sleeping in your makeup clogs pores, traps bacteria, and leads to dull, aging skin and breakouts. Invest in a good makeup remover, micellar water, or cleansing balm. Gently massage the remover over your face to dissolve the makeup, then follow up with a gentle facial cleanser to wash it all away. Finish with your nighttime moisturizer to let your skin repair itself overnight.

    Common Beginner Mistakes to Avoid

    Common makeup mistakes to avoid including dirty brushes and wrong foundation testing.

    Even with the best tips, it is easy to make mistakes. Here are a few extra things to watch out for as you practice:

    • Using Dirty Brushes: Dirty makeup brushes harbor bacteria and make makeup application streaky. Wash your brushes with a gentle shampoo or brush cleaner at least once a week.
    • Matching Foundation to Your Hand: The skin on your hand is a different color and texture than the skin on your face. Always test foundation on your jawline.
    • Skipping Lip Liner: If you struggle with lipstick bleeding into the fine lines around your mouth, a lip liner will act as a barrier and keep your lip color sharp all day.
    • Applying Makeup in Bad Lighting: Always apply your makeup in natural daylight if possible. Yellow indoor lighting can make you apply too much blush or the wrong shade of foundation.

    To stay updated on the latest beauty trends, product recommendations, and daily advice, be sure to follow our Facebook page where we share daily updates!

    Frequently Asked Questions (FAQs)

    1. What are the most important makeup tips for beginners?

    The most important makeup tips for beginners are to prioritize skincare prep, apply foundation in thin layers, find the exact shade match for your skin, and always blend downward. Additionally, setting makeup with powder and properly removing it at night are crucial for a flawless look and healthy skin.

    2. What should a beginner buy for makeup?

    A beginner does not need a massive makeup kit. Start with the essentials: a moisturizer, a primer, a lightweight foundation or BB cream, a concealer, a neutral eyeshadow palette, a black or brown mascara, a cream blush, a tinted lip balm, and a translucent setting powder. A damp beauty sponge is also a must-have tool for seamless blending.

    3. How do I make my makeup look natural?

    To make makeup look natural, avoid heavy, full-coverage foundations. Instead, use a BB cream or skin tint and only apply concealer where absolutely necessary. Focus on cream products, like cream blush and bronzer, as they melt into the skin and mimic a natural flush. Blend everything thoroughly to avoid harsh lines.

    4. Do I really need to use a makeup primer?

    Yes, you do. Makeup primer acts as a base that smooths out the skin’s texture, fills in pores, and gives the foundation something to grip onto. It drastically increases the longevity of your makeup, preventing it from melting off or creasing throughout the day.

    5. How do I choose the right foundation shade?

    To choose the right foundation shade, test a few shades on your jawline in natural daylight. The correct shade will disappear into your skin and match your neck perfectly. If you are torn between two shades, choose the one that is slightly lighter, as you can always warm up your face with bronzer.

    Conclusion

    Confident American woman with flawless natural makeup after following makeup tips for beginners.

    Learning how to apply makeup is a journey, and every makeup artist started exactly where you are right now. By following these 10 essential makeup tips for beginners, you will build a strong foundation of skills that will make your daily beauty routine effortless and enjoyable. Remember to prioritize your skincare, invest in the right basic products, and take your time blending. Don’t be afraid to make mistakes, as they are the best way to learn. With a little patience and practice, you will be creating flawless, beautiful makeup looks in no time!

  • Minimalist Makeup Routine: 5 Steps for a Natural Everyday Look

    Minimalist Makeup Routine: 5 Steps for a Natural Everyday Look

    essential products for a minimalist makeup routine laid out on marble

    Creating a minimalist makeup routine is the best way to simplify your mornings while still looking polished and refreshed. In a world dominated by 20-step beauty tutorials and overflowing makeup drawers, the appeal of minimalism has never been stronger. We all want to look put-together, but very few of us have the time to spend 45 minutes in front of the mirror every single morning. Enter minimalism: the beauty philosophy that proves less is truly more.

    A minimalist approach to makeup is about enhancing your natural features rather than masking them. It focuses on high-quality, multi-purpose products that deliver maximum impact with minimal effort. Whether you are heading to the office, running errands, or dropping the kids off at school, mastering a simple minimalist makeup routine will save you time and boost your confidence. If you are just starting your beauty journey, this guide pairs perfectly with our natural makeup looks for beginners guide. For even more visual inspiration, be sure to check out our Pinterest boards, where we pin daily aesthetic ideas.

    What is a Minimalist Makeup Routine?

    A minimalist makeup routine is a curated approach to beauty where you use only the essential products needed to even out your skin tone, add dimension, and define your features. Instead of using a separate primer, foundation, concealer, and setting powder, a minimalist might opt for a tinted moisturizer that does the job of all four. The goal is to streamline your makeup bag so that applying your makeup takes five minutes or less.

    This routine isn’t about ditching makeup entirely; it’s about working smarter, not harder. By focusing on skin health and strategic placement of color, you achieve that effortless “I woke up like this” glow.

    The Benefits of a Minimalist Approach to Beauty

    flawless natural glowing skin achieved with a minimalist makeup routine

    Switching to a minimalist beauty routine offers several incredible benefits for both your skin and your daily schedule:

    1. Saves Valuable Time

    The most obvious benefit is the time you get back in the morning. When you only have five products to apply, your morning routine is cut down from 30 minutes to 5 minutes. That extra time can be used for sleeping in, enjoying a slower cup of coffee, or doing a quick hair care routine to complete your look.

    2. Better for Your Skin

    Layering multiple heavy products can clog pores and trap bacteria, leading to breakouts and dull skin. A minimalist routine allows your skin to breathe. By using fewer products, you reduce the risk of skin irritation and let your natural complexion shine through.

    3. Saves Money

    When you commit to a minimalist makeup routine, you stop buying trendy, single-use products that collect dust at the bottom of your drawer. You invest in a few high-quality staples that you use every single day, ultimately saving hundreds of dollars a year.

    4. Effortless to Maintain

    Minimalist makeup is incredibly low-maintenance. Because you aren’t wearing layers of heavy foundation, you don’t have to worry about your makeup creasing, cake-ing, or melting off by lunchtime. A quick blot with a tissue is usually all you need for a midday refresh.

    The 5-Step Minimalist Makeup Routine

    Ready to streamline your morning? Here is the ultimate 5-step minimalist makeup routine that will leave you looking fresh and radiant in under five minutes.

    Step 1: Prep and Protect (Skincare First)

    skincare prep step for a minimalist makeup routine applying SPF moisturizer

    The foundation of any great minimalist look is healthy skin. Since you will be wearing less makeup, your skin needs to be in its best condition. Start by cleansing your face, applying a lightweight moisturizer, and—crucially—applying a broad-spectrum SPF. Sunscreen is the ultimate anti-aging product and protects your skin from dark spots and sun damage. Allow your skincare to absorb for a minute before moving on to makeup. If you struggle with dullness and want that perfect dewy base, you might want to explore our glass skin makeup tutorial for beginners for extra prep tips.

    Step 2: Even Out Your Base

    applying tinted moisturizer with fingers in a minimalist makeup routine

    Skip the heavy, full-coverage foundation. Instead, reach for a BB cream, CC cream, or a lightweight tinted moisturizer. These products hydrate your skin while providing a sheer, natural wash of color that evens out your complexion. Use your fingers or a damp beauty sponge to blend it outwards from the center of your face. If you have specific blemishes or dark under-eye circles, take a small amount of creamy concealer and dot it only where needed. Blend it out with your ring finger for a seamless finish.

    Step 3: Add a Natural Flush (Blush and Brows)

    applying cream blush to cheeks during a minimalist makeup routine

    To bring life back to your face, blush is non-negotiable. A cream blush is ideal for a minimalist makeup routine because it blends effortlessly into the skin, leaving a natural, dewy flush that looks like you just came from a brisk walk. Smile and blend the cream onto the apples of your cheeks, blending slightly upwards towards your temples.

    Next, define your brows. Well-groomed brows frame your face and mean you can skip eye makeup altogether if you are in a rush. Use a brow gel (clear or tinted) to brush your hairs upward and set them in place. If you have sparse areas, lightly fill them in with a brow pencil using short, hair-like strokes.

    Step 4: Define Your Eyes

    applying mascara for a natural eye look in a minimalist makeup routine

    You don’t need a 12-pan eyeshadow palette for an everyday look. A single swipe of mascara is all you need to open up your eyes and make you look awake. Choose a mascara that lengthens and separates rather than one that adds heavy volume, which can look clumpy for a minimalist aesthetic. Wiggle the wand from the root to the tip of your upper lashes. If you want a little extra definition, take a brown eyeliner pencil and smudge it lightly into your upper lash line for a soft, invisible eyeliner effect.

    Step 5: Swipe on a Tinted Balm

    hydrating lips with tinted balm to finish a minimalist makeup routine

    Finish your minimalist makeup routine with a hydrating lip product. A tinted lip balm or a sheer lip oil adds a perfect pop of color while keeping your lips moisturized. Shades like soft pinks, peaches, or sheer berries work best for that effortless, “no-makeup” makeup look. Swipe it on, and you are ready to conquer your day!

    Transitioning from Heavy Makeup to Minimalist Makeup

    If you are used to wearing a full face of makeup every day, transitioning to a minimalist routine can feel intimidating. You might feel “naked” without your full-coverage foundation and contour. Give yourself a grace period of about two weeks. Start by swapping out one heavy product at a time. For example, trade your matte foundation for a tinted moisturizer first. Once you get used to that, swap your heavy lipsticks for tinted balms. Over time, you will notice how much more comfortable and breathable your skin feels, and you will fall in love with your natural complexion.

    To stay updated on the latest beauty trends and tips, be sure to follow our Facebook page, where we share daily inspiration and community advice!

    Frequently Asked Questions (FAQs)

    1. What is a minimalist makeup routine?

    A minimalist makeup routine is a simplified beauty regimen that uses only essential, multi-purpose products to enhance your natural features. Instead of heavy layers, it focuses on lightweight formulas like tinted moisturizers, cream blushes, and lip balms to create a natural, effortless look in under five minutes.

    2. Can I use regular foundation in a minimalist routine?

    While you can, it is highly recommended to swap heavy, full-coverage foundation for lighter alternatives like BB creams or tinted moisturizers. These lighter formulas are easier to blend, look more natural, and allow your skin to breathe, which is the core philosophy of a minimalist makeup routine.

    3. How do I choose the right shades for minimalist makeup?

    For a minimalist look, stick to shades that closely mimic your skin’s natural undertones. Choose a blush that matches your natural flush (like soft peach or rosy pink) and a lip color that is close to your natural lip shade. The goal is to look like a slightly enhanced, healthier version of yourself.

    4. Is a minimalist makeup routine good for acne-prone skin?

    Yes! Minimalist makeup is excellent for acne-prone skin because it involves using fewer products, which means fewer ingredients that could potentially clog pores. By using non-comedogenic (pore-clogging) tinted moisturizers and mineral sunscreens, you allow your skin to heal while still covering up blemishes lightly.

    5. How long does a minimalist makeup routine take?

    Once you are comfortable with the steps, a minimalist makeup routine should take no more than 3 to 5 minutes. Because you are using fewer products and focusing on quick, blendable formulas like creams, you can easily apply your makeup in the car (when parked!) or right before a Zoom meeting.

    final fresh and natural look of a 5-minute minimalist makeup routine

    Conclusion

    Adopting a minimalist makeup routine is truly life-changing for busy women who still want to look and feel their best. By focusing on skin health, using multi-purpose products, and embracing your natural beauty, you can cut your morning prep time in half. Not only will your skin thank you for the break from heavy chemicals, but your wallet will thank you too. Remember, makeup is meant to enhance your features, not hide them. Grab your tinted moisturizer, swipe on some mascara, and enjoy the freedom that comes with a beautifully simple, minimalist approach to beauty!