Creating a minimalist makeup routine is the best way to simplify your mornings while still looking polished and refreshed. In a world dominated by 20-step beauty tutorials and overflowing makeup drawers, the appeal of minimalism has never been stronger. We all want to look put-together, but very few of us have the time to spend 45 minutes in front of the mirror every single morning. Enter minimalism: the beauty philosophy that proves less is truly more.
A minimalist approach to makeup is about enhancing your natural features rather than masking them. It focuses on high-quality, multi-purpose products that deliver maximum impact with minimal effort. Whether you are heading to the office, running errands, or dropping the kids off at school, mastering a simple minimalist makeup routine will save you time and boost your confidence. If you are just starting your beauty journey, this guide pairs perfectly with our natural makeup looks for beginners guide. For even more visual inspiration, be sure to check out our Pinterest boards, where we pin daily aesthetic ideas.
What is a Minimalist Makeup Routine?
A minimalist makeup routine is a curated approach to beauty where you use only the essential products needed to even out your skin tone, add dimension, and define your features. Instead of using a separate primer, foundation, concealer, and setting powder, a minimalist might opt for a tinted moisturizer that does the job of all four. The goal is to streamline your makeup bag so that applying your makeup takes five minutes or less.
This routine isn’t about ditching makeup entirely; it’s about working smarter, not harder. By focusing on skin health and strategic placement of color, you achieve that effortless “I woke up like this” glow.
The Benefits of a Minimalist Approach to Beauty
Switching to a minimalist beauty routine offers several incredible benefits for both your skin and your daily schedule:
1. Saves Valuable Time
The most obvious benefit is the time you get back in the morning. When you only have five products to apply, your morning routine is cut down from 30 minutes to 5 minutes. That extra time can be used for sleeping in, enjoying a slower cup of coffee, or doing a quick hair care routine to complete your look.
2. Better for Your Skin
Layering multiple heavy products can clog pores and trap bacteria, leading to breakouts and dull skin. A minimalist routine allows your skin to breathe. By using fewer products, you reduce the risk of skin irritation and let your natural complexion shine through.
3. Saves Money
When you commit to a minimalist makeup routine, you stop buying trendy, single-use products that collect dust at the bottom of your drawer. You invest in a few high-quality staples that you use every single day, ultimately saving hundreds of dollars a year.
4. Effortless to Maintain
Minimalist makeup is incredibly low-maintenance. Because you aren’t wearing layers of heavy foundation, you don’t have to worry about your makeup creasing, cake-ing, or melting off by lunchtime. A quick blot with a tissue is usually all you need for a midday refresh.
The 5-Step Minimalist Makeup Routine
Ready to streamline your morning? Here is the ultimate 5-step minimalist makeup routine that will leave you looking fresh and radiant in under five minutes.
Step 1: Prep and Protect (Skincare First)
The foundation of any great minimalist look is healthy skin. Since you will be wearing less makeup, your skin needs to be in its best condition. Start by cleansing your face, applying a lightweight moisturizer, and—crucially—applying a broad-spectrum SPF. Sunscreen is the ultimate anti-aging product and protects your skin from dark spots and sun damage. Allow your skincare to absorb for a minute before moving on to makeup. If you struggle with dullness and want that perfect dewy base, you might want to explore our glass skin makeup tutorial for beginners for extra prep tips.
Step 2: Even Out Your Base
Skip the heavy, full-coverage foundation. Instead, reach for a BB cream, CC cream, or a lightweight tinted moisturizer. These products hydrate your skin while providing a sheer, natural wash of color that evens out your complexion. Use your fingers or a damp beauty sponge to blend it outwards from the center of your face. If you have specific blemishes or dark under-eye circles, take a small amount of creamy concealer and dot it only where needed. Blend it out with your ring finger for a seamless finish.
Step 3: Add a Natural Flush (Blush and Brows)
To bring life back to your face, blush is non-negotiable. A cream blush is ideal for a minimalist makeup routine because it blends effortlessly into the skin, leaving a natural, dewy flush that looks like you just came from a brisk walk. Smile and blend the cream onto the apples of your cheeks, blending slightly upwards towards your temples.
Next, define your brows. Well-groomed brows frame your face and mean you can skip eye makeup altogether if you are in a rush. Use a brow gel (clear or tinted) to brush your hairs upward and set them in place. If you have sparse areas, lightly fill them in with a brow pencil using short, hair-like strokes.
Step 4: Define Your Eyes
You don’t need a 12-pan eyeshadow palette for an everyday look. A single swipe of mascara is all you need to open up your eyes and make you look awake. Choose a mascara that lengthens and separates rather than one that adds heavy volume, which can look clumpy for a minimalist aesthetic. Wiggle the wand from the root to the tip of your upper lashes. If you want a little extra definition, take a brown eyeliner pencil and smudge it lightly into your upper lash line for a soft, invisible eyeliner effect.
Step 5: Swipe on a Tinted Balm
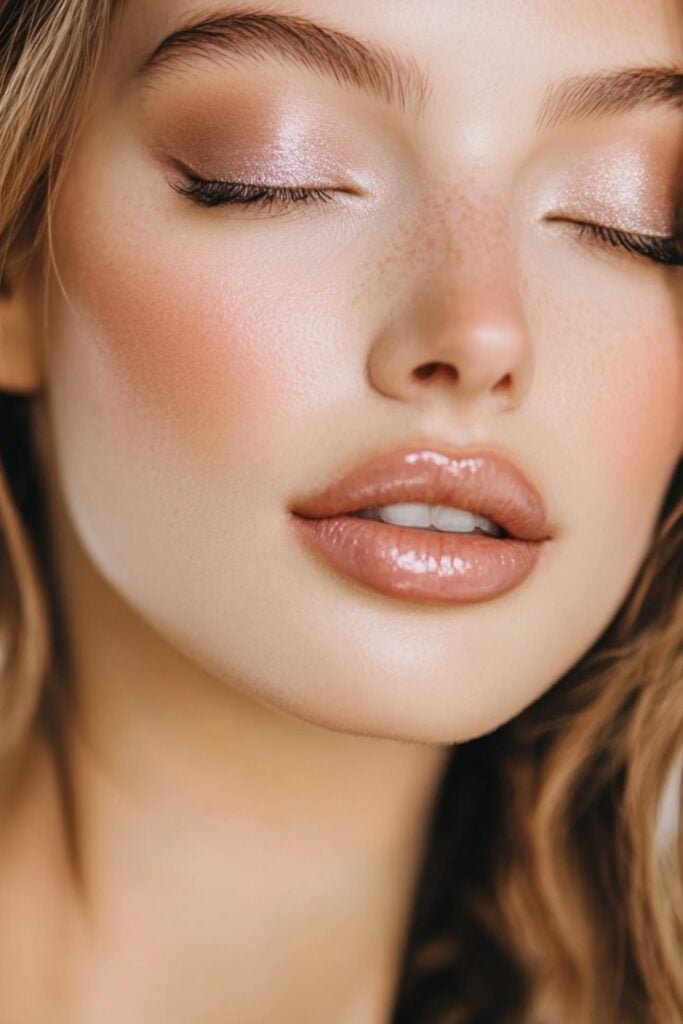
Finish your minimalist makeup routine with a hydrating lip product. A tinted lip balm or a sheer lip oil adds a perfect pop of color while keeping your lips moisturized. Shades like soft pinks, peaches, or sheer berries work best for that effortless, “no-makeup” makeup look. Swipe it on, and you are ready to conquer your day!
Transitioning from Heavy Makeup to Minimalist Makeup
If you are used to wearing a full face of makeup every day, transitioning to a minimalist routine can feel intimidating. You might feel “naked” without your full-coverage foundation and contour. Give yourself a grace period of about two weeks. Start by swapping out one heavy product at a time. For example, trade your matte foundation for a tinted moisturizer first. Once you get used to that, swap your heavy lipsticks for tinted balms. Over time, you will notice how much more comfortable and breathable your skin feels, and you will fall in love with your natural complexion.
To stay updated on the latest beauty trends and tips, be sure to follow our Facebook page, where we share daily inspiration and community advice!
Frequently Asked Questions (FAQs)
1. What is a minimalist makeup routine?
A minimalist makeup routine is a simplified beauty regimen that uses only essential, multi-purpose products to enhance your natural features. Instead of heavy layers, it focuses on lightweight formulas like tinted moisturizers, cream blushes, and lip balms to create a natural, effortless look in under five minutes.
2. Can I use regular foundation in a minimalist routine?
While you can, it is highly recommended to swap heavy, full-coverage foundation for lighter alternatives like BB creams or tinted moisturizers. These lighter formulas are easier to blend, look more natural, and allow your skin to breathe, which is the core philosophy of a minimalist makeup routine.
3. How do I choose the right shades for minimalist makeup?
For a minimalist look, stick to shades that closely mimic your skin’s natural undertones. Choose a blush that matches your natural flush (like soft peach or rosy pink) and a lip color that is close to your natural lip shade. The goal is to look like a slightly enhanced, healthier version of yourself.
4. Is a minimalist makeup routine good for acne-prone skin?
Yes! Minimalist makeup is excellent for acne-prone skin because it involves using fewer products, which means fewer ingredients that could potentially clog pores. By using non-comedogenic (pore-clogging) tinted moisturizers and mineral sunscreens, you allow your skin to heal while still covering up blemishes lightly.
5. How long does a minimalist makeup routine take?
Once you are comfortable with the steps, a minimalist makeup routine should take no more than 3 to 5 minutes. Because you are using fewer products and focusing on quick, blendable formulas like creams, you can easily apply your makeup in the car (when parked!) or right before a Zoom meeting.
Conclusion
Adopting a minimalist makeup routine is truly life-changing for busy women who still want to look and feel their best. By focusing on skin health, using multi-purpose products, and embracing your natural beauty, you can cut your morning prep time in half. Not only will your skin thank you for the break from heavy chemicals, but your wallet will thank you too. Remember, makeup is meant to enhance your features, not hide them. Grab your tinted moisturizer, swipe on some mascara, and enjoy the freedom that comes with a beautifully simple, minimalist approach to beauty!
If you love keeping up with the latest beauty trends, you’ve likely found yourself staring at the salon menu, completely torn between two popular options: acrylic and gel. The debate of acrylic vs gel nails is one that every beauty enthusiast eventually encounters. Both offer stunning, long-lasting results, but they are fundamentally different in how they are applied, maintained, and removed.
Choosing the right manicure isn’t just about picking the prettiest color; it’s about understanding what your natural nails need, your lifestyle, and how much time you’re willing to invest in upkeep. Whether you are looking for inspiration on Pinterest for your next salon visit or just trying to understand the hype, knowing the facts is essential. In this comprehensive guide, we will break down everything you need to know about acrylic vs gel nails so you can make an informed decision on your next salon visit.
What Are Acrylic Nails?
Acrylic nails have been a staple in the beauty industry for decades. They are known for their durability and ability to add significant length to short or bitten natural nails.
An acrylic manicure involves mixing a liquid monomer with a powder polymer to create a paste. This paste is then applied directly to the natural nail (often over a plastic tip or form) and left to air dry. Once dry, the acrylic hardens into a tough, protective shell that can be filed and shaped into whatever length or style you desire. If you want to see some stunning examples of what this material can do, check out these trendy acrylic nail designs 2026 to get inspiration for your next appointment.
The Pros of Acrylic Nails
Incredible Durability: Acrylics are incredibly hard. If you work with your hands or are prone to breaking nails, acrylics offer a tough shield that protects your natural nails underneath.
Extreme Length: Because they are so strong, acrylics can extend the nail far beyond its natural length without bending or snapping. This makes them perfect for dramatic shapes like stiletto or coffin.
Cost-Effective: Generally, acrylic manicures are slightly cheaper than gel extensions, making them a budget-friendly option for long-term wear.
Easy to Fix: If an acrylic nail breaks, a nail tech can easily patch it with a bit more acrylic mixture, saving the whole manicure without needing a full replacement.
The Cons of Acrylic Nails
Harsh Chemicals: The application process involves strong fumes from the liquid monomer, which can be overwhelming in poorly ventilated salons.
Appearance: If not applied perfectly or if they begin to lift, acrylics can look slightly thicker and less natural than gel nails.
Nail Damage: The removal process requires soaking in pure acetone and often heavy filing. If done improperly, it can severely thin your natural nails.
What Are Gel Nails?
Gel nails have surged in popularity over the last few years, becoming the go-to choice for those who want a natural-looking, glossy finish. Unlike acrylic, gel polish comes in a bottle and is applied similarly to traditional nail polish. However, it cures (dries) under a UV or LED lamp rather than air-drying.
There are two main types of gel manicures: soft gel (regular gel polish that soaks off easily) and hard gel (which is used to build out the length and structure of the nail, similar to acrylic, but cures under a light). If you’ve browsed the latest gel nail designs 2026, you’ve likely seen the beautiful, high-shine results this method produces.
The Pros of Gel Nails
Natural Look and Feel: Gel is much lighter and thinner than acrylic. It conforms to the natural shape of your nail bed, giving a highly realistic appearance.
High Gloss Shine: The shine of a gel manicure is unmatched. It stays glossy for weeks without dulling, giving your hands a constantly fresh look.
No Harsh Fumes: Gel application is odorless, making the salon experience much more pleasant for both you and the nail technician.
Faster Curing: Because gel cures under a UV/LED lamp in seconds, the application process is generally faster than waiting for acrylic to air dry.
The Cons of Gel Nails
Less Durable: Gel is more flexible than acrylic, which means it can be more prone to peeling or chipping if you use your nails as tools.
UV Light Exposure: The curing process requires UV light. While the risk is low, some people prefer to wear fingerless UV-protective gloves during the curing process to protect their skin.
Harder to Repair: If a gel nail breaks, it cannot be easily patched. You usually have to remove the gel on that finger and reapply it entirely.
Acrylic vs Gel Nails: The Key Differences
To truly settle the acrylic vs gel nails debate, let’s compare them side-by-side across four main categories: durability, application, removal, and nail health.
1. Durability and Strength
If you want unbreakable nails, acrylic is the winner. Its rigid structure makes it highly resistant to impact. Gel nails, while durable, are softer and more flexible. If you have a highly active lifestyle or do a lot of manual typing, housework, or crafting, acrylic will likely hold up better. However, if you treat your hands gently, gel will easily last you two to three weeks without chipping.
2. Application Process
Acrylic application requires skill to mix the right ratio of liquid to powder. It smells strong and takes time to shape before it air-dries. Gel application is smoother and cleaner. The tech brushes on the gel, puts your hand under the lamp for 30-60 seconds, and the polish is instantly hardened. This makes gel a much quicker process for simple manicures.
3. Removal Process
Neither acrylic nor hard gel should be peeled off at home—doing so will rip off the top layers of your natural nail. Both require soaking in acetone. However, soft gel polish is generally easier and faster to soak off than acrylics. Acrylics often require 20-30 minutes of soaking in pure acetone, followed by gentle filing to remove the remaining residue.
4. Nail Health and Safety
Neither option is inherently “good” for your nails, as both require the natural nail plate to be filed down slightly for adhesion. However, gel is generally considered slightly safer for the nail bed because it is more flexible and moves with the natural nail. Acrylic’s rigidness can cause the natural nail separation if the acrylic is snagged. To see what shapes work best for different nail types, you can explore these beautiful nail designs 2026 and discuss them with your technician.
How to Choose Between Acrylic vs Gel Nails
Still not sure which one is right for you? Here is a quick checklist to help you decide based on your lifestyle:
Choose Acrylic Nails If:
You want extreme length (like long stiletto or coffin shapes).
You work with your hands and need heavy-duty, unbreakable nails.
You are on a tighter budget.
You love the look of intricate, 3D nail art that requires a strong, thick base.
Choose Gel Nails If:
You prefer a natural, lightweight feel on your fingers.
You want a high-gloss, glass-like finish that lasts for weeks.
You are sensitive to strong chemical smells.
You prefer shorter to medium-length nails (like short square or almond shapes).
Tips for Maintaining Your Manicure
No matter which side of the acrylic vs gel nails debate you land on, proper aftercare is essential for making your manicure last and keeping your natural nails healthy.
Moisturize Daily: Both acrylic and gel can dry out your natural nails and cuticles. Apply cuticle oil twice a day to keep the surrounding skin hydrated and prevent lifting.
Wear Gloves: When washing dishes or using harsh cleaning chemicals, always wear rubber gloves. Prolonged exposure to water and chemicals breaks down the bond of both acrylic and gel.
Don’t Use Your Nails as Tools: Never use your freshly manicured nails to open soda cans, scrape off labels, or pry things open. This is the number one cause of breakage for both gel and acrylic.
Schedule Fills: For acrylics, you will need to get a “fill” every 2 to 3 weeks as your natural nail grows out, leaving a gap at the base. Hard gel also requires fills, while soft gel polish is usually entirely removed and reapplied.
To stay updated on the latest beauty and nail trends, be sure to follow our Facebook page where we share daily inspiration and tips!
Frequently Asked Questions (FAQs)
1. Which lasts longer, acrylic or gel nails?
Acrylic nails generally last longer than gel nails because they are harder and more rigid. While gel manicures typically last about two to three weeks before chipping or peeling, acrylics can last up to four weeks before they require a fill, provided they are applied correctly and maintained well.
2. Are gel nails safer for natural nails than acrylic?
Gel nails are often considered slightly safer because they are more flexible and move naturally with your nail. However, the safety of both manicures heavily depends on the application and removal processes. Proper removal (soaking in acetone rather than forcing them off) is crucial for both to prevent severe damage to the natural nail bed.
3. Can I get gel polish over acrylic nails?
Yes! In fact, this is a very common request at salons. A nail technician will apply the acrylic to build the length and shape, and then apply a gel polish on top for the color. This gives you the strength of acrylic combined with the high-gloss shine and color variety of gel.
4. Why do my gel nails peel off after a few days?
If gel nails peel off quickly, it is usually due to improper preparation of the nail bed before application. If the nail wasn’t properly dehydrated and primed, or if there was oil or lotion left on the nail, the gel will not adhere properly. Another cause could be curing the gel under an old or weak UV/LED lamp.
5. Is the UV light used for gel nails dangerous?
The UV lamps used to cure gel nails emit a very low level of UV radiation. While the risk is relatively low, dermatologists recommend applying a broad-spectrum sunscreen to your hands 20 minutes before your appointment or wearing fingerless UV-protective gloves during the curing process to minimize any potential skin damage.
Conclusion
When it comes down to acrylic vs gel nails, there is no universal “right” answer—it all depends on your personal preferences, lifestyle, and nail goals. Acrylics are the undefeated champions of strength and length, making them ideal for those who want dramatic, durable nails. On the other hand, gel nails offer a lightweight, glossy, and natural aesthetic that is perfect for those who want a low-maintenance, natural-looking enhancement.
Whichever you choose, always ensure you go to a licensed, reputable nail technician. Proper application and safe removal are the most critical factors in ensuring your natural nails stay healthy underneath. Once you find the manicure that works for you, you can start experimenting with all the gorgeous, trendy designs the beauty world has to offer!
Welcome to the ultimate glass skin makeup tutorial for beginners. Glass skin is not oily skin with highlighter on top. That is a common misunderstanding that leads to people applying five layers of shimmer and wondering why their face looks reflective in the wrong way. Real glass skin has a specific quality — the skin appears smooth, translucent, and luminous from within, like light is passing through a clean pane of glass rather than bouncing off a greasy surface.
The difference matters because the technique required to achieve real glass skin is completely different from the technique for a standard dewy finish. Dewy skin is about surface sheen. Glass skin is about skin that looks so well-hydrated and even-textured that it appears to glow on its own, with makeup enhancing that quality rather than creating it from scratch.
This distinction is what makes glass skin achievable for beginners — you do not need advanced contouring skills or a drawer full of luxury products. You need the right skincare prep, lightweight products applied in the correct order, and an understanding of where to add luminosity and where to keep things matte.
The Non-Negotiable Prep Step That Most Tutorials Skip
Almost every glass skin makeup tutorial jumps straight to primer and foundation. The problem is that glass skin is 60% skincare prep and 40% makeup. If the skin underneath is dehydrated, flaky, or uneven, no amount of luminous foundation will create the glass effect — it will just highlight the texture problems.
The prep does not need to be complicated. A simplified version that actually works looks like this:
Cleanse gently: A hydrating cleanser, not a stripping one. The skin should feel soft after cleansing, not tight. Tightness means you have removed too much of the natural moisture barrier.
Hydrating toner: Pat it in — do not swipe. Patting pushes the product into the skin rather than across it. Two to three layers of a hydrating toner (something with hyaluronic acid, glycerin, or centella asiatica) plumps the skin noticeably within minutes.
Lightweight serum: A single hydrating serum is enough. Niacinamide works well for most skin types because it hydrates while also calming redness and smoothing texture. Apply it while the toner is still slightly damp — this helps the serum absorb more effectively.
Moisturizer: This is where people make the biggest mistake — skipping moisturizer because they think it will make their makeup slide off. The opposite is true. Well-moisturized skin holds makeup better and looks smoother underneath it. Use a gel-cream formula if you are worried about heaviness.
Sunscreen: Even if you are doing your makeup indoors for content, get in the habit. A lightweight chemical sunscreen absorbs quickly and does not leave the white cast that ruins glass skin’s translucent quality.
Wait at least 3-5 minutes after sunscreen before touching your face with makeup. This lets everything absorb and settle. If you apply foundation over sunscreen that has not fully absorbed, you get pilling — those annoying little rolls of product that ruin the smooth base glass skin requires.
Step 1: Primer — But Not Any Primer
The primer you choose for glass skin matters more than the foundation. A mattifying primer is the wrong choice here — it actively fights against the luminous finish you are trying to build. A silicone-based smoothing primer is the right direction because it fills in texture and creates a blank canvas, but some silicone primers can look too flat under lighting.
The ideal primer for glass skin is a hydrating glow primer — something with a slight luminosity that blurs pores without adding heavy shimmer. If you cannot find a dedicated glow primer, a small amount of liquid highlighter mixed into your regular smoothing primer achieves a similar effect. The key word is “small amount” — you want a hint of glow in the primer, not a visible shimmer layer.
Apply a thin, even layer over the entire face. Do not skip the eyelids — glass skin is a full-face effect, and matte eyelids against glowing skin look disconnected. Blend the primer down onto your neck as well, especially if your foundation shade does not perfectly match your neck (which is true for most people).
Step 2: Foundation — Less Is More, Always
Full-coverage foundations are the enemy of glass skin. They are formulated to cover everything, which means they sit on top of the skin as a layer rather than merging with it. Glass skin requires a foundation that looks like it is part of the skin, not sitting on top of it.
The best foundation textures for glass skin, in order of preference:
Tinted moisturizer: The lightest option. Provides just enough color to even out the skin tone without adding a detectable layer. Best for people with relatively even skin who just want a slight polish.
Light-coverage liquid foundation: The middle ground. More coverage than a tinted moisturizer but still thin enough to let the skin’s natural texture show through. This is where most beginners should start.
Skin tint: A newer category that sits between serum and foundation. Extremely thin, high in skincare ingredients, with just enough pigment to blur imperfections. Excellent for glass skin if you can find the right shade.
Application method matters as much as product choice. Dampen a beauty sponge slightly (not dripping — squeeze out most of the water) and bounce the foundation into the skin. Bouncing, not dragging, presses the product into the skin and creates a more natural finish. Use the sheerest layer you can get away with. If you need more coverage in specific areas, build it in those spots only rather than applying a thicker layer everywhere.
Step 3: Concealer — Only Where You Actually Need It
One of the biggest mistakes in glass skin routines is applying concealer over the entire under-eye area and then wondering why the face looks cakey. Glass skin works because of the contrast between the luminous base and the areas where the skin is allowed to show through naturally.
Apply concealer only on actual blemishes, visible dark circle areas (not the entire under-eye), and any redness around the nose or chin. Use a small flat brush or the pointed end of a beauty sponge for precise placement. Blend the edges until they disappear into the foundation — there should be no visible line where the concealer ends and the foundation begins.
For under-eye concealer specifically, choose a shade that is one to two shades lighter than your foundation, not three or four shades lighter. The dramatic brightening effect looks unnatural under the luminous finish of glass skin. A subtle brightening that matches the glow of the rest of the face reads as intentional, not overcorrected.
Step 4: The Glow Layer — This Is What Makes It Glass Skin
This is the step that separates glass skin from just “nice makeup.” The glow layer is where you strategically add luminosity to make the skin appear translucent and lit from within.
The technique is specific: you are not applying highlighter the way you would for a night-out look. Instead, you are placing a very thin, subtle glow in areas where light would naturally hit the face.
Where to apply:
The highest points of the cheekbones — but blended outward, not concentrated in one spot
The bridge of the nose — a thin line, blended so it is not a visible stripe
The center of the forehead — just a small amount, blended well
The cupid’s bow — barely there, just a touch
The chin — only if your chin tends to look flat in photos
Where NOT to apply:
The sides of the nose — this makes pores look larger
Under the eyes — this makes texture and fine lines more visible
The entire cheek area — this removes the dimension that makes glass skin look three-dimensional
Product choice for the glow layer: a liquid or cream highlighter is significantly better than powder for glass skin. Powder sits on top of the foundation as a separate layer, which works for a night-out highlight but breaks the seamless quality that glass skin requires. Liquid highlighter merges into the foundation and becomes part of the skin rather than sitting on it.
Apply the liquid highlighter with your fingers — the warmth helps it blend seamlessly. A tiny amount is enough. You can always add more, but removing excess liquid highlighter without disturbing the foundation underneath is difficult.
Step 5: Setting — The Controversial Step
Traditional glass skin purists will tell you not to set your makeup at all. For most people in real-world conditions — heat, humidity, touching your face, wearing a mask — this is impractical advice. Unset glass skin will slide off your face within three hours.
The solution is strategic setting. You are not dusting powder over the entire face. You are setting only the areas that tend to get oily or where makeup tends to migrate:
The T-zone: forehead, nose bridge, chin
Under the eyes (very lightly, to prevent concealer creasing)
Use a translucent setting powder — not a tinted one. A tinted powder adds a layer of opacity that works against the translucent quality of glass skin. Apply with a fluffy brush, not a dense one. A dense brush packs on too much product. A fluffy brush deposits a barely-there layer that controls oil without adding texture.
Then — and this is important — go back over the areas where you applied highlighter with a clean beauty sponge. Press gently. This removes any powder that landed on the highlight zones and reactivates the glow. This single step is what makes the difference between “dewy makeup that turned matte” and “glass skin that actually lasts.”
Step 6: Cream Blush — The Underrated Glass Skin Hero
Powder blush does not work well with glass skin. It adds a matte texture that breaks the seamless luminosity you have built. Cream or liquid blush is the right choice because it merges into the base rather than sitting on top of it.
The application method for cream blush in a glass skin routine is different from how you would normally apply it. Instead of placing it on the apples of the cheeks and blending upward, place it slightly higher — on the upper cheekbone area — and blend outward toward the temples. This positions the color where it catches light, which makes it look like a natural flush rather than applied color.
Use your fingers or a damp sponge. Fingers are better for cream blush because the warmth helps the product melt into the skin. Start with less than you think you need. Cream blush builds up quickly, and too much color under a glass skin base looks ruddy rather than glowing.
Good color choices for glass skin: soft pinks, peachy tones, and muted corals. Avoid deep berries or bright fuchsias — the intensity fights against the softness that makes glass skin work. The blush should look like you just came in from a light walk in cool weather, not like you applied color.
Step 7: Brows and Eyes — Keep Them Soft
Heavy eye makeup contradicts glass skin. The whole point of the look is that the skin is the star — everything else should support that, not compete with it.
Brows: A light, feathery brow using a fine-tip pencil or a small angled brush with powder. Fill in sparse areas only — do not redraw the entire brow shape. The arch should look natural, not sculpted. A clear brow gel to set the hairs is enough. Avoid heavy pomades or waxy pencils that make brows look painted on.
Eyes: A single matte or satin eyeshadow in a neutral tone — warm beige, soft brown, or muted taupe — swept across the lid and slightly into the crease. One color is enough. If you want more definition, a slightly deeper shade in the outer crease only, blended well so there are no visible lines. A thin brown eyeliner along the upper lash line (not black — brown is softer and more in keeping with the glass skin aesthetic) and mascara to finish. No dramatic wings, no cut creases, no heavy shimmer on the lids.
Step 8: Lips — The Finishing Touch
Glass skin lips should look hydrated and slightly plump, not matte and dry. A lip tint, a sheer lipstick, or a tinted lip balm all work. The color should be in the same soft family as your blush — pinks, peachy nudes, or sheer corals.
For an extra glass-like effect on the lips, apply a clear or slightly shimmery lip gloss over the tint. The gloss should be non-sticky — sticky gloss looks cheap and catches hair and dust. A hydrating lip oil or a lightweight gloss formula gives the plump, glassy lip look without the tackiness.
Avoid matte lipsticks entirely. They create a visual disconnect between the glowing skin and the flat, dry lips. If you must wear a matte formula (for longevity at an event, for example), apply a tiny dot of gloss just in the center of the lower lip to create the illusion of hydration without the full gloss commitment.
Products That Actually Work for Glass Skin (At Different Budgets)
You do not need expensive products to achieve glass skin. The technique matters more than the brand. That said, certain product types and textures work better than others regardless of price:
Under $15 Options
e.l.f. Halo Glow Liquid Filter: Can be used as primer, mixed with foundation, or as the glow layer. Extremely versatile for the price.
NYX Born to Glow Liquid Illuminator: Good liquid highlighter option for the glow step. Subtle enough for glass skin, buildable if you want more intensity.
CeraVe Moisturizing Cream: Skincare prep does not need to be expensive. This is one of the most effective moisturizers for creating a smooth base, and it works under makeup without pilling.
Wet n Wild Megaglow Highlighting Stick: Cream stick highlighter that works well for targeted glow placement.
$15-$35 Options
Maybelline Fit Me Dewy + Smooth Foundation: One of the best drugstore foundations for glass skin. Light coverage, natural dewy finish, wide shade range.
Rare Beauty Soft Pinch Tinted Lip Oil: Excellent for the glass skin lip step. Sheer color with a non-sticky glossy finish.
Fenty Beauty Eaze Drop Blush: Liquid blush that blends beautifully into a glass skin base. Buildable, natural-looking flush.
Ilia Super Serum Skin Tint: A true skin tint with SPF and skincare ingredients. Very thin, very natural — ideal for glass skin if the shade match works for you.
$35+ Options
Charlotte Tilbury Flawless Filter: The product that popularized the “your skin but better” category. Works as primer, mixed with foundation, or alone. Expensive but effective.
SAIE Glowy Super Gel: Lightweight gel highlighter that gives a very natural, skin-like glow without shimmer particles.
Glossier Perfecting Skin Tint: Extremely minimal coverage that lets your skincare prep show through. Best for people who already have relatively even skin.
Common Glass Skin Mistakes to Avoid
Skippping skincare prep: This is the number one reason glass skin fails. If your skin is dehydrated underneath, the makeup will look cakey and textured no matter what products you use.
Using too many luminous products: Glow primer + luminous foundation + liquid highlighter + setting spray with glow = a face that looks wet, not glassy. Pick two glow products maximum.
Applying highlighter under the eyes: This magnifies every fine line, crease, and texture issue. The under-eye area should stay matte or semi-matte.
Using full-coverage foundation: Heavy foundation creates a layer on top of the skin. Glass skin requires products that merge with the skin, not sit on top of it.
Not setting at all: Pure glass skin without any setting works in controlled environments (photo studios, air-conditioned rooms). In real life, it slides off. Strategic setting is the practical solution.
Using powder highlighter: Powder adds texture. Liquid or cream highlighter merges into the base. For glass skin specifically, liquid is always the better choice.
Ignoring the neck: Glowing face, matte neck is an instant giveaway that you are wearing luminous makeup. Blend everything down onto the neck.
How to Make Glass Skin Last All Day
The biggest complaint about glass skin is that it does not last. The glow fades, the foundation separates, and by midday you have a patchy, uneven base. This happens because glass skin relies on hydration, and hydration naturally decreases throughout the day as the skin absorbs and loses moisture.
A few strategies that actually extend wear:
Spray setting spray before and after powder: A light mist of dewy setting spray before applying powder creates a tacky layer that helps the powder grip. Another mist after powder reactivates the glow. This two-step process significantly extends wear without adding visible product.
Carry a hydrating mist: A small facial mist in your bag (rose water, glycerin-based mist, or even a hydrating setting spray) refreshed the glow midday without disturbing the makeup. Two sprays, pat gently with clean fingers, and the luminosity comes back.
Blot, do not powder, for touch-ups: When your T-zone gets shiny (not glowy — there is a difference), use blotting paper, not powder. Blotting paper removes oil without adding texture. Powder builds up over multiple touch-ups and eventually looks cakey.
Avoid touching your face: This applies to all makeup but matters more for glass skin because the products are designed to be thin and mergeable. Every time you touch your face, you are moving product around.
Glass Skin for Different Skin Types
Oily Skin
Glass skin is harder for oily skin but not impossible. The key is keeping the glow products away from your oil-prone zones (T-zone, chin) and concentrating them on the high points of the cheeks and forehead center. Use a water-based moisturizer instead of a richer cream. Set the T-zone more thoroughly. Accept that your glass skin will look slightly more “dewy” than someone with dry skin — that is fine, it is still glass skin, just your skin’s version of it.
Dry Skin
Dry skin has the easiest time achieving glass skin because the look is fundamentally about hydration. Your challenge is not creating glow — it is preventing the foundation from clinging to dry patches. Extra attention to exfoliation (gentle, not harsh) in your prep step, and a slightly richer moisturizer, will solve most issues.
Combination Skin
The most common skin type, and arguably the one that glass skin suits best. You can use the full technique — glow on the cheeks, strategic setting on the T-zone — without having to compensate for extreme oiliness or dryness. Follow the standard routine as described above.
Frequently Asked Questions
Can I get glass skin with drugstore products only?
Absolutely. The technique — proper prep, light layers, strategic glow placement, targeted setting — matters more than product price. The drugstore options listed above have been used by thousands of people to achieve convincing glass skin. Expensive products can make the process slightly easier or the finish slightly smoother, but they are not required.
Does glass skin work on mature skin?
Glass skin can actually be flattering on mature skin because the luminous finish draws attention away from texture and fine lines rather than highlighting them — as long as you avoid placing glow products directly over wrinkles or textured areas. Keep the glow on the high planes of the face (cheekbones, forehead center) and keep textured areas (under-eyes, around the mouth) more matte.
How is glass skin different from dewy skin?
Dewy skin is about surface sheen — the skin looks moist and reflective. Glass skin goes further: the skin appears translucent, smooth, and lit from within, as if light is passing through it rather than just reflecting off it. Glass skin typically requires more skincare prep and more precise product placement than a standard dewy look.
Can I wear glass skin makeup in summer without it melting off?
Yes, with adjustments. Use a water-based primer instead of silicone (silicone breaks down faster in heat). Switch from liquid highlighter to a cream stick — it is slightly more stable in high temperatures. Set the T-zone more thoroughly. Skip the heavy moisturizer in your prep and use a lighter gel-cream instead. Carry blotting papers and a hydrating mist for midday refreshes.
Do I need to do the full skincare routine every time?
No. The full cleanse-tone-serum-moisturize-sunscreen routine is ideal for your first application of the day. For touch-ups or reapplications, you can skip straight to a light mist of hydrating spray and then reapply only the areas that need it. The initial prep is what creates the base — once that base is in place, maintaining it requires much less effort.
Long almond nails get most of the attention in nail content, but short almond shapes have quietly become the pick people actually keep going back to. There is a practical reason for that: they survive daily life better, they grow out more gracefully, and they do not demand the constant upkeep that longer lengths do.
The shift toward shorter lengths is not just about convenience either. Nail trends in 2025 have genuinely moved toward restrained, refined designs — the kind that look intentional without needing five layers of hand-painted detail. Short almond nails sit perfectly in that space: enough shape to flatter the fingers, short enough to feel like you could actually type, cook, or open a can without panicking.
If your natural nails are not particularly long or you simply prefer something low-maintenance, these fifteen short almond nail designs cover the full range from barely-there to quietly striking — all designed to work on nails that stop at or just past the fingertip.
1. Sheer Nude with a Single Fine Line
This is the design that convinced a lot of people short nails could still feel finished. A sheer nude base — think something slightly warmer than your natural nail color — with one thin metallic or white line placed just above the smile line.
The line does the heavy lifting. It turns what would otherwise read as a plain manicure into something deliberate, like a piece of jewelry for your nail. A single fine line also ages well as the nail grows out, since it sits far enough from the free edge that the regrowth is not immediately obvious.
How to get it right: Use a sheer gel or BIAB as the base rather than regular polish — the builder gel gives the nail enough structure to hold the almond shape even at shorter lengths. For the line, a striping tape or a very fine detail brush works. Gold or silver metallic lines feel more elevated than white for this particular look.
Best suited for: Warm to neutral skin tones, everyday wear, office-friendly settings.
2. Soft Muted Peach on Short Almond
Peach tones have replaced the brighter corals of previous years, and the muted version works especially well on short almond nails because it reads as soft rather than loud. The color should sit somewhere between a blush and a light terracotta — not orange, not pink, but that quiet in-between.
On a short almond shape, muted peach has a way of looking clean and put-together even without any added design elements. It is the kind of color that people notice without being able to pinpoint exactly what they are noticing — which is usually the sign of a good neutral.
How to get it right: Two thin coats of a peach-toned gel polish give better opacity control than one thick coat. A matte top coat changes the entire feel of this color — it goes from classic to modern with that single step. If you want to add something small, a single tiny dot near the cuticle on one or two nails keeps it interesting without overcomplicating it.
Best suited for: All skin tones, spring and summer wear, minimalists who still want color.
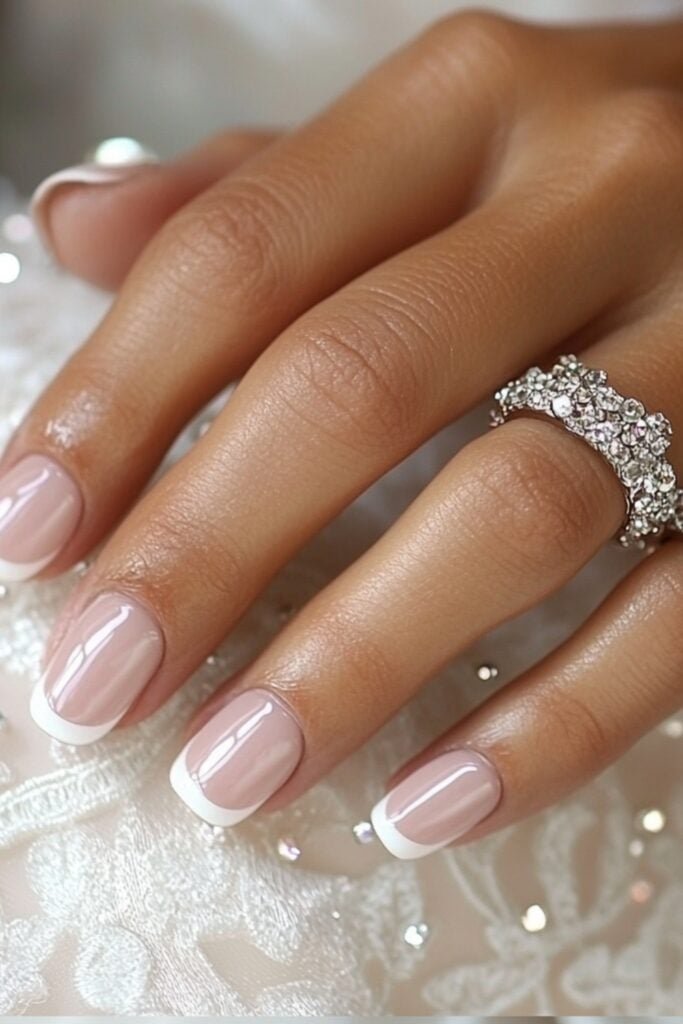
3. Short Almond French with a Rounded Smile Line
The classic French tip adapted for short almond nails needs a softer approach than the crisp, straight-line version you see on longer sets. A rounded or slightly curved smile line follows the natural shape of the short almond tip and feels less severe, more like a gentle accent than a hard border.
This small adjustment — curved instead of straight — makes a surprising difference in how wearable the design feels. Straight French tips on short nails can look slightly stunted, but the curved version looks like it was designed specifically for that length rather than adapted from a longer template.
How to get it right: A natural or very pale pink base with an off-white tip (not pure white — that can look too harsh on short nails). The curve should follow the natural C-shape of the nail free edge. Keep the tip narrow — about a third of the nail width at most — so it reads as elegant rather than blocky.
Best suited for: All lengths within the short range, all skin tones, timeless everyday wear.
4. Micro Glitter Accent on Sheer Base
Full glitter nails on short almond shapes can feel overwhelming — there is not enough nail surface for the glitter to spread across without looking dense. A single accent nail with micro glitter, or a very thin glitter band near the tip on all nails, solves that problem completely.
Micro glitter (as opposed to chunky glitter) is key here. The fine particles catch light subtly rather than flashing, which keeps the overall look understated. On a sheer or nude base, a thin band of micro glitter near the free edge reads as a quiet detail rather than a statement.
How to get it right: Apply glitter over a cured base coat so you can control exactly where it sits. A small fan brush lets you place a thin, even band rather than a scattered mess. Seal with a thick layer of clear gel or a hard gel top coat to smooth out the texture — gritty glitter on short nails feels unfinished.
Best suited for: Evening wear, holiday seasons, anyone wanting subtle sparkle without full glitter nails.
5. Olive Green Short Almond Nails
Green has been building momentum in nail trends for a few seasons now, and olive specifically has become the go-to for people who find brighter greens too costume-like. Olive on short almond nails reads as earthy and sophisticated — it has a depth that paler greens lack, and it pairs surprisingly well with gold jewelry, which most people already wear daily.
The color works on short almond shapes because it has enough richness to stand on its own without needing extra design elements. A single solid coat of a good olive green gel looks complete, which is exactly what you want from a short nail design — minimal effort, maximum impact.
How to get it right: Test olive shades in natural light before committing — some pull too yellow, others too brown. The sweet spot is a true olive that reads as green first, warm second. A glossy top coat keeps it classic; matte makes it feel more editorial. One or two nails with a subtle darker olive accent near the cuticle adds dimension without complicating things.
Best suited for: Autumn and winter wear, warm and neutral skin tones, fans of earth-tone palettes.
6. Thin Negative Space Stripe
Negative space designs work remarkably well on short nails because the visible natural nail creates the illusion of more surface area than there actually is. A single thin vertical stripe left bare (or filled with a contrasting color) on each nail gives short almond shapes a graphic quality that does not rely on length.
The stripe should be narrow — no wider than a striping tape line. Wider negative space sections on short nails start to look fragmented rather than designed. A thin stripe reads as intentional architecture rather than an accident.
How to get it right: Place striping tape vertically on each nail before applying your base color. Once the color is applied and removed while still slightly tacky, cure fully. The result is a perfectly clean line with no hand-painting required. A nude or soft pink base with the natural nail showing through as the stripe is the most wearable version of this.
Best suited for: Modern minimalists, all seasons, people who like graphic design elements in their nails.
7. Lavender Mist on Short Almond
Lavender has moved past its “trendy phase” and settled into the kind of color that now feels like a neutral option for people who want something beyond nude. On short almond nails, a soft lavender mist — more dusty than pastel, more grey than purple — has a calmness that works for both casual and dressed-up settings.
The key distinction here is “mist” versus “solid lavender.” A misty application has slight translucency, showing just a hint of the natural nail beneath. That translucency keeps it from looking flat or childish, which is the risk with any pastel on short nails.
How to get it right: One thin coat of a sheer lavender over a slightly warmer base gel gives that misty quality without needing to mix custom colors. If you want more opacity, two thin coats still look better than one thick one. A single nail with a slightly deeper lavender or a tiny floral detail keeps the set from reading as monotonous.
Best suited for: Spring and early summer, cool and neutral skin tones, lavender lovers who want a grown-up version.
8. Chocolate Brown Minimalist Almond Nails
Brown tones have replaced the sheer nudes as the “new neutral” in nail design, and chocolate brown specifically has become a staple for short almond shapes. It is warm, it is rich, and it has the kind of depth that makes short nails look intentional rather than just short.
Chocolate brown on almond also has an unexpected versatility: it pairs with gold for a luxurious feel, with cream for a softer look, and it even works as a base for subtle negative space designs if you want to add something later without starting over.
How to get it right: The shade matters enormously here. Too red and it becomes burgundy, too light and it reads as tan. Look for a true chocolate — deep, warm brown with no obvious red or orange undertone when swatched. A single glossy coat over a good base is all you need. For something slightly different, a matte chocolate with one glossy accent nail creates texture contrast that makes the whole set feel more considered.
Best suited for: Autumn and winter, warm skin tones, anyone wanting an alternative to nude or black.
9. Barely-There Pink with a Crescent Moon Detail
The crescent moon manicure — a curved accent near the cuticle that mirrors the shape of the nail base — is one of the few designs that actually looks better on short nails than long ones. On longer nails, the crescent can get lost in the extra surface area. On short almond nails, it becomes a focal point because there is less space competing for attention.
A barely-there pink base keeps the whole thing understated, while the crescent — in white, gold, or a slightly deeper pink — adds just enough interest to make the design feel finished without looking overworked.
How to get it right: A small curved brush or a moon stencil makes the crescent shape easier to control than freehand. The curve should follow the natural shape of the cuticle area, not a perfect circle. Keep the crescent thin — it should suggest a moon rather than draw one in full. Cure the base first, then add the crescent, then top coat. Doing it in this order prevents smudging the accent into the base.
Best suited for: All seasons, all skin tones, people who like subtle nail art that is still visible.
10. Soft Grey Short Almond Nails
Grey is possibly the most underrated nail color for short almond shapes. A warm grey — not concrete grey, not blue-grey, but something with just a hint of warmth — has the same versatility as nude but with more visual interest. It looks clean, modern, and slightly unexpected in a way that makes people ask about it.
On short almond nails, grey also has a practical advantage: it does not show chips or regrowth as obviously as lighter colors do. A soft grey growing out by a millimeter still looks intentional, which extends the life of the manicure meaningfully.
How to get it right: Warm grey can be hard to find in standard polish lines — gel polish tends to have better warm grey options. Test on a nail wheel first if possible, since grey shifts significantly under different lighting. A glossy finish keeps it polished; a matte finish makes it feel more architectural. Either works, but they give completely different vibes.
Best suited for: Year-round wear, all skin tones (warmer greys for warm skin, cooler greys for cool skin), office and casual settings.
11. Dual-Tone Half-Moon Split
Splitting the nail into two complementary tones at the half-moon point creates a design that reads as more complex than it actually is. On short almond nails, a horizontal split — lighter on top, darker on bottom, or vice versa — uses the limited surface area efficiently without feeling cramped.
The trick is choosing two tones that clearly belong together but are not so similar that the split becomes invisible. A nude and a soft brown, a sheer pink and a dusty rose, or a cream and a light taupe all create enough contrast to read as a design choice rather than a mistake.
How to get it right: Paint the bottom half first, cure, then use tape or a steady hand for the top half. The split line does not need to be perfectly straight — a very slight curve following the nail shape actually looks more organic and intentional on almond. Clean up any overlap with a small detail brush dipped in clear gel before the final cure.
Best suited for: People who want nail art without hand-painted details, all seasons, medium to short almond lengths.
12. Dusty Rose with a Single Rhinestone
One small rhinestone placed at the base of one nail — usually the ring finger — is the minimum viable nail art. It takes a plain dusty rose manicure and gives it a focal point without turning the whole set into a “nail art” look. On short almond nails, a single stone reads as deliberate because there is not much else competing for attention.
Dusty rose itself is a strong choice for short nails because it has enough color to be visible but enough softness to feel grown-up. It avoids the childish quality that brighter pinks can have on shorter lengths.
How to get it right: Use a very small stone — 2mm or 3mm at most. Anything larger on a short nail looks disproportionate. Place it at the center base of the nail, not off to the side, and embed it into a cured layer of gel so it sits flush rather than raised. A raised stone on a short nail catches on everything and will pop off within days.
Best suited for: Events, date nights, anyone wanting the smallest possible upgrade to a plain manicure.
13. Cream and Taupe Minimalist Gradient
A subtle gradient from cream at the cuticle to taupe at the tip gives short almond nails a sense of dimension that a single solid color cannot achieve. The transition should be gentle — not an obvious ombré, but a slow shift that you notice more in person than in photos.
This works on short almond shapes because the gradient follows the natural taper of the nail, reinforcing the shape rather than fighting against it. On longer nails, gradients can sometimes look stretched or uneven. On short nails, the shorter surface area keeps the transition tight and controlled.
How to get it right: Apply the lighter color (cream) first as a full base. Then sponge or brush the darker color (taupe) starting from about the middle of the nail, building intensity toward the tip. A makeup sponge gives a softer blend than a brush. Seal with a glossy top coat to merge the two colors visually. One thin layer of top gel smooths out any visible transition line.
Best suited for: Autumn and winter, neutral lovers, people who want something subtle but not plain.
14. Short Almond Chrome Nails — Muted Silver
Chrome nails have been everywhere, but the full-coverage mirror chrome can feel too intense on short almond shapes. A muted silver chrome — more brushed metal than mirror — tones down the effect while keeping the reflective quality that makes chrome appealing in the first place.
The muted version also has a practical benefit: it does not show every smudge and fingerprint the way mirror chrome does. On short nails that you are using constantly, that makes a real difference in how polished the manicure looks after a few days of wear.
How to get it right: Apply a chrome powder over a fully cured grey or silver base gel, then immediately top coat. Do not rub the powder in as aggressively as you would for full mirror chrome — a lighter application gives the brushed metal effect. If the result is too muted, a second very light application intensifies it without going full mirror.
Best suited for: Year-round, all skin tones, people who like chrome but find full mirror too much for daily wear.
15. Natural Short Almond with a Glossy Top Coat Only
Sometimes the best short almond nail design is no design at all. A clean, well-shaped natural nail with nothing but a high-gloss top coat (or a clear builder gel like BIAB) is the baseline that every other design on this list is building from.
This is not laziness — it is a specific aesthetic choice that requires the nail shape itself to be flawless, the cuticles to be well-groomed, and the top coat to be perfectly applied without bubbles or streaks. When done well, it looks more expensive than most colored manicures.
How to get it right: Prep is everything here. Clean cuticles, even file shape, no ridges in the natural nail (buff lightly if needed). A thin layer of builder gel or BIAB gives the nail enough strength to hold the almond shape and provides a smooth surface for the glossy top. Two coats of a high-shine top coat, cured fully between each, gives that glass-like finish. Reapply top coat every 4-5 days to maintain the gloss as it naturally dulls with wear.
Best suited for: Purists, professional settings, people with naturally healthy nails who want to show them off.
What Makes These Designs Work on Short Almond Specifically
Every design on this list was chosen with short almond geometry in mind. The nail surface is smaller, the free edge is narrower, and the overall silhouette is more compact than a longer almond shape. Designs that work on long almond nails — large hand-painted florals, heavy chrome, extensive negative space patterns — often look cramped or out of proportion when scaled down.
The designs here avoid that problem by working with the constraints of short nails rather than against them. Thin lines, solid colors, subtle accents, and minimal placement all use the smaller canvas intentionally. The result is a set of designs that look like they were made for short nails, not adapted from longer ones.
How to Make Short Almond Nails Last Longer
Short nails already have a durability advantage over longer lengths, but a few habits extend that further:
Gel over regular polish: Gel cures hard and resists chipping in a way that regular polish simply cannot match on short nails that are constantly in use.
Builder gel base: A thin layer of BIAB or clear builder gel under your color adds structural support that keeps the almond shape intact even as the nail grows out.
Gloves for water work: Short nails spend more time submerged in water during daily tasks than long nails do (because people with long nails tend to avoid water more carefully). Gloves prevent the gel from lifting at the edges.
Top coat refresh: Adding a fresh layer of top coat every 4-5 days restores the gloss and seals any micro-lifting at the free edge before it becomes visible chipping.
Avoid using nails as tools: This applies to all lengths but matters more on short nails because there is less margin for error — one pry can crack the gel right at the stress point of the almond tip.
Frequently Asked Questions
Are short almond nails actually shorter than regular almond nails?
Yes. Short almond nails typically extend just to or slightly past the fingertip, while regular almond nails extend noticeably beyond. The shape — wider at the base, tapered to a rounded point — is the same, but the length is reduced. Think of it as the same silhouette in a smaller size.
Can I get short almond nails if my natural nails are weak?
Short almond is actually the best shape for weak nails because it removes less length than you might think. The almond taper happens mostly in the free edge, and since the free edge is short, there is less structural stress on the nail. A builder gel overlay adds strength without requiring much length.
Do short almond nail designs work for nail biters?
Short almond can work for recovering nail biters, but the shape needs to be conservative — barely tapered, with most of the almond suggestion coming from the file angle rather than actual length. As the nails grow, the shape can be refined gradually. Starting with a natural nail look (design number 15) is usually the most realistic entry point.
How many days do short almond gel nails typically last?
A well-applied gel manicure on short almond nails generally lasts 2-3 weeks before the regrowth becomes visible enough to need a fill. The shorter length means less leverage on the gel, which actually extends wear compared to longer nails where the free edge catches on things more easily.
Should I choose matte or glossy for short almond nails?
Both work, but they serve different purposes. Glossy is more classic, more forgiving of minor imperfections, and better for showing off color depth. Matte is more modern, more editorial, and better at making textured effects (like muted chrome or brushed metal) look intentional. For everyday wear, glossy is the safer choic
Learning makeup for the first time can feel genuinely overwhelming — the products, the brushes, the techniques, the tutorials that seem to assume you already know what you’re doing. But here’s the truth that experienced makeup artists know and rarely say out loud: natural makeup looks for beginners are actually easier to achieve than dramatic ones. Natural looks are forgiving. They celebrate what you already have rather than requiring you to transform it. And when done correctly, they produce results that look genuinely beautiful without looking like you tried too hard.
The natural makeup looks for beginners in this guide cover everything from the most basic five-minute routine you’ll reach for on busy mornings to soft glam looks appropriate for dates, weddings, and special occasions — all built on techniques simple enough to master in your first week of practice. Each tutorial in this collection uses minimal products, straightforward application methods, and the kind of practical advice that makes the difference between a look that works and one that doesn’t.
1. The No-Makeup Makeup Look
The no-makeup makeup look is the most foundational of all natural makeup looks for beginners — the goal is to appear as though you woke up with naturally perfect skin, bright eyes, and healthy lips, while the makeup itself remains completely undetectable. This is the look you will reach for more than any other in your collection, and mastering it first gives you the confidence foundation that every other tutorial builds on.
The technique centers on skin first, everything else second. A lightweight tinted moisturizer or skin tint (not a full-coverage foundation) applied with fingertips in thin, tapping motions across the face creates the barely-there base that defines this look. Fingers are genuinely the best tool here — they warm the product slightly during application, helping it blend seamlessly into the skin rather than sitting on top of it. Concentrate coverage only where you actually need it: around the nose, any blemish areas, and the chin, leaving the cheeks and forehead largely unenhanced where natural skin texture and tone look beautiful.
Cream concealer in a shade one level lighter than your skin tone applied only under the eyes with a fingertip in a tapping (never rubbing) motion addresses dark circles without creating a heavy, masked appearance. A small amount of clear or tinted brow gel combed through the brows in the direction of natural hair growth shapes them without creating an overly defined or makeup-heavy impression. A single coat of brown or black mascara on the upper lashes only — wiggled from root to tip to separate rather than build — adds definition. A lip balm in a sheer pink or peachy tint that matches your natural lip color within two shades completes the look without adding visible color.
How to achieve it step by step: Moisturize and apply SPF first, wait sixty seconds for it to absorb, then apply tinted moisturizer with fingertips. Tap concealer under eyes. Brush brows. Apply mascara. Apply tinted lip balm. Total time: five to seven minutes.
Pro tip: The single most important product decision in this look is choosing a tinted moisturizer that matches your skin tone exactly — not one shade lighter (which reads as a mask) and not darker (which looks heavy). Swatch three shades on your jawline in natural light and choose the one that disappears.
Best for: All skin tones, everyday and work wear, women who are completely new to makeup
2. The Glowy Skin Base Look
Glowy, dewy skin is one of the most universally flattering aesthetics in all natural makeup looks for beginners, and achieving it is significantly more straightforward than it appears in tutorials. The entire concept rests on one principle: hydration creates glow. When the skin is properly moisturized and the products layered over it have luminous rather than matte qualities, the result is the specific inner-glow effect that everyone is chasing.
Start with a hydrating primer applied after moisturizer — a water-based primer with a slightly tacky texture that catches subsequent products and keeps them from sinking into the skin throughout the day. Over this primer, apply a liquid foundation or skin tint with a luminous finish using a damp beauty sponge — the dampness of the sponge dilutes the product slightly and prevents it from looking cakey, while the pressing and bouncing motion of a sponge application creates the skin-like texture that brush application cannot replicate.
The key product in this look is a liquid highlighter — not a powder highlighter with obvious shimmer particles, but a liquid formula with a subtle pearlescent quality. Applied with a fingertip on the highest points of the face where natural light hits — the tops of the cheekbones, the inner corners of the eyes, the center of the nose bridge, and the cupid’s bow — the liquid highlighter creates the impression of light emanating from within the skin rather than being applied to its surface. A damp beauty sponge pressed lightly over the entire face after highlighter application blends everything into a seamless, unified glow.
How to achieve it step by step: Hydrating moisturizer, wait sixty seconds. Hydrating primer, wait thirty seconds. Luminous foundation or skin tint with damp sponge. Liquid concealer under eyes, blended with sponge. Liquid highlighter on cheekbones, nose bridge, inner corners, cupid’s bow. Press damp sponge lightly over everything. Tinted lip balm. Total time: ten to twelve minutes.
Pro tip: Setting a glowy skin look is a balance — you need enough setting powder to prevent the glow from looking greasy, but too much powder eliminates the dewy quality entirely. Apply translucent setting powder only to the T-zone (forehead, nose, chin) with a large fluffy brush and leave the cheeks completely powder-free.
Best for: All skin types except very oily, every occasion from casual to formal
3. The Five-Minute Everyday Look
When life is busy — which is most days — natural makeup looks for beginners need to be achievable in real time constraints, and this five-minute routine is the most practical and genuinely flattering option for daily wear. The premise is simple: identify the three features that make the most visual difference when enhanced and focus entirely on those.
For most people those three features are the skin (a brief evening of skin tone), the eyes (a single mascara coat), and the lips (a sheer wash of color). A BB cream or CC cream — which combines moisturizer, SPF, color correction, and light coverage in one product — applied quickly with fingertips across the face in thirty seconds addresses the skin. A single coat of black or brown mascara curled first with an eyelash curler adds immediate eye openness and definition that no other single product matches for impact-to-effort ratio. A sheer tinted lip balm or lip oil in a flattering peachy-nude or pink shade that suits your complexion provides the lip color that makes the face look complete and put-together.
The eyelash curler is the single most underused tool in beginner makeup — curling lashes before mascara application creates an eye-opening effect that makes eyes look larger, brighter, and more awake. Hold the curler at the base of the lashes for ten seconds, then pulse gently toward the tips, holding for five seconds at each position. Apply mascara immediately after curling before the lashes have time to relax back to their natural straight position.
How to achieve it step by step: BB cream with fingertips over entire face. Concealer under eyes only if needed. Curl lashes. One coat mascara upper lashes. Tinted lip balm. Total time: five minutes exactly with practice.
Pro tip: Keep a set of five-minute makeup products in a small pouch separate from your full collection — having the exact products you need for this look always together means you can apply it on the go, in a car, or in any five-minute window without hunting through a full makeup bag.
Best for: All skin tones, busy weekday mornings, school and work environments
4. The Soft Flush Look
A soft flush of color across the cheeks, nose, and forehead that mimics the natural rosiness of healthy, active skin is one of the most universally flattering natural makeup looks for beginners because it references something the skin already does naturally — it simply amplifies and perfects it. This look is particularly beautiful in spring and summer when sun-warmed skin with natural color is the seasonal aesthetic.
The key to the soft flush look is cream blush applied with fingertips rather than powder blush applied with a brush. Cream blush blends into the skin rather than sitting on top of it, creating the impression of color coming from within — which is exactly the quality of natural facial flushing. Apply a small amount to the fingertip and tap onto the apples of the cheeks (the round parts that lift when you smile), then blend rapidly upward toward the temples and outward toward the ears before the cream sets. The movement should be fast and light — cream blush blends most naturally when moved quickly rather than worked slowly.
Extend a very small amount of the same cream blush product lightly across the nose bridge with one finger — this sun-kissed nose reference is the detail that makes the soft flush look genuinely natural rather than simply blushed. A barely-there amount dusted across the forehead with a large fluffy brush completes the all-over warmth effect.
How to achieve it step by step: Apply tinted moisturizer or skin tint as base. Tap cream blush on cheek apples and blend upward quickly. Light touch on nose bridge with same product. Set with a light dust of translucent powder if needed. Mascara and tinted lip balm to complete. Total time: eight minutes.
Pro tip: Choose a cream blush color by holding the product next to your natural cheek flush when you have just walked in from cold air or done light exercise — that natural flush color is exactly the shade that will look most natural on your specific skin tone.
Best for: All skin tones, every occasion, especially beautiful in spring and summer
5. The Defined Brow Look
Eyebrows frame the face more powerfully than any other facial feature, and mastering brow shaping and filling is one of the highest-impact skills in all natural makeup looks for beginners. The goal here is not dramatically different brows but rather a clean, defined version of your own natural brows — filling sparse areas, evening out asymmetry, and setting the hairs in place for a polished, finished appearance.
Begin by brushing brow hairs upward and outward with a clean spoolie brush — the direction in which brow hairs are brushed before filling significantly affects the final result, and brushing upward reveals the natural density and shape of the brow before any product is added. This upward brush also creates the fuller, editorial-style brow that is particularly fashionable in 2026.
A brow pencil in a shade that matches your brow hairs exactly (or one shade lighter for very dark hair to avoid a heavy appearance) used in short, hair-like strokes fills in sparse areas. The strokes should follow the natural direction of brow hair growth — upward strokes toward the arch and outward strokes toward the tail — rather than filling in solid blocks of color, which create an unnatural, drawn-on appearance that is the most common beginner brow mistake.
Finish by brushing through the filled brow with a clean spoolie to blend the pencil strokes into the natural hairs, then apply a clear or tinted brow gel over the entire brow to set the hairs in place and add a slight laminated quality that is one of the defining beauty trends of 2026.
How to achieve it step by step: Brush brows upward with spoolie. Identify sparse areas. Fill with short hair-like strokes in brow direction. Brush through with clean spoolie to blend. Apply brow gel to set. Total time: five minutes per brow with practice.
Pro tip: The arch of your natural brow should align with the outer edge of your iris — use a thin pencil or makeup brush held vertically at the outer edge of the iris to identify where your natural arch falls before filling, and enhance rather than move this natural arch point.
Best for: All face shapes, transforms any other simple makeup look instantly
6. The Mascara-Only Eye Look
Among all natural makeup looks for beginners, the mascara-only eye look demonstrates most clearly how transformative a single well-applied product can be. No eyeshadow, no liner, no complex technique — just mascara applied with intention and precision to create eyes that look wide open, defined, and genuinely beautiful.
The mascara-only look works best with a few preparatory steps that beginners often skip. Curling the lashes before application is not optional — it is the step that creates the eye-opening effect that uncurled lashes with mascara cannot achieve regardless of how many coats are applied. An eyelash primer applied before mascara adds volume and length to the natural lashes so that the mascara has more to work with — this step is particularly valuable for women with short or straight natural lashes.
Apply the first mascara coat by placing the brush at the base of the lashes and wiggling it back and forth slightly before pulling upward to the tip — the wiggling motion at the base ensures the brush separates each individual lash from its neighbors, preventing the clumping that makes mascara look amateur. A second coat applied before the first is fully dry builds volume while maintaining the separation the first coat created. A third coat on the outer corner lashes only creates a subtle lifting and fanning effect that makes the eyes appear wider.
How to achieve it step by step: Curl lashes. Apply lash primer if available. First mascara coat — wiggle at base, pull to tip. Second coat before first is dry. Third coat on outer corners only. Clean up any smudges with a cotton swab. Total time: four minutes.
Pro tip: Apply a thin line of nude or white eyeliner pencil to the inner rim of the lower eyelid (the waterline) — this single detail makes the whites of the eyes appear brighter and larger, amplifying the eye-opening effect of the mascara application significantly.
Best for: All eye shapes and skin tones, fastest eye-enhancing technique available
7. The Monochromatic Look
Using the same color family on eyes, cheeks, and lips in coordinating shades is one of the most sophisticated and foolproof natural makeup looks for beginners because the color harmony eliminates the possibility of a mismatched or clashing result. When all three elements of the face speak the same color language, the look reads as deliberately considered and effortlessly polished.
The most flattering monochromatic palette for natural looks is a warm peachy-nude family — a soft peach eyeshadow on the eyelids, peachy-coral cream blush on the cheeks, and a sheer peachy-nude lip gloss or tinted balm on the lips. Warm peachy tones complement every skin tone from the fairest to the deepest, making this the most universally applicable monochromatic option.
Apply a single peachy-nude eyeshadow across the entire lid from lash line to crease using a flat eyeshadow brush or the fingertip — the fingertip is actually more effective for beginners because it deposits color with more precision and less fallout than a brush. Blend the edges very gently with a clean finger or blending brush to create a soft transition rather than a hard edge. A coat of mascara on top of the eyeshadow defines the look without adding visual complexity.
How to achieve it step by step: Apply skin base. Peachy-nude eyeshadow on lid with fingertip, blend edges. Mascara. Cream blush in coordinating peach-coral on cheeks. Peachy-nude lip gloss. Total time: eight minutes.
Pro tip: The monochromatic look works most naturally when you choose shades that are slightly different in depth rather than identical — slightly deeper eyeshadow, medium blush, and lighter lip creates the tonal variation that keeps the look from appearing flat or one-dimensional.
Best for: All skin tones, first special occasion makeup, date nights and brunches
8. The Glowy Summer Look
Sun-kissed, bronzed, and dewy — the summer glow look is among the most requested natural makeup looks for beginners during warmer months, and it requires fewer products than most people expect. The entire aesthetic is built around the impression that you have spent a beautiful day outdoors and your skin is showing the warmth of the sun.
Bronzer is the defining product of this look, and applying it correctly is the single skill that separates a naturally sun-kissed result from an orange, muddy, or mask-like one. The placement formula for bronzer is the “3” shape — starting at the temples, sweeping down and forward across the cheeks, and then downward to the sides of the jaw on each side of the face, creating a number 3 shape on each half of the face when viewed from the front. This placement mimics the actual areas where the sun naturally deposits color on an outdoor-active face.
A matte bronzer (not shimmer for the base) applied with a large fluffy brush in circular blending motions creates warmth without obvious sparkle. A sheer highlighter on the cheekbones and nose bridge adds the glow that sunlight creates on high points of the face. A peachy-coral cream blush applied to the apples of the cheeks adds the flush of someone who has been genuinely outdoors. Glossy lips in a peachy nude or clear gloss complete the summer aesthetic.
How to achieve it step by step: Light coverage skin base. Bronzer in 3 shape with fluffy brush. Cream blush on cheek apples. Liquid or powder highlighter on cheekbones and nose bridge. Mascara. Glossy lip in peach or clear. Total time: ten minutes.
Pro tip: Apply bronzer before blush in the technique sequence — bronzer creates the warm shadow that blush sits within, and applying blush first then bronzer over it muddies both products and makes the result look heavy and unnatural.
Best for: All skin tones (choose bronzer one to two shades deeper than your natural skin), summer and outdoor occasions
9. The Soft Brown Eye Look
A soft brown eyeshadow look is the entry point into eye makeup for most beginners, and for excellent reason — brown eyeshadow is the most forgiving, the most universally flattering, and the most versatile eye color in existence. It suits every eye color, every skin tone, and every occasion from grocery shopping to wedding guest. Among natural makeup looks for beginners, the soft brown eye is the one that teaches the most transferable skills.
The technique uses two brown shades — a lighter, matte warm brown for the lid and a slightly deeper, slightly cooler brown for the crease — and one blending skill that, once learned, applies to virtually every eyeshadow look. Apply the lighter brown across the entire eyelid from lash line to crease using the fingertip or a flat brush. Then apply the deeper brown only in the crease — the fold of skin between the lid and the brow bone — using a soft blending brush in windshield-wiper motions that move the brush back and forth rather than in a circular motion. The back-and-forth motion blends the crease color into the lid color gradually, creating a soft gradient that gives the eye depth and dimension without any obvious line.
A thin line of brown (not black) eyeliner pencil along the upper lash line, blurred with a small brush or fingertip for a smudged rather than precise line, adds definition. Brown mascara rather than black keeps the overall look soft and natural. A tiny amount of shimmery champagne or gold eyeshadow tapped on the inner corner of the eye with a fingertip creates the bright, open effect that finishes the look.
How to achieve it step by step: Apply light brown to full lid. Apply deeper brown to crease with blending brush, windshield-wiper motion. Blend until no hard line. Brown liner on upper lash line, blur with fingertip. Brown mascara. Champagne shimmer inner corner. Total time: twelve minutes.
Pro tip: If the crease color looks too intense after application, use a clean blending brush with no product on it to gently press and roll over the crease area — the clean brush picks up excess pigment and further softens the transition between crease and lid, which is the most common adjustment beginners need to make.
Best for: All eye colors — particularly stunning on dark brown eyes, all skin tones
10. The Fresh-Faced Spring Look
Spring makeup in its most natural and beautiful form is less about color and more about texture — dewy skin, barely-there color, and a freshness that references the season’s quality of everything beginning again. This natural makeup looks for beginners entry is perfect for the warmer months when heavy makeup feels wrong and skin-forward beauty feels completely right.
A sheer, lightweight foundation or foundation stick — which melts into the skin with fingertip application and provides buildable coverage without weight — creates the canvas. Skip powder entirely for this look unless you have genuinely oily skin that requires it — powder eliminates the spring freshness the look depends on. A berry-toned or soft pink cream blush tapped on the cheek apples and very lightly on the temples adds the season’s characteristic warmth.
A soft pastel eyeshadow — lavender, soft pink, or mint — applied very lightly across the lid with a finger creates the subtle color wash that references spring’s palette without reading as costume-like. The color should be barely visible from a distance, registering more as a skin tone variation than as obvious eyeshadow. A single coat of mascara on upper and lower lashes adds definition. A pink or berry glossy lip ties the color story of the blush and eyeshadow together at the lips.
How to achieve it step by step: Sheer foundation with fingertips. No powder. Berry or pink cream blush on cheeks and temples. Pastel eyeshadow very lightly on lid. Mascara upper and lower. Pink glossy lip. Total time: eight minutes.
Pro tip: The pastel eyeshadow in this look looks most natural when the eyelid is completely clean and unprimed — eye primer creates a base that makes eyeshadow appear brighter and more saturated, which works against the barely-there quality this specific look requires.
Best for: Fair to medium skin tones, spring and early summer occasions
The Most Important Products for Natural Makeup Looks
Building a small but capable collection of products is the foundation that makes all natural makeup looks for beginners achievable consistently. The complete beginner collection does not need to be large or expensive — it needs to be right.
Skin: Tinted moisturizer or skin tint, cream concealer in your skin tone, translucent setting powder.
Color: One cream blush in a peachy-nude or rosy-nude, one bronzer one shade deeper than your skin, a highlighter with subtle sheen.
Eyes: One neutral eyeshadow palette with light and medium brown shades, one mascara in brown or black, an eyelash curler, a brow pencil matching your hair, clear brow gel.
Lips: Two to three tinted lip balms or lip oils — one nude, one peachy, one pink — to suit different occasions.
Tools: One damp beauty sponge, one large fluffy brush for bronzer and powder, one small blending brush for eyes, and a clean spoolie brush.
11. The Romantic Evening Look
Natural does not mean casual, and this natural makeup looks for beginners tutorial proves that a genuinely romantic and special-occasion-appropriate look is completely achievable without complex techniques or dramatic products. The romantic evening look uses the same natural skin foundation as everyday looks but layers in deeper eye definition and a more intentional lip that elevates the overall impression for evening contexts.
Begin with a luminous skin base slightly more polished than everyday wear — a full-coverage foundation applied with a damp beauty sponge provides more coverage than a tinted moisturizer while still looking skin-like. Concealer under eyes and over any blemishes provides the perfected canvas that evening lighting rewards. A warm taupe or brown eyeshadow deepened slightly compared to the daytime brown eye look — spending more time on the crease color and blending it higher toward the brow bone — creates a more deliberate, dressed-up eye.
Soft brown eyeliner along both the upper and lower lash lines, blurred to a smudged rather than crisp line, adds the definition that reads as romantic and thoughtful. Two coats of black mascara (switching from brown to black for evening) intensifies the eye. A lip color with more presence than everyday lip balm — a satin or cream formula in a mauve, dusty rose, or berry shade — provides the evening-appropriate lip that makes the look complete.
How to achieve it step by step: Luminous foundation with sponge. Concealer where needed. Set T-zone lightly with powder. Warm taupe-brown on lid, deeper brown in crease blended high. Brown liner upper and lower lash lines, smudged. Two coats black mascara. Highlight on cheekbones. Mauve or berry satin lip. Total time: fifteen to eighteen minutes.
Pro tip: For evening wear, set the under-eye concealer with a very small amount of loose powder on a tiny brush — evening lighting can make under-eye areas appear creased if the concealer is not set, and a light setting step prevents this without adding a powdered appearance to the skin.
Best for: All skin tones, dinner dates, weddings, evening events
12. The “No Eyeliner” Bold Eye
Many beginners believe that dramatic eyes require eyeliner — but this technique creates genuinely striking eye definition using only eyeshadow, demonstrating that natural makeup looks for beginners can include bold eyes without requiring the precise line-drawing skill that liquid eyeliner demands. This look substitutes a tightlined lower lash line and a deep-blended eyeshadow for the traditional liner-and-shadow combination, producing a result that reads as sophisticated and deliberately made-up while remaining soft and forgiving in its technique.
A medium brown eyeshadow applied with a flat brush along the upper lash line — as close to the lashes as possible — creates the definition of eyeliner in a far more blendable and forgiving format. Apply the shadow first with a precise flat brush directly at the lash line, then blend upward and outward with a soft blending brush to graduate the intensity from its darkest point at the lash line to nothing at the crease. A slightly darker brown or soft black eyeshadow applied wet (with a dampened brush) at the very outer corner of the eye creates a subtle wing effect without the difficulty of actually drawing a wing.
A white eyeliner pencil on the inner waterline makes the eyes appear significantly larger and brighter — this single step counterbalances the darkening effect of the shadow liner and prevents the look from reading as heavy despite the depth of color at the lash line.
How to achieve it step by step: Skin base. Medium brown shadow at upper lash line with flat brush. Blend upward with blending brush. Dark brown or soft black wet shadow at outer corner. White liner inner waterline. Mascara two coats. Neutral glossy lip. Total time: twelve minutes.
Pro tip: Using eyeshadow wet (by dampening the brush before picking up the product) creates a more intense, liner-like deposit of color that dries down to a soft, blended edge — the perfect compromise between the precision of liner and the softness of shadow.
Best for: All eye shapes, beginners who want eye definition without eyeliner skill
13. The Dewy Glass Skin Look
Glass skin — the Korean beauty aesthetic of skin so hydrated and healthy it appears almost reflective — is one of the most admired and searched natural makeup looks for beginners, and its foundation is more about skincare preparation than makeup application. The actual makeup technique is simple; the preparation that makes it work is the more important element.
The glass skin prep sequence is: gentle cleanser, hydrating toner applied in patting motions (never wiping), a hydrating serum, a moisturizer appropriate for your skin type, and a facial mist applied over moisturizer to lock in the layers. This multi-step hydration sequence creates the base of plumped, luminous skin that glass skin makeup builds on — without this preparation, the same makeup products produce a flat, ordinary result rather than the specific glass-like quality the look requires.
Over this prepared skin base, apply a lightweight liquid foundation with a dewy finish using a damp sponge in dabbing motions — never rubbing or buffing, which disrupts the hydrated surface of the skin. A liquid highlighter mixed with the foundation before application creates an all-over glow rather than isolated highlight points. Glass skin is defined by uniform luminosity across the entire face rather than specific highlight placement, which distinguishes it from a standard glowy skin look.
How to achieve it step by step: Full skincare prep — cleanser, toner, serum, moisturizer, facial mist. Mix liquid highlighter with foundation on back of hand. Apply with damp sponge in dabbing motions. Minimal concealer under eyes only. No powder. Clear or nude gloss lip. Total time: fifteen minutes including skincare.
Pro tip: A facial mist applied over the completed glass skin look as a final step adds a fresh, lit-from-within quality that no product can replicate after the fact — a few spritzes from thirty centimeters away refreshes and unifies all products while adding the specific luminosity that makes glass skin so beautiful.
Best for: All skin types (modify moisturizer weight for oily skin), Korean beauty aesthetic enthusiasts
14. The Natural Bridal Makeup Look
The most important makeup look in a woman’s life deserves its own natural tutorial — and the natural bridal look in natural makeup looks for beginners is specifically designed to be beautiful, long-lasting, and genuinely photographable without requiring professional-level technique. The key principle is that bridal natural makeup is the most polished version of your everyday natural look, not a dramatic departure from it.
The skin base for natural bridal makeup requires a primer specifically — bridal events are long, emotionally taxing on skin (tears create their own challenges), and require a foundation that holds through hours of activity, photography, and likely some crying. A pore-filling or blurring primer under a medium-full coverage foundation creates the durability that everyday looks do not need. Set thoroughly with translucent powder, including under the eyes where creasing is most likely.
A champagne or rose gold shimmer eyeshadow on the lid, soft brown in the crease, and a thin brown eyeliner line at the upper lash line — all set with a makeup setting spray — creates the eyes. Soft pink-nude satin lipstick provides the lip. Individual false lashes or a half-lash (applied only to the outer two-thirds of the lash line) add the photographic definition that the biggest photographs of the day reward.
How to achieve it step by step: Primer. Medium-full coverage foundation with sponge. Powder thoroughly. Champagne shimmer on lid. Brown in crease blended. Brown liner upper lash. Full lash or half-lash application. Setting spray. Soft pink-nude satin lip. Total time: twenty-five to thirty minutes.
Pro tip: Practice this complete look at least twice before the wedding day — once a month before and once a week before. This allows you to identify any products that need to be swapped, practice the timing, and ensure the look photographs the way you intend it to in advance rather than discovering surprises on the day itself.
Best for: Brides and wedding party members, formal special occasions
15. The Clean Girl Aesthetic
The clean girl aesthetic — one of the most-searched beauty trends in 2026 — is the most contemporary of all natural makeup looks for beginners: perfect skin, defined brows, gloss lips, and the specific impression of someone who prioritizes genuine skin health over makeup application. The look is aspirational precisely because it appears to require almost no effort, yet the underlying technique — particularly the skin preparation — is more deliberate than it appears.
Clean girl makeup begins with excellent skincare: cleanser, toner, serum, moisturizer, and SPF applied in a ritual that creates the canvas the look depends on. A skin tint or very sheer foundation applied only to areas that need evening out — not as a full-face application — with a damp sponge creates the specific half-coverage that clean girl skin requires: you can see the actual skin beneath the coverage, but it is more even and polished than bare skin.
Perfectly brushed, lightly laminated brows are the defining feature — a clear or light brown brow gel applied after brushing hairs straight upward creates the fluffy, editorial brow quality that reads immediately as deliberately contemporary and on-trend. A single coat of mascara on upper lashes. A touch of cream blush on the cheeks and nose bridge. Glossy lip in a clear or your-lips-but-better nude shade. Simple, considered, and genuinely beautiful.
How to achieve it step by step: Full skincare routine. Sheer skin tint where needed, fingertips only. Cream concealer under eyes. Brush brows upward, apply clear brow gel. One mascara coat upper lashes. Cream blush cheeks and light on nose. Clear or nude gloss lip. Total time: eight minutes.
Pro tip: The clean girl aesthetic is specifically about the quality of the skin appearing genuinely healthy rather than covered — if your skin is congested, tired, or dehydrated, the look reads as thin coverage over imperfect skin rather than naturally beautiful skin. Invest in skincare consistency in the weeks before you begin wearing this look for the best results.
Best for: All skin tones, 2026’s most-trending natural aesthetic, everyday wear
Common Mistakes in Natural Makeup Looks for Beginners
Understanding what not to do is as valuable as technique guidance in all natural makeup looks for beginners. The most common beginner mistakes that undermine otherwise well-executed natural looks are consistently the same across different skill levels and product choices.
The most damaging is foundation shade mismatch — a foundation that is even slightly too light reads as a mask in every lighting condition and undermines every natural look regardless of how well the rest of the application is executed. Always test foundation shades in natural light on the jawline, never the inner wrist, and wear the shade for at least an hour before purchasing.
Over-powdering is the second most common issue — translucent powder should address oiliness and set the skin without flattening its natural texture, and beginners consistently use more than necessary. A single light pass with a large brush covers adequately; multiple passes create the flat, cakey appearance that natural makeup specifically exists to avoid.
Neglecting to blend adequately — whether eyeshadow edges, foundation into the hairline and jaw, or blush toward the temples — creates visible borders between products and the skin that immediately read as amateur application. Blending is not a final optional step but the continuous action that happens during every product application from beginning to end.
Frequently Asked Questions: Natural Makeup Looks for Beginners
What are the most important natural makeup looks for beginners to learn first? The five-minute everyday look, the no-makeup makeup look, and the mascara-only eye look are the three most essential natural makeup looks for beginners to master before any others. These three looks teach the fundamental techniques — skin base application, feature enhancement, and eye opening — that all subsequent makeup skills build on.
What products do I need for natural makeup looks? A tinted moisturizer or skin tint, cream concealer, cream blush, bronzer, mascara, an eyelash curler, a brow pencil and brow gel, one neutral eyeshadow palette, and two or three tinted lip balms cover every natural look in this collection. You do not need a large collection — you need the right products used with consistent technique.
How long does it take to get good at natural makeup looks? Most women find that practicing three to four times per week for three to four weeks produces a significant and noticeable improvement in application technique. Natural makeup looks are genuinely more forgiving than dramatic looks, meaning skill develops faster because minor imperfections are less visible and less impactful on the final result.
What is the difference between a no-makeup look and a natural makeup look? A no-makeup makeup look specifically attempts to be undetectable — the goal is for the wearer to appear genuinely bare-faced while actually wearing makeup. A natural makeup look is visible but enhances features without dramatically transforming them. Both are valid approaches to natural makeup looks for beginners depending on the desired outcome.
How do I make natural makeup last all day? Apply a primer before foundation, set with translucent powder in the T-zone, use a setting spray after completing the look, and carry a blotting paper or compact powder for midday touch-ups. These four steps extend the wear of any natural makeup look significantly without adding complexity to the application process.
Are natural makeup looks appropriate for all occasions? Natural makeup looks span every occasion from grocery shopping to formal weddings — the difference is the level of polish applied within the natural aesthetic. A five-minute everyday look is appropriately casual, while the romantic evening look or natural bridal look are thoroughly appropriate for formal events. The natural framework is infinitely versatile.
Final Thoughts
The natural makeup looks for beginners in this collection prove that beautiful, flattering, and genuinely polished makeup does not require dramatic techniques, expensive products, or years of practice. It requires understanding what you are trying to achieve — enhancing your specific features in their most natural and healthy form — and applying the right products with the right techniques consistently until those techniques become second nature.
Start with the no-makeup makeup look and the five-minute everyday routine. Practice until they feel comfortable. Then add the soft brown eye look and the glowy skin base. Build your collection gradually and your skill set alongside it. Within six to eight weeks of consistent practice, what currently feels uncertain and effortful will feel natural, quick, and genuinely enjoyable.
For complementary beauty inspiration, explore the makeup trends 2026 collection and discover the Korean makeup look 2026 guide on DailyJuggar. Save your favorite tutorials on Pinterest and join our community on Facebook for daily beauty updates.
📌 Save these natural makeup looks for beginners to your Pinterest boards for your next makeup session!
Some nail trends fade fast, others quietly stick around season after season. Almond nail designs 2026 fall firmly into the second category — softer than a square edge, far more wearable day to day than a stiletto point, and somehow just as right in July heat as under a heavy December coat. The shape flatters nearly every hand, which is exactly why it keeps resurfacing as a favorite base for everything from minimalist nudes to full seasonal art.
What makes this year’s crop of almond looks stand out is how much range the shape can hold. Almond nail designs 2026 move comfortably between milky blues and moody navys, holiday snowflakes and sculptural gold lines, without ever losing that elongated, elegant silhouette that made almond popular in the first place. Below are 20 of the most wearable versions worth saving, along with exactly how to recreate each one and where it fits best.
Why the Almond Shape Keeps Winning Every Season
Almond nails sit in a genuinely useful middle ground — long enough to elongate the fingers and give a design some visual room to work with, but rounded enough at the tip that it doesn’t carry the fragility or upkeep of a sharp stiletto shape. That balance is a big reason nail techs keep recommending it to clients who want something photogenic without constant breakage worries.
The shape is also unusually good at carrying both directions at once: a soft milky gradient reads as quiet and minimal on almond, while a deep navy or matte black on the same shape feels bold and sculptural. Few nail shapes flex between those two moods this convincingly, which is exactly why almond nail designs 2026 include everything from barely-there nudes to full graphic statement sets without ever looking mismatched as a category.
1. Soft Milky Blue Almond Nails for a Clean Look
This design leans into barely-there elegance. A smooth almond shape paired with a milky blue gradient creates a polished, calm finish that reads as expensive without trying too hard, sitting right between minimal and directional.
The gradient effect is what elevates this beyond a standard pale blue mani — the color builds gently from the cuticle outward rather than sitting flat, giving the whole nail a soft sense of depth. That subtlety is exactly why this look keeps appearing across both short and medium almond lengths.
It’s genuinely wearable through most of the year, especially late spring into early summer, and pairs easily with linen, denim, and even office-appropriate outfits without ever feeling like it’s trying too hard.
Styling tip: Build a sheer BIAB or builder gel base first, then layer a soft blue gel gradually toward the tip, sealing with a high-gloss top coat for that glassy clean finish.
Best for: Medium almond length, cooler undertones, spring through early summer.
2. Deep Navy Almond Nails with a Modern French Twist
Dark shades have earned a real place in almond nail designs 2026, and this navy look proves why. A bold blue base pairs with a soft diagonal accent that nods to the French tip without following its classic rules, keeping the whole set elegant despite the richness of the color.
Precision matters here more than in a solid color set — the diagonal accent needs a steady hand to read as intentional rather than accidental, so a fine liner brush and a highly pigmented, even-curing navy gel are worth the extra care.
This is a strong pick when you want your nails to feel powerful rather than quiet. It suits longer almond lengths especially well, and works beautifully for evening looks or the colder months when deeper tones feel more grounding.
Styling tip: Use a precision liner brush for the diagonal accent, and choose a navy gel known for curing evenly without streaking.
Best for: Long almond length, all skin tones, evening and colder-weather wear.
3. Pink and Rose Gold Almond Nails with Subtle Art
This is where softness meets sparkle. A blush pink base paired with rose gold shimmer and minimal nail art creates a feminine, elevated look that stays refined rather than crossing into overdone territory.
Fine glitter gel, rather than chunky glitter, is the key material choice — it keeps the shimmer looking like a natural extension of the pink base instead of a separate layer sitting on top. A light hand with rose gold chrome powder can achieve a similar effect if you prefer a smoother finish.
This design works for events, casual weekends, and transitional seasons like early fall alike, which is part of why it remains one of the most consistently requested almond looks across the year.
Styling tip: Use a thin detailing brush to keep any nail art refined rather than busy, and apply rose gold chrome powder sparingly for a soft glow rather than heavy shimmer.
Best for: Medium almond length, warm undertones, events and casual weekends alike.
4. Red Almond Nails with Gold Accents for Statement Style
Red never really disappears, it just evolves. This year, red almond nails feel more sculpted and intentional, especially paired with subtle gold accents that turn a classic color into a confident statement rather than a default choice.
A velvet matte top coat is what gives this look its updated feel, contrasted against metallic gold foil or gel paint details. Clean nail prep matters more than usual on bold, saturated colors like this, since any unevenness in the base shows through clearly.
This is a strong go-to when you want a manicure that feels deliberate rather than default. It’s bold without being loud, and works equally well on medium or long almond lengths.
Styling tip: Use a velvet matte top coat as your base finish, then apply gold foil or metallic gel paint slowly and precisely for clean, luxe detailing.
Best for: Long or medium almond length, all skin tones, evening and statement occasions.
5. Winter Blue Almond Nails with Snowflake Art
Seasonal nails are back in a more refined way this year, and this design is proof. A translucent pink base fades into deep blue tips with delicate snowflake detailing, giving a polished take on winter-themed nails that avoids feeling costume-like.
The almond shape is what keeps this look elegant despite the seasonal motif — a squarer shape with the same design would read more literal, while the tapered almond tip softens the snowflake detail into something more graceful.
It balances festive energy with everyday wearability, which makes it a strong pick for anyone who wants seasonal cues without committing to something too playful for daily life.
Styling tip: Use a dotting tool for symmetrical snowflakes, and keep the white gel paint ultra-fine so the detailing stays delicate rather than heavy.
Best for: Medium almond length, cooler undertones, winter holiday season.
6. Lavender Almond Nails with Winter Snowflake Art
This set leans into a softer side of seasonal nails. A calm, modern lavender base carries gentle white snowflake detailing that references winter without going overboard, working beautifully on both medium and short almond lengths.
A creamy lavender rather than a neon or overly saturated shade is what keeps this design feeling soft and cohesive. Adding a light shimmer accent nail brings extra depth without pulling focus away from the overall calm tone.
This is an easy recommendation for anyone who wants something simple but still seasonal — cozy, soft, and polished, especially paired with winter knits and neutral coats.
Styling tip: Use ultra-thin white gel paint and a liner brush for the snowflake details, and add a single shimmer accent nail for subtle depth.
Best for: Short or medium almond length, all skin tones, winter everyday wear.
7. Elegant White Almond Nails with Red Crystal Details
This manicure is proof that white almond nails don’t have to feel plain. A crisp white base paired with silver striping and red crystal accents turns the look into a refined statement, sitting right between festive and elegant.
High opacity in the white gel is essential here, since a streaky or sheer white undercuts the whole design. Flat-back rhinestones or Swarovski-style crystals, applied with nail glue gel rather than bulky adhesive, keep the finish clean rather than raised and clunky.
This works well as a holiday party manicure that still feels grown-up — bold, but controlled rather than chaotic, and especially suited to longer almond lengths.
Styling tip: Use a high-opacity white gel as the base and apply crystals with a thin layer of nail glue gel to avoid bulk.
Best for: Long almond length, all skin tones, holiday parties and special events.
8. Black Almond Nails with Minimal Floral Design
Dark nails are having a confident moment, and this design shows why. Glossy black almond nails paired with delicate floral accents create contrast without losing sophistication — sleek, modern, and quietly artistic.
The key is restraint on the floral detail. A jet-black gel polish on most nails, paired with a nude or sheer accent nail carrying fine, controlled floral strokes, keeps the whole look feeling intentional rather than heavy-handed.
This is a strong option for anyone moving from minimal nails into more expressive territory. It reads as cool and considered, and works especially well for evening looks or colder seasons.
Styling tip: Use fine brushes and controlled, minimal strokes for the floral accent — less detail reads as more sophisticated here.
Best for: Medium or long almond length, all skin tones, evening and colder-season wear.
9. Classic Red Almond Nails with Playful Holiday Art
There’s something timeless about red almond nails, and this version leans into that classic appeal while adding playful charm. Snowflakes, dots, and a small tree detail make the set unmistakably festive while staying clean and balanced overall.
A true red gel with a glossy top coat forms the base, while white gel paint and a dotting tool handle the small holiday icons. Precision matters more than usual with tiny details like these, since imperfect small icons read as sloppy rather than charming.
This is the kind of design that instantly lifts your mood — joyful but still polished, and especially suited to the colder months when a festive touch feels welcome.
Styling tip: Use a dotting tool for crisp, small holiday icons, and work slowly to keep the tiny details clean.
Best for: Medium almond length, all skin tones, holiday season.
10. Milky Pink Almond Nails with Gold Marble Accents
Soft, elegant, and endlessly wearable, this design captures a lot of what makes milky pink popular this year. A subtle marble effect paired with fine gold accents creates movement without overpowering the nail.
Building the marble effect takes a light hand — a sheer pink builder gel base, followed by white gel applied thinly and worked into soft marbled streaks, keeps the effect looking organic rather than forced. Gold foil or fine metallic gel adds just enough luxury on top.
This is a genuinely safe-but-beautiful option that works year-round and pairs with almost anything, making it a strong pick if you only want to commit to one almond design this season.
Styling tip: Layer white gel thinly and work it while still soft to create natural-looking marble streaks before adding gold foil accents.
Best for: Medium almond length, all skin tones, year-round wear.
11. Playful Blue Almond Nails with Graphic Details
This design feels lighter, fresher, and a little more playful than most on this list. A soft matte blue base mixed with dots, stripes, and a small graphic accent turns the classic almond shape into something fun without losing polish.
Matte finishes tend to read as more modern against graphic detailing than glossy ones, which is why a matte top coat is worth using here instead of the usual high-shine finish. Striping tape or a fine liner brush handles the black detailing cleanly.
This is a strong pick for warmer months when nails can afford to feel a little less serious — youthful, creative, and still surprisingly easy to wear with casual outfits.
Styling tip: Use striping tape for crisp graphic lines if freehand detailing feels tricky, then seal with a matte top coat.
Best for: Short or medium almond length, all skin tones, spring and summer.
12. Pink Almond Nails with Modern French Lines
This set feels like a confident update on the French manicure. Soft pink and coral tones meet sharp black outlining, creating a bold contour effect that makes the almond shape stand out even more than usual.
Precision is everything in this design — a long liner brush and slow, deliberate application are what keep the black outlining crisp rather than shaky. A sheer pink base underneath lets the graphic linework read clearly against it.
This works especially well through transitional seasons, striking a balance that feels polished enough for work but bold enough to feel current and worth a second look.
Styling tip: Use a long liner brush and work slowly for the black outlining — rushing this step is the most common cause of uneven lines.
Best for: Medium almond length, all skin tones, transitional-season wear.
13. Red Almond Nails with Cozy Winter Art Accents
This look blends classic red almond nails with cozy winter charm. A deep glossy red carries the main set, while an accent nail with textured knit-style detailing and small winter motifs adds warmth and personality.
Raised textural details like the knit effect are worth using sparingly — one accent nail is usually enough to add interest without making the set feel bulky or overworked. White sculpting gel handles the texture well when applied in a light, controlled layer.
This is the kind of manicure that makes cold days feel a little warmer — nostalgic, stylish, and well suited to winter wardrobes overall.
Styling tip: Reserve the raised knit-style texture for one accent nail only, using white sculpting gel applied thinly for a clean raised effect.
Best for: Medium almond length, all skin tones, winter wear.
14. Purple Almond Nails with Graphic Snowflake Details
Bold color lovers will appreciate this one. A saturated purple base paired with clean white snowflake and stripe details gives the manicure a graphic, almost editorial edge that still feels seasonal and intentional.
Full opacity in the purple gel matters a lot here, since any sheerness will dull the graphic contrast against the white detailing. Curing each white detail carefully, one layer at a time, keeps the lines sharp and prevents them from bleeding into the purple base.
This is a bold winter choice for longer almond lengths especially, delivering a strong, stylish, and unapologetically graphic look.
Styling tip: Cure each white detail layer separately rather than all at once to keep lines sharp and prevent bleeding.
Best for: Long almond length, all skin tones, winter statement wear.
15. Green Almond Nails with Gold French Accents
This design feels quietly luxurious. A soft nude base paired with sage green tips and fine gold accents creates a refined take on the French tip, elegant and fresh without leaning on any single trend too heavily.
Restraint is the whole point of this look — the gold should accent the green tip, not dominate it. A sheer nude builder gel base and thin gold foil or metallic striping gel keep the balance in check.
This is a design worth bookmarking for its versatility. It works across seasons, feels sophisticated, and pairs beautifully with neutral wardrobes, proving that almond nail designs 2026 can feel both timeless and current at once.
Styling tip: Apply gold foil or metallic striping gel in a single thin line at the tip edge rather than covering the whole green section.
Best for: Medium almond length, all skin tones, year-round wear.
16. Warm Brown Almond Nails with Autumn Leaf Accent
This manicure instantly feels like fall wrapped around your fingertips. Rich brown tones move from deep cocoa to warm caramel, grounded by a single cream accent nail carrying a delicate leaf motif.
Precision matters more than complexity in this design — the leaf detail works best with fine gel paint and a light hand rather than an elaborate, multi-layered illustration. Warm brown gel polishes with a glossy finish carry most of the visual interest on their own.
This is a strong pick for transitional months, pairing perfectly with knits, boots, and neutral layers while always feeling quietly stylish rather than trend-chasing.
Styling tip: Keep the leaf motif simple and use fine gel paint with a light hand rather than attempting heavy detail.
Best for: Long almond length, warm undertones, fall and transitional wear.
17. Nude Almond Nails with Sculptural Gold Line Art
There’s something undeniably elegant about nude almond nails done this way. A soft blush base paired with structured gold line accents turns a minimal manicure into something closer to wearable art.
Clean nail prep is essential here, since nude shades show every imperfection underneath. Metallic striping tape or gold gel paint, applied over a sheer nude builder gel, creates the sculptural line effect without adding bulk.
This is a strong option when you want nails that feel expensive but effortless. It works year-round and rarely feels out of place, regardless of occasion.
Styling tip: Prioritize flawless base prep before adding gold line details, since nude shades reveal any unevenness clearly.
Best for: Medium almond length, all skin tones, year-round wear.
18. Blue Almond Nails with Heart Motifs for a Playful Mood
This set brings pure joy. A soft blue base with simple heart accents feels lighthearted and fresh, especially against warm-weather styling, while the clean shape and glossy finish keep it feeling grown-up rather than juvenile.
Keeping the heart design minimal is what prevents it from tipping into childish territory — a creamy blue gel with small, evenly placed white hearts using detailing gel is enough to carry the whole look.
This is a favorite for spring and early summer days, feeling carefree, sweet, and more versatile than it might first appear.
Styling tip: Keep heart motifs small and place them on just one or two nails rather than the entire set.
Best for: Short or medium almond length, all skin tones, spring and summer.
19. Neutral Almond Nails with Subtle Graphic Accents
Soft taupe and beige tones come together in this understated but thoughtful design. Minimal line art, tiny symbols, and a hint of shimmer create a layered look that rewards a second glance rather than announcing itself immediately.
Spacing the small design elements out, rather than crowding them onto every nail, is what keeps this look feeling intentional. Muted gel shades and ultra-fine detailing brushes are the main tools needed to pull this off cleanly.
This is a strong choice when you want nails that feel calm and considered — the kind of set that fits seamlessly into everyday life and elevates even the simplest outfit.
Styling tip: Space small graphic accents across only a few nails rather than repeating the same detail on every finger.
Best for: Medium almond length, all skin tones, everyday wear.
20. Deep Blue Almond Nails with Soft Floral Accent
This final look feels bold yet balanced. A glossy deep blue dominates the set, softened by a milky white accent nail carrying a subtle floral detail — dramatic without tipping into heavy.
A highly pigmented blue gel against a sheer white base for the accent nail creates strong contrast while keeping the floral detail delicate. A small crystal or dot placed near the floral motif adds dimension without overpowering the design.
This is the kind of look to reach for when you want your nails to feel confident and intentional. It works beautifully on longer almond lengths and proves that bold color can still feel refined.
Styling tip: Keep the floral motif confined to one accent nail and add a single small crystal for dimension rather than multiple embellishments.
Best for: Long almond length, all skin tones, evening and statement wear.
How to Choose Your Almond Nail Design for 2026
Start by thinking about length and lifestyle together. Longer almond nails carry sculptural details like gold line art or crystal accents especially well, but they do require a bit more care day to day. Shorter or medium almond lengths handle graphic, playful designs — like the heart motifs or matte blue stripes — just as elegantly while staying lower-maintenance.
From there, consider how much color commitment you actually want this season. Neutral and milky tones (soft blue, blush pink, nude) work as close to year-round bases, while richer colors like navy, red, or purple tend to feel most at home in fall and winter. If you’re newer to nail art, pick a design that isolates the detail work to a single accent nail, the same principle that makes several of the looks above easy to recreate at home.
Frequently Asked Questions About Almond Nail Designs 2026
What makes almond nail designs 2026 different from previous years? This year’s almond looks lean more toward restraint and precision — milky gradients, sculptural gold lines, and single-accent-nail detailing — rather than covering every nail in heavy embellishment, which is a shift from busier styles seen in past seasons.
Are almond nail designs 2026 suitable for short nails? Yes — several looks above, including the milky blue gradient and lavender snowflake designs, are specifically built to work on short or medium almond lengths without losing their intended effect.
Do almond nail designs 2026 work well for the workplace? Many of the more neutral and nude-based looks, like the sculptural gold line art or the green French accent design, are refined enough to read as professional and office-appropriate.
How long do almond gel nail designs typically last? A well-applied gel set on an almond shape generally lasts two to three weeks before a fill is needed, similar to other shapes, though almond’s tapered tip can be slightly more prone to snagging than a squared edge if nails are kept very long.
What nail shape pairs best with bold color in almond nail designs 2026? Longer almond lengths tend to showcase bold, saturated colors like navy, red, and purple most dramatically, since there’s more surface area for the color and any accent detailing to read clearly.
Can I recreate these almond nail designs 2026 looks without a nail salon? Most of the designs above only require basic gel polish, a fine liner or detailing brush, and occasionally a dotting tool or striping tape, making them realistic to attempt at home with a bit of patience.
Final Thoughts on Almond Nail Designs 2026
From milky blue gradients to sculptural gold line art, almond nail designs 2026 confirm why this shape keeps earning its place season after season — it flatters, it elongates, and it can carry almost any color or detail without ever losing its elegance. Pick one length that suits your daily routine, one color story for the season, and build your next set from there.
📌 Pin this post so you can come back to these almond nail designs 2026 anytime you need fresh inspiration before your next appointment.
There’s a reason the coffin shape refuses to go out of style — it’s sharp without being harsh, long without being impractical, and it gives every design a little extra runway to work with. Coffin nail designs 2026 are proving that all over again, mixing rich solid color with glossy chrome, moody matte finishes, and detail work that actually holds up to daily life. This isn’t a shape you settle for; it’s one you choose because it makes everything look a touch more deliberate.
What I love most about this year’s crop of coffin nail designs 2026 is the range. Some looks are quiet and polished, made for the office or a coffee run. Others are loud on purpose — chrome finishes, marbled swirls, hand-painted detail that turns your hands into their own little art piece. Whatever mood you’re chasing, there’s a set here worth screenshotting. Let’s get into the list.
1. Ink Navy Power Set
A saturated, near-black navy covers the nail in this look, polished to a mirror-glass shine. There’s nothing fussy about it — just deep, confident color on a long, sharp coffin tip. It reads powerful in a quiet way, the kind of manicure that doesn’t need embellishment to make an impression.
This shade keeps showing up across coffin nail designs 2026 because it works as a genuine alternative to classic black without losing any of the drama. It slides easily from a blazer to an oversized sweater, which makes it one of the most versatile dark tones on this list.
Solid navy holds its color well over two to three weeks, especially with a strong glossy top coat sealing in the shine. It suits every skin tone and works equally well for the office, dinner plans, or just an ordinary Tuesday when you want to feel put together.
Styling tip: Apply two thin, even coats rather than one thick one for the deepest, most even color payoff.
Best for: Medium to long coffin tips, all skin tones, everyday to formal wear.
2. Espresso Glaze Coffin
This warm, glassy brown looks almost good enough to drink. The high-shine finish gives it a rich, almost syrupy depth, and paired with a clean coffin shape, it comes across as elevated without trying too hard. It’s the kind of neutral that never actually reads as boring.
Warm browns have become a defining color story within coffin nail designs 2026, offering something richer than a typical nude while still staying easy to wear. It’s become a go-to for anyone who wants a manicure that feels put-together but doesn’t compete with the rest of their look.
This finish wears gracefully and tends to hide small chips better than lighter shades. It flatters medium and deeper skin tones especially well, though it genuinely suits everyone, and works for both casual days and dressed-up occasions.
Styling tip: Keep cuticles well hydrated — glossy espresso tones show off healthy-looking skin around the nail.
Best for: Any nail length, medium to deep skin tones, everyday wear.
3. Matte Forest Fade
A gradient that moves through brown, olive, and deep evergreen gives this design a layered, earthy feel, finished with a soft matte top coat instead of the usual gloss. It looks a little artistic, a little moody, and completely intentional.
Multi-tone matte fades have carried serious momentum into coffin nail designs 2026, mostly because they offer texture and depth without needing intricate line work. It’s an easy way to feel creative without committing to full-on nail art.
Matte finishes tend to show wear slightly faster than glossy ones, so capping the free edge with each coat helps prevent early chipping. This look complements every skin tone and pairs beautifully with neutral, earth-toned outfits.
Styling tip: Use a separate brush for each shade so the colors stay clean instead of muddying together.
Best for: Medium to long coffin tips, all skin tones, casual and creative settings.
4. Chrome Teal Statement
Full mirror-chrome in a bold teal turns this manicure into a genuine event. It’s shiny, a little futuristic, and impossible to ignore — the kind of look that catches reflections every time your hand moves. On long, sharp coffin tips, it feels glamorous rather than gimmicky.
This look has found a real following within coffin nail designs 2026 because it offers drama that goes beyond the usual solid colors and soft shimmer. It’s become a favorite for anyone who wants their manicure to double as a statement piece.
Chrome finishes can show fingerprints more easily, so handling with a bit of care and refreshing the top coat weekly keeps it looking sharp. It suits every skin tone and is especially fun for parties, events, or any day you want your hands to steal the spotlight.
Styling tip: Apply chrome powder in small circular motions for the most even, mirror-like finish.
Best for: Long coffin tips, all skin tones, statement occasions.
Why Coffin Shape Keeps Leading Nail Trends
Out of every nail shape available, coffin continues to dominate — and it’s not just about looks. The flat, tapered tip gives designers more surface area to work with than almond or round shapes, which is part of why so many of the boldest coffin nail designs 2026 lean into gradients, marbling, and fine detail work. There’s simply more canvas to play with.
There’s also a styling advantage. The elongated shape makes hands appear longer and more slender, and the squared-off tip keeps the whole look feeling structured rather than delicate. That combination of drama and durability is exactly why the shape has stayed relevant season after season instead of fading out like so many nail trends before it.
5. Olive & Glitter Accent
A rich, murky olive covers most nails, while one glitter-drenched accent nail adds a burst of sparkle. It’s a combination that somehow reads both minimal and festive at the same time — earthy enough for daily wear, sparkly enough to feel a little special.
This pairing keeps appearing throughout coffin nail designs 2026 because it lets you enjoy a bold, sparkly moment without covering every nail in glitter. It’s a smart middle ground for anyone who wants some shine without full commitment.
The solid olive nails wear well over time, and since only one nail carries the glitter, upkeep stays fairly simple. It flatters every skin tone and suits everything from a casual coffee run to a holiday gathering.
Styling tip: Apply two coats of glitter polish over a clear base on the accent nail to build dimension without clumping.
Best for: Medium coffin tips, all skin tones, casual to festive wear.
6. Creamy Beige Minimalism
A soft, universally flattering beige covers the nail in this design, kept clean and understated on a medium-length coffin shape. There’s a quiet confidence to it — the kind of manicure that lets your outfit, not your nails, take center stage.
This shade has held steady as one of the most requested picks within coffin nail designs 2026, especially among people who want something polished for work or professional settings. It’s proof that a simple solid color can still feel current when the shape and finish are right.
Thin, even coats are key here since anything applied too thick can look streaky. This tone suits every skin tone and works for essentially any occasion, from job interviews to weekend brunch.
Styling tip: Stick to two thin coats and finish with a glassy top coat for a smooth, non-streaky result.
Best for: Medium coffin tips, all skin tones, work and everyday wear.
7. Black & Nude Geometry
Clean black lines cut across a sheer nude base in this design, creating a graphic, almost architectural look. A few tiny flecks of silver glitter keep it from feeling too severe. It’s edgy but still office-appropriate, which is a harder balance to strike than it sounds.
Geometric, negative-space designs have carried real momentum into coffin nail designs 2026, offering a way to look intentional and artistic without needing free-hand painting skills. Striping tape makes the sharp lines achievable even for a first attempt at home.
Because the design relies on clean lines rather than delicate detail, it tends to wear evenly and look sharp until your next fill. It suits every skin tone and moves easily between office days and dinner plans.
Styling tip: Use thin striping tape to map out your lines before filling in the black gel for crisp, professional-looking edges.
Best for: Medium to long coffin tips, all skin tones, office to evening wear.
8. Burgundy Marble Swirl
Deep burgundy swirls into soft white in this design, creating a marbled effect that looks a little different on every nail. It’s fluid and almost hypnotic, similar to watching wine swirl in a glass — moody, decadent, and undeniably eye-catching.
Marbled techniques remain one of the standout methods within coffin nail designs 2026, mostly because they deliver serious visual interest without needing precise symmetry. The imperfect, organic quality is actually the whole point.
This design tends to age gracefully since the abstract swirl pattern hides minor wear better than a solid color would. It complements every skin tone and works beautifully for gallery openings, dinners out, or any occasion that calls for a little extra artistry.
Styling tip: Swirl the colors together with a fine needle tool while the polish is still wet for the most natural marbled texture.
Best for: Long coffin tips, all skin tones, evening and special occasions.
9. Blush-to-Magenta Fade
A soft blush base fades gradually into a deeper magenta at the tips, giving this design a romantic, almost golden-hour quality. It’s dramatic in color but kept approachable by a shorter coffin length, which makes the whole look easygoing rather than precious.
Ombré techniques continue to be a favorite within coffin nail designs 2026 because they’re genuinely forgiving to recreate — no fine detail work required, just a steady hand and a makeup sponge. That accessibility is a big part of why this look keeps trending.
The gradient wears evenly as it grows out since there’s no hard line to maintain. It suits every skin tone and works nicely for everyday wear, especially if you’re trying to stretch time between salon visits.
Styling tip: Dab the two shades together gradually with a damp makeup sponge rather than blending with a brush for the smoothest fade.
Best for: Short to medium coffin tips, all skin tones, everyday wear.
10. Mocha with Minimalist Bling
A warm, taupe-brown base gets one small crystal placed near the cuticle of each nail in this design. It’s understated but never plain — like a favorite leather bag or a warm cup of cocoa translated into a manicure. The sparkle catches light just enough to feel intentional.
This pairing of neutral color and minimal sparkle has become a signature combination within coffin nail designs 2026, appealing to anyone who wants a set that feels expensive without being loud. It reads polished in literally any setting.
The solid base wears well over time, and because there’s only a single small gem per nail, the design tends to look tidy even as it grows out. It flatters every skin tone and suits both everyday wear and slightly dressier occasions.
Styling tip: Use a no-wipe top coat to set the crystals so they stay firmly in place between appointments.
Best for: Medium coffin tips, all skin tones, everyday to semi-formal wear.
11. Classic Burgundy Solid
Every trend list needs one true staple, and this wine-toned burgundy earns its spot. It’s rich, glossy, and instantly polished — the kind of color that makes you feel put-together even on an otherwise low-key day. On a sharp coffin tip, it reads sophisticated without feeling dated.
Burgundy remains one of the most consistently popular shades within coffin nail designs 2026, largely because it works across nearly every season and occasion. It’s the rare color that feels both timeless and current at once.
A ridge-filling base coat helps this shade look flawless, since deep, glossy polish tends to reveal any texture underneath. It suits every skin tone and moves effortlessly from casual dinners to business meetings.
Styling tip: Use a smoothing base coat first — deep glossy shades show every imperfection, so a flawless canvas matters.
Best for: Any coffin length, all skin tones, versatile day-to-night wear.
12. Emerald Chrome & Matte Black
Shiny emerald chrome pairs with matte black accent nails in this design, creating a moody, dimensional look that feels a little architectural. The contrast between high-shine and flat matte is really what makes it stand out — rich without being overdone.
Chrome-and-matte combinations have picked up serious traction within coffin nail designs 2026, offering drama through texture contrast rather than color alone. It’s a technique that photographs beautifully under both daylight and evening lighting.
Because the design mixes finishes, a careful top coat application on the chrome nails helps preserve that mirror shine longest. It works for every skin tone and suits formal dinners, weddings, or any event where you want your hands to feel deliberate.
Styling tip: Seal chrome nails with a no-wipe top coat and leave the matte nails uncoated to preserve the texture contrast.
Best for: Long coffin tips, all skin tones, formal and evening occasions.
13. Lilac & Swirl Accent
A soft lilac base gets one accent nail featuring a delicate, topographic-style swirl in white or light gray. It’s playful without being childish, and the swirl detail gives it a subtle, artistic edge that keeps the overall look from feeling too sweet.
Lilac has quietly built momentum as one of the more unexpected shades within coffin nail designs 2026, offering something different from the usual neutral or jewel-tone options. It works well for anyone who wants a touch of color without going bold.
The solid lilac nails wear cleanly over time, and the single detailed accent nail keeps maintenance simple. It suits every skin tone and pairs beautifully with soft knitwear or a relaxed, low-key outfit.
Styling tip: Use a fine liner brush or a stamping plate for the swirl detail if freehand isn’t your strong suit.
Best for: Medium coffin tips, all skin tones, casual and everyday wear.
14. Candy Apple Red Gloss
A punchy, high-shine red covers the nail edge to edge in this design, polished until it looks almost lacquered. It’s retro in the best way — think vintage convertibles and old-school glamour — but on a sharp coffin tip, it feels current rather than nostalgic.
Red never really leaves the conversation, and within coffin nail designs 2026 it keeps earning its spot because it works for nearly every occasion, from holiday parties to an ordinary Tuesday when you want a confidence boost. It’s bold without needing any extra detail to back it up.
Red does tend to chip a little faster at the tips than deeper shades, so a fresh coat of top coat every week or so helps it stay glossy. It flatters every skin tone and suits both dressed-up evenings and casual daytime wear equally well.
Styling tip: Seal the free edge of each nail carefully with the top coat — this is where red chips first and fastest.
Best for: Medium to long coffin tips, all skin tones, everyday to festive wear.
15. Plum Wine Shine
A deep, glossy plum sits right between burgundy and true purple, giving this design a rich, jewel-toned depth. The high shine keeps it feeling luxurious rather than heavy, especially when it catches light against gold jewelry or a satin sleeve.
This shade has carved out its own space within coffin nail designs 2026 as an alternative to the more common burgundy and navy options. It offers the same moody sophistication but with a slightly softer, more romantic edge.
Glossy plum wears well over several weeks and tends to look rich even as it starts to grow out. It suits every skin tone and works beautifully for cold-weather evenings, dinner parties, or any occasion that calls for a bit of extra glamour.
Styling tip: Choose a glossy top coat over a matte one here — the shine is what makes this color read as luxurious rather than flat.
Best for: Any coffin length, all skin tones, evening and cold-weather occasions.
16. Twisted Cranberry French
This design reimagines the classic French manicure with a creamy almond-toned base and cranberry-red tips, finished with an unexpected diagonal flick on the accent nail instead of a straight line. It feels vintage and modern all at once.
Reworked French tips keep showing up throughout coffin nail designs 2026 as people look for ways to update a classic without losing what makes it timeless. The colored tip and asymmetrical detail give it just enough personality to stand out from a typical French set.
This design holds up nicely as it grows out since the tip color naturally masks regrowth better than a solid color would. It suits every skin tone and works especially well for celebratory dinners, holidays, or any event with a bit of dress-up energy.
Styling tip: Use a curved brush or a French tip guide sticker to get a clean, confident sweep across the nail in one motion.
Best for: Medium to long coffin tips, all skin tones, celebratory occasions.
17. Stardust Celestial Blue
A muted, dusty slate blue serves as the base for this design, with tiny hand-painted white stars scattered across the nail like a clear night sky. It’s quiet and a little magical, without ever tipping into costume territory.
Celestial detailing has become a recurring theme within coffin nail designs 2026, offering a whimsical touch that still reads as sophisticated thanks to the muted color palette. It’s a favorite for anyone who wants a little storytelling in their manicure.
Because the stars are fine detail work, a strong top coat helps keep them crisp and prevents smudging over time. This look suits every skin tone and pairs beautifully with cozy, low-key outfits during the colder months.
Styling tip: Use a fine dotting tool or a toothpick dipped in white gel for clean, consistent star shapes.
Best for: Medium coffin tips, all skin tones, casual and cold-weather wear.
18. Electric Cobalt Pop
A vivid, saturated cobalt blue takes center stage in this design, applied as a clean solid color with no gradient or detail to soften it. It’s bold, energizing, and exactly the kind of color that cuts through a season of neutral layering.
This shade has become a favorite within coffin nail designs 2026 for anyone who wants a genuine pop of color rather than another muted or jewel-toned option. It reads confident and a little rebellious in the best possible way.
Bright blues can sometimes stain the natural nail, so a quality base coat is essential before application. It suits every skin tone and works well for anyone looking to break up an otherwise neutral wardrobe with something unexpected.
Styling tip: Always apply a pigmented base coat first to prevent blue staining, especially if you plan to switch colors again soon.
Best for: Short to medium coffin tips, all skin tones, casual and everyday wear.
19. Soft Pink Heart Accent
A gentle blush-pink base gets a delicate, hand-painted heart outline on one or two accent nails in this design, finished with a few tiny rhinestones for sparkle. It’s romantic without being overly sweet, especially on a clean, squared-off coffin tip.
Minimalist heart and romantic detailing continue to trend within coffin nail designs 2026, offering a softer counterpoint to the bolder chrome and jewel-tone looks on this list. It’s an easy way to add a little sentiment to an otherwise simple manicure.
The solid blush base wears cleanly, and because only an accent nail or two carries the detailed design, touch-ups stay simple. It suits every skin tone and works nicely for date nights, anniversaries, or just a bit of everyday self-care.
Styling tip: Outline the heart in a thin white liner first, then fill in lightly so the shape stays clean and symmetrical.
Best for: Short to medium coffin tips, all skin tones, romantic and everyday occasions.
20. Champagne Gold Foil Chrome
A warm, creamy champagne base gets scattered gold foil accents in this design, giving it a celebratory, almost jewelry-like finish. It feels dressed up without being overly formal, which makes it one of the more versatile statement looks on this list.
Gold foil detailing has held a steady place within coffin nail designs 2026, especially heading into celebratory seasons and year-end events. It offers festive shine without leaning on red or green, making it easy to wear well beyond the holidays.
Foil accents are delicate, so sealing them under a strong glossy top coat is key to keeping them intact. This look flatters every skin tone and suits New Year’s plans, anniversaries, or any occasion that calls for a bit of extra shine.
Styling tip: Press the foil pieces on while the polish is still slightly tacky so the edges tear naturally instead of sitting flat and uniform.
Best for: Medium to long coffin tips, all skin tones, celebratory occasions.
How to Choose the Right Coffin Nail Design for You
With so many coffin nail designs 2026 to pick from, the decision usually comes down to how much detail you want and how the shape fits your lifestyle. If your days are busy and hands-on, solid colors or subtle gradients tend to hold up better and require less careful handling than fine line work or delicate marbling. If you have more patience for upkeep, hand-painted detail, chrome finishes, and marbled swirls offer a lot more personality per set.
Coffin length matters too. Longer tips give you more room for gradients, swirls, and layered detail, while shorter coffin shapes tend to look cleanest with solid color or simple accent nails. And don’t underestimate finish — glossy solids photograph beautifully and go the longest between touch-ups, while matte and textured finishes bring a completely different, more tactile mood to the same shape.
What Makes a Coffin Shape Work for Almost Anyone
One thing that sets coffin nails apart from other trending shapes is how adjustable they are. Length, tip width, and how tapered the sides are can all be adjusted slightly to flatter different hand shapes, which is part of why the style has stayed a constant across so many seasons of coffin nail designs 2026. A slightly shorter, less tapered coffin reads more casual and low-maintenance, while a longer, sharply angled version leans dramatic and editorial.
If you’re trying the shape for the first time, it’s worth asking your nail tech to start on the shorter, more moderate end. You can always go longer or sharper at your next appointment once you know how the shape feels in daily life — typing, cooking, and getting dressed included.
Frequently Asked Questions About Coffin Nail Designs 2026
What colors are most popular in coffin nail designs 2026? Deep, rich tones like burgundy, navy, and emerald are trending alongside warm neutrals like espresso and mocha, plus statement chrome finishes in teal and green.
Are matte or glossy finishes trending more this year? Both have a strong presence, but matte and textured finishes have gained noticeable ground within coffin nail designs 2026 for their moody, tactile appeal.
How long do coffin nail designs typically last? Most gel-based coffin sets last two to three weeks with proper care, though designs with fine detail like marbling or hand-painted accents may need a bit more gentle handling.
Can I recreate coffin nail designs 2026 at home? Solid colors, simple ombré fades, and single accent-nail designs are very doable at home. Chrome finishes and detailed marbling are usually easier to achieve with professional tools and experience.
Does the coffin shape suit every nail length? Coffin shapes work best on medium to long nails since the flat, tapered tip needs some length to really show off. Shorter coffin shapes are possible but offer less visual impact.
Do these coffin nail designs suit all skin tones? Yes — the majority of looks on this list were chosen because they work across a wide range of skin tones, though a few warm neutrals and cool jewel tones may lean slightly toward specific undertones.
Final Thoughts
From quiet, polished neutrals to bold chrome statements, coffin nail designs 2026 prove that this shape still has plenty of room to surprise. Whether you gravitate toward a classic solid or something with a little more artistry, there’s a set on this list worth trying — or at least saving for your next appointment.
📌 Loved these looks? Pin your favorites to your nail inspiration board so you don’t lose them before your next salon visit.
There’s a particular kind of joy that comes with the first cold snap of the year — pulling out your favorite sweater, reaching for a warmer coffee order, and giving your nails a seasonal refresh. That’s exactly where winter nail designs 2026 come in. This year’s palette leans into contrast: icy shimmer next to deep, velvety color, delicate hand-painted detail next to bold metallic shine. It’s a manicure mood board that feels equal parts cozy and glamorous.
What makes winter nail designs 2026 so fun to explore is how personal they can be. Some of these looks are quiet and understated, made for slipping your hands into gloves without a second thought. Others are meant to be noticed — chrome finishes, sculpted accents, glitter gradients that catch every bit of holiday light. Whichever mood you’re in, there’s a design on this list built for it. Save your favorites, screenshot the polish names, and let’s get into it.
1. Frosted Silver Minimalism
This look starts with a sheer, almost-there silver base that catches light without ever feeling loud. It’s the kind of manicure that photographs beautifully in low winter light, giving off a soft metallic glow rather than a full-on shine. The finish reads polished and expensive without requiring a single embellishment.
It’s trending right now because it fits into the broader “quiet luxury” moment happening across fashion and beauty. People want their manicures to feel considered, not busy, and this design nails that balance. It also happens to be one of the lowest-maintenance options on this list, which matters when your schedule gets packed with holiday plans.
This one holds up well through two to three weeks of wear since there’s no fine detail work to chip or smudge. It looks especially good against fair to medium skin tones and works for literally any occasion, from the office to a formal dinner.
Styling tip: Pair this with silver jewelry and let your hands do double duty as an accessory on their own.
Best for: Almond or oval nail shapes, fair to medium skin tones, everyday wear.
2. Deep Emerald Velvet
Few colors say “winter” quite like a deep, saturated emerald. This design uses a matte or semi-matte finish to give the green a velvety, almost fabric-like texture, which is a big departure from the glossy greens you’d see in other seasons. It feels rich without trying too hard.
Deep jewel tones are having a real moment within winter nail designs 2026, and emerald in particular pairs beautifully with the darker days of the season. It photographs well both indoors under warm light and outdoors against snow, which makes it a favorite for holiday photos.
Matte emerald tends to show wear a bit faster than glossy finishes, so it’s best refreshed weekly if you want it looking crisp. It flatters nearly every skin tone and works especially well for evening events or festive gatherings.
Styling tip: Skip a top coat entirely to keep that soft matte texture intact for as long as possible.
Best for: Medium to long nails, all skin tones, evening or holiday occasions.
3. Snow-Kissed Nude French
The French manicure keeps reinventing itself, and this version swaps the classic white tip for a barely-there icy white with a subtle shimmer running through it. The nude base underneath is warmer than the typical French pink, giving the whole look a softer, more natural finish.
This take on the French tip is popular because it works for people who want something polished but not attention-grabbing. It’s become one of the most requested salon looks this season precisely because it reads as effortless while still being deliberate.
It grows out gracefully, which is a big plus if you’re not able to get regular touch-ups during a busy season. It suits every skin tone and nail shape, making it one of the most universally flattering picks on this entire list.
Styling tip: Ask your nail tech for a slightly rounded tip line instead of a sharp one for an even softer effect.
Best for: Any nail shape, all skin tones, work or everyday settings.
4. Midnight Sapphire Shimmer
This design takes deep navy blue and adds a fine, almost dust-like shimmer that only reveals itself when your hand catches the light. From a distance it reads as a rich solid color; up close, it’s full of tiny sparkle. That layered effect is what makes it feel special.
Blue has become one of the standout colors within winter nail designs 2026, largely because it offers drama without veering into the expected reds and greens of the holiday season. It gives you a festive feeling while still looking sophisticated enough for daily wear.
The shimmer finish holds up nicely over time since it doesn’t rely on delicate line work. It looks stunning against darker skin tones especially, though it complements every complexion, and works well for both daytime errands and evening plans.
Styling tip: Use a single glitter accent nail instead of shimmer on all ten for a slightly more subdued version.
Best for: Medium to long nails, all skin tones, versatile day-to-night wear.
Why Winter 2026 Nail Trends Are Leaning Into Texture
If you look closely at this season’s most popular looks, one thing stands out: texture is doing a lot of the work. Matte finishes, velvet-effect polishes, and soft shimmer are showing up far more than the high-shine, glassy looks that dominated warmer months. Part of this comes down to seasonal mood — winter feels tactile, layered, and cozy, and nail art is simply following that lead.
There’s also a practical side to it. Textured finishes tend to hide small imperfections and everyday wear better than glossy ones, which makes them a smart choice during a season packed with cooking, gift-wrapping, and general hands-on activity. Expect to see this texture-forward approach carry through the rest of winter nail designs 2026, especially in matte jewel tones and soft-shimmer neutrals.
5. Cozy Cinnamon Chrome
Warm metallics are having a serious moment, and this cinnamon-toned chrome finish is proof. It sits somewhere between rose gold and copper, giving off a warm, almost candlelit glow that feels tailor-made for shorter, darker days.
This design has picked up steam because it offers the drama of a chrome manicure without leaning into the cooler silvers and icy blues that can feel a little clinical. It’s warm, wearable, and pairs beautifully with the browns and creams dominating winter wardrobes right now.
Chrome finishes can show fingerprints and light scratching more than other textures, so a fresh top coat every week or so keeps it looking its best. It’s especially flattering on warmer undertones and works beautifully for both casual outings and dressier occasions.
Styling tip: Apply chrome powder over a fully cured gel base for the smoothest, most mirror-like finish.
Best for: Short to medium nails, warm undertones, casual to semi-formal wear.
6. Holographic Ice Ombré
This look blends a pale, icy blue base into a soft holographic finish at the tips, creating a gradient that shifts color depending on the light. One moment it looks silvery-blue, the next it flashes hints of lavender and pink.
Holographic finishes keep resurfacing in winter nail designs 2026 because they capture that “frozen, sparkling” feeling people associate with the season without needing any hand-painted detail. It’s a technique-forward look that still feels approachable enough to try at home with the right products.
Because the holographic effect relies on fine particles, it’s best sealed with a strong top coat to prevent premature dulling. This look suits fair to medium skin tones especially well and feels right at home at holiday parties or winter weddings.
Styling tip: Apply the holographic polish only to the top third of the nail for a gradient rather than an all-over effect.
Best for: Medium nails, fair to medium skin tones, festive occasions.
7. Plum Wine Elegance
A deep, wine-adjacent plum has become one of the most requested shades this season, and it’s easy to see why. It reads darker than a classic red but warmer than a true purple, landing in this rich, grape-like space that feels instantly luxurious.
This shade is popular because it works as a genuine red alternative for people who want something a little moodier for winter. It’s become a go-to within winter nail designs 2026 for anyone attending holiday dinners who wants a color that photographs beautifully under warm restaurant lighting.
Plum wears exceptionally well and tends to hide minor chipping better than brighter reds. It flatters nearly every skin tone and works for both office settings and evening events without needing any adjustment.
Styling tip: Keep the finish glossy rather than matte to let the wine-toned depth really shine through.
Best for: Any nail length, all skin tones, office or evening wear.
8. Pearl White Snowflake Art
A soft pearl-white base becomes the canvas for delicate, hand-painted snowflakes in this design. The pearl finish gives the white a gentle shimmer rather than a flat, stark look, which keeps the whole manicure feeling soft instead of clinical.
This design remains one of the most searched-for winter nail designs 2026 because it captures the season’s imagery directly without feeling costume-like. The fine detail work makes it feel special-occasion-worthy, while the pearl base keeps it wearable for everyday life too.
Because it involves fine linework, this design benefits from a glossy top coat to protect the details from chipping. It works on every skin tone and looks particularly striking on longer nail shapes where there’s more canvas for the snowflake detail.
Styling tip: Vary the size of the snowflakes across your nails rather than repeating the exact same design for a more natural, hand-drawn feel.
Best for: Medium to long nails, all skin tones, holiday gatherings.
9. Charcoal Matte Sophistication
A muted charcoal gray with a full matte finish gives this manicure a moody, editorial feel. It’s darker than a classic gray but stops short of true black, landing in this in-between space that feels modern and a little unexpected.
Matte darks have become a favorite within winter nail designs 2026 for anyone who wants drama without glitter or shine. It pairs beautifully with the neutral, tonal outfits that tend to dominate winter wardrobes, making it an easy match for daily styling.
Matte finishes generally show wear a bit sooner than glossy ones, so keep a matte top coat on hand for quick touch-ups. This look suits every skin tone and feels equally at home running errands or dressing up for a night out.
Styling tip: Add one glossy accent nail to break up the matte finish and add visual interest.
Best for: Short to medium nails, all skin tones, everyday to evening wear.
10. Ruby Red Glitter Fade
Classic red gets a refresh here with a glitter gradient that fades from a solid ruby base into scattered fine glitter at the tips. It keeps the timeless appeal of red nails while adding just enough sparkle to feel current.
Red remains one of the most enduring colors within winter nail designs 2026, largely because it works for literally every winter occasion — holiday parties, family dinners, New Year’s plans. This glitter-fade version updates the classic without straying too far from what makes red nails so beloved in the first place.
The glitter portion holds up nicely since it’s sealed under a top coat, though the solid red base may need a touch-up sooner if you’re especially hard on your hands. It complements every skin tone and remains one of the most versatile picks on this list.
Styling tip: Use a makeup sponge to dab the glitter on for a soft, gradual fade rather than a hard line.
Best for: Any nail shape, all skin tones, holiday and festive events.
11. Champagne Gold Foil
This look pairs a warm, creamy champagne base with delicate gold foil accents scattered across one or two nails. The effect feels celebratory without being over the top, like a manicure dressed for a toast.
Metallic gold has cemented itself as a staple within winter nail designs 2026, especially heading into New Year’s celebrations. It offers a festive touch that doesn’t rely on red or green, making it a great option for anyone who wants to feel dressed up without leaning into traditional holiday colors.
Foil accents tend to be delicate, so sealing them well with a glossy top coat is essential for longevity. This design flatters every skin tone and works beautifully for New Year’s Eve, anniversaries, or any occasion that calls for a little extra shine.
Styling tip: Apply the foil pieces while the polish is still slightly tacky so they adhere with natural, organic edges.
Best for: Medium nails, all skin tones, celebratory occasions.
12. Frosted Lavender Whisper
A pale, icy lavender with a soft frosted finish gives this design a gentle, almost powdery look. It’s not quite purple and not quite gray, sitting in this soft in-between shade that feels calm and a little dreamy.
This color has grown in popularity because it offers something different from the usual winter neutrals without being too bold. Within winter nail designs 2026, it’s become a favorite for anyone who wants a manicure that feels soft and a little romantic during an otherwise cold, stark season.
The frosted finish wears gracefully and tends to look good even as it grows out, since there’s no sharp line to maintain. It suits cooler undertones especially well and works nicely for both daytime and evening wear.
Styling tip: Pair with silver rather than gold jewelry to keep the cool-toned palette consistent.
Best for: Short to medium nails, cool undertones, everyday wear.
13. Navy Starlight Constellation
A deep navy base gets scattered with tiny hand-painted stars in this design, mimicking a clear night sky. Some nails carry just a few scattered stars while an accent nail might feature a small constellation shape connected with fine lines.
This design taps into the celestial trend that keeps resurfacing within winter nail designs 2026, offering a bit of whimsy without feeling childish. It’s become especially popular for winter travel and vacation photos, where the deep blue pairs beautifully against snowy backdrops.
Because the detail work is fine, a strong glossy top coat helps protect the design from smudging. It looks striking on every skin tone and works well for both everyday wear and special winter getaways.
Styling tip: Use a dotting tool for the stars rather than a brush for cleaner, more consistent dots.
Best for: Medium to long nails, all skin tones, travel and special occasions.
14. Cocoa Latte Warmth
This design uses a warm, milky brown reminiscent of a latte, finished with a soft satin sheen rather than high gloss. It’s a color that feels instantly cozy, almost like an extension of your favorite winter drink.
Warm neutrals have become a defining thread throughout winter nail designs 2026, offering an alternative to the icy blues and silvers that dominate typical seasonal palettes. This shade works especially well for anyone who wants a manicure that feels grounded and low-key rather than flashy.
It wears well over time and tends to hide minor wear thanks to its muted tone. This color flatters every skin tone and pairs effortlessly with the neutral, earthy outfits that tend to be popular this time of year.
Styling tip: Add a single matte nail among the satin finish for subtle textural contrast.
Best for: Any nail length, all skin tones, everyday and office wear.
15. Silver Fox Metallic
A full metallic silver with a mirror-like finish gives this look serious presence. It’s bold and reflective, catching every bit of available light, which makes it a natural pick for darker winter days when you want your hands to do a little shining of their own.
Full metallic looks have made a strong comeback within winter nail designs 2026, moving away from subtle shimmer and into something bolder and more statement-making. It’s become a favorite among people who want their manicure to feel like a genuine accessory.
Metallic finishes can show scratches more easily than other textures, so handling with a bit of extra care helps it last. It suits every skin tone and works particularly well for holiday parties or any occasion where you want your hands to stand out.
Styling tip: Keep the rest of your jewelry minimal so the metallic nails remain the focal point.
Best for: Short to medium nails, all skin tones, festive occasions.
16. Blush Winter Rose
A soft, dusty rose with the faintest shimmer creates a romantic, understated look that feels distinctly wintry despite its warm undertone. It’s a gentler alternative to the icy pastels that usually define the season’s softer looks.
This shade has found its footing within winter nail designs 2026 as a bridge between the warmth people crave in winter and the softness typically associated with spring manicures. It reads as feminine and polished without feeling overly delicate.
This color wears beautifully over several weeks thanks to its muted, forgiving tone. It complements every skin tone and works equally well for the office, casual outings, or dressier winter events.
Styling tip: Pair with a glossy top coat for a soft, dewy finish rather than a flat one.
Best for: Any nail shape, all skin tones, versatile everyday wear.
17. Pine Forest Accent Nail
This design keeps most nails a simple, soft neutral while dedicating one accent nail to a deep pine green with a tiny hand-painted tree or branch detail. It’s a minimal way to bring in a festive element without going overboard.
Accent-nail designs remain popular within winter nail designs 2026 because they let you enjoy a seasonal detail while keeping the rest of the manicure versatile and low-key. It’s an easy middle ground for anyone who wants a hint of holiday spirit at work or in more formal settings.
Because only one nail carries the detailed design, this look tends to age gracefully even as polish wears down elsewhere. It suits every skin tone and works nicely for both office environments and casual holiday gatherings.
Styling tip: Keep the accent nail on your ring finger, where it naturally draws the eye without overwhelming the whole look.
Best for: Short to medium nails, all skin tones, office and casual wear.
The Color Psychology Behind This Season’s Nail Palette
There’s a reason certain shades keep reappearing across winter nail designs 2026 — deep jewel tones, warm metallics, and icy pastels all tap into different emotional notes people are drawn to this time of year. Deep greens and blues tend to feel grounding and a little introspective, which fits the slower, cozier pace of winter. Warm metallics like gold and cinnamon chrome bring a sense of celebration and light during the darkest, shortest days of the year. Meanwhile, icy pastels and frosted neutrals offer a kind of calm, almost meditative quality, echoing the quiet stillness of a snow-covered morning.
Choosing a shade isn’t just about what looks good with your wardrobe — it’s worth thinking about the mood you want your hands to carry through the season. That’s part of why this trend list spans such a wide emotional range, from bold and celebratory to soft and contemplative.
18. Icy Blue Glacier Fade
A cool, pale blue fades from nearly white at the cuticle into a deeper glacier blue at the tips, creating an effect reminiscent of ice catching the light. It’s crisp, clean, and unmistakably wintry.
This gradient technique has become one of the standout methods within winter nail designs 2026 because it offers visual depth without requiring intricate hand-painted detail. It’s approachable enough to recreate at home while still looking intentional and polished.
The ombré effect tends to wear evenly since there’s no hard edge to maintain as the polish grows out. It suits fair to medium skin tones especially well and works nicely for both daytime wear and evening events.
Styling tip: Use a slightly damp sponge for blending to avoid harsh lines between the two shades.
Best for: Medium nails, fair to medium skin tones, everyday to evening wear.
19. Cranberry Cream Swirl
This design swirls a deep cranberry red with a soft cream, creating a marbled effect that feels painterly rather than precise. No two nails end up looking exactly alike, which gives the whole set a handcrafted, artistic quality.
Marbled and swirl techniques have picked up momentum within winter nail designs 2026 as people look for designs that feel more expressive than a simple solid color. This particular color combination nods to classic holiday palettes while still feeling fresh and unexpected.
Because the swirl pattern is somewhat abstract, minor wear tends to blend into the design rather than standing out. It flatters every skin tone and works well for holiday parties, family gatherings, or any festive winter occasion.
Styling tip: Use a thin striping brush and drag the colors together gently rather than mixing them fully for the most natural marbled effect.
Best for: Medium to long nails, all skin tones, festive occasions.
20. Onyx Black Glass Nails
A deep, glassy black finish with an ultra high-shine top coat gives this look serious edge. The glass-nail technique creates such a smooth, reflective surface that it almost looks wet, adding a sleek, modern quality to a classic black manicure.
Glass nails have carried real momentum into winter nail designs 2026, offering a bold, minimal option for anyone who wants drama without color or detail work. It’s become a favorite among people who want their manicure to feel sculptural and architectural rather than decorative.
This finish holds up well since there’s no fine detail to chip, though keeping nails properly moisturized helps prevent the polish from looking dry at the edges. It suits every skin tone and works for both everyday wear and dressed-up evening looks.
Styling tip: Apply an extra-thick final top coat layer and let it fully cure for the glassiest possible finish.
Best for: Any nail length, all skin tones, everyday to evening wear.
How to Choose the Right Winter Nail Design for You
With so many winter nail designs 2026 to consider, narrowing it down usually comes down to three things: your lifestyle, your nail shape, and how much maintenance you’re willing to keep up with. If your days are packed with cooking, gift-wrapping, and general hands-on activity, lean toward solid colors or textured matte finishes that hide daily wear better than fine detail work. If you have more time to spend in the salon chair, hand-painted designs like snowflakes or constellations offer a lot of personality.
Nail shape matters too — longer almond or coffin shapes give more canvas for gradients and detailed art, while shorter rounded shapes tend to look cleanest with solid colors or subtle shimmer. Finally, think about how often you’re willing to touch things up. Glossy solids and metallics tend to go the longest between appointments, while matte finishes and fine glitter work usually need a bit more upkeep to stay looking fresh.
Frequently Asked Questions About Winter Nail Designs 2026
What colors are trending most in winter nail designs 2026? Deep jewel tones like emerald and sapphire, warm metallics like cinnamon chrome and champagne gold, and icy pastels such as frosted lavender and glacier blue are leading the season.
Are matte or glossy finishes more popular this winter? Both are trending, but matte and textured finishes have gained significant ground within winter nail designs 2026 thanks to their cozy, tactile appeal.
How long do winter nail designs typically last? Most gel-based winter nail designs last two to three weeks with proper care, though fine detail work like hand-painted snowflakes may need a bit more gentle handling.
Can I recreate these winter nail designs 2026 at home? Many of these looks, especially solid colors, ombré fades, and simple accent nails, are very doable at home with basic nail art tools. More intricate designs like constellations or 3D details are easier to achieve with professional help.
What nail shapes work best for winter designs? Almond and coffin shapes give more room for gradients and detailed art, while short round or square shapes look clean and polished with solid colors or shimmer finishes.
Do these designs suit all skin tones? Yes — most looks on this list were chosen specifically because they flatter a wide range of skin tones, though a few, like warm metallics or cool pastels, may lean slightly toward warmer or cooler undertones.
Final Thoughts
From frosted minimalism to bold glass-black finishes, winter nail designs 2026 offer something for every mood and occasion this season. Whether you’re drawn to quiet, understated shimmer or full-on festive sparkle, there’s a look here worth trying — and plenty worth saving for later. Pick one, or better yet, rotate through a few as the season goes on.
📌 Loved these looks? Pin your favorites to your winter beauty board so you can find them again when you’re ready to book your next appointment.
Short nails used to be the “safe” choice — the option you picked when you didn’t have time for anything fancier. That’s not the story anymore. Short nail designs 2026 are confident, deliberate, and often more expressive than long sets, favoring clean shapes, smart color pairings, and small graphic details that survive a full day of typing, cooking, and everything in between. Whether you’re someone who’s never left short nails or you’re transitioning down from acrylics, this year gives you more reason than ever to lean in.
What makes this shift interesting is how much personality fits into a smaller canvas. Instead of chasing length, short nail designs 2026 put the focus on finish, color depth, and precision — a single crystal, a clean French curve, or a soft gradient can carry an entire look. Below are 20 of the styles worth saving to your board right now, along with exactly how to recreate each one and where each fits best.
Why Short Nails Are Having a Real Moment
Part of this shift comes down to lifestyle. More people are working with their hands daily — typing, cooking, gardening, gym sessions — and long extensions simply don’t hold up to that pace. Nail artists have responded by treating short length as a design opportunity rather than a limitation, building looks that rely on shape, color depth, and fine detail work instead of surface area. A well-executed short set now reads as intentional, not like a placeholder before your next full set.
There’s also a broader shift toward “quiet luxury” running through beauty in general, and nails are no exception. Glossy solids, soft neutrals, and one well-placed detail photograph beautifully and wear well in real life, which is exactly why so many of the designs below lean toward restraint rather than maximalism. It’s a much lower-maintenance way to still feel finished every day.
1. Soft Lavender French With a Modern Edge
This manicure balances calm and polish in equal measure. A muted lavender base, airy but still grounded in tone, sits under a crisp white tip that quietly updates the classic French shape. It reads as elevated without trying too hard, which is exactly the kind of understated confidence defining short nail designs 2026 right now.
The reason this look keeps trending is simple: it goes with everything. Office days, brunch, travel — the soft lavender-and-white combination doesn’t compete with an outfit, it just finishes it. That versatility is a big part of why French reinventions keep outperforming more novelty-driven designs in searches and saves.
Durability-wise, this set holds up well on shorter lengths because there’s less surface area for the tip to catch and chip. It looks especially clean on cooler skin undertones, though the soft lavender base is forgiving enough to suit most tones with the right white shade underneath.
Styling tip: Layer a sheer milky base (something like a classic bubble-bath shade) under the lavender gel for extra depth, then finish tips with a thin white gel liner rather than a thick brush for a crisper line.
Best for: Soft square shape, cooler undertones, everyday office or travel wear.
2. Blue Frost Tips With Playful Winter Details
A translucent base keeps this design light, while deep blue glitter concentrated at the tip and fine white line accents add movement and seasonal contrast. It sits right at the intersection of festive and wearable — enough sparkle to feel special, not so much that it reads costume-y.
This look works especially well heading into the colder months because it references winter without committing to a full holiday theme. That in-between quality is exactly why it keeps showing up on moodboards from late fall through the new year — it has staying power well past any single event.
On shorter nails, the glitter gradient stays contained and doesn’t overwhelm the hand, which keeps the whole look feeling controlled rather than busy. It photographs particularly well in daylight, when the blue glitter catches natural light instead of flattening out.
Styling tip: Use a thin liner brush for the white accent details, and apply the glitter gel in slow, thin layers — rushing this step is the most common reason gradients end up patchy.
Best for: Rounded square shape, any skin tone, winter and holiday season.
3. Teal Polka Minimalism With Subtle Sparkle
This set is proof that restraint works beautifully on shorter nails. Rich teal solids paired with a soft nude base and evenly spaced polka dots create a sense of balance, while a single small crystal accent adds just enough interest without tipping into overload.
It’s a design that reads as put-together in professional settings while still having a playful edge, which is exactly the kind of duality a lot of people are looking for right now. The structure of the polka dots also makes it easy to keep consistent across all ten nails, which isn’t always true of freehand designs.
Because the design relies on a neutral builder gel base, it adapts easily to both gel and acrylic short sets, making it one of the more flexible options on this list for people who switch between the two.
Styling tip: Use a dotting tool rather than a brush for the polka dots — consistency in dot size matters more here than artistic flourish.
Best for: Almond or squoval shape, warm undertones, work-to-weekend versatility.
4. Deep Red Stripes With Autumn Texture
This manicure feels like early fall evenings. A deep red shimmer paired with a soft nude base and diagonal stripes brings warmth and gentle movement to the hand, reinventing a classic red in a way that feels current rather than predictable.
The shimmer finish is what sets this apart from a standard red mani — it catches light differently depending on the angle, which reads as more dimensional in photos and in person. That texture is a big reason this design keeps coming back into rotation every autumn, season after season.
It’s genuinely flattering across most skin tones because the wine-toned undertone in the red keeps it from skewing too orange or too cool. This is a strong pick for anyone who wants a seasonal color without switching to something heavier or darker.
Styling tip: Use a fine striping brush for the diagonal lines, and don’t rush the shimmer coats — two thin layers look far more even than one thick one.
Best for: Squared shape, all skin tones, sweater-weather everyday wear.
5. Festive Confetti Tips With a Clean Base
This design mixes a clean nude base with confetti-style red and green tips that feel joyful without veering childish. It captures that end-of-year, celebratory mood while still staying wearable well past a single event.
What makes it work is the restraint in the base — because the nude underneath is so clean, the confetti detail at the tip reads as intentional rather than cluttered. It’s an easy way to bring in seasonal color without overhauling the whole nail.
This look is particularly good for anyone who loves a white-based design but wants something a little more unexpected. The glossy top coat keeps the surface smooth despite the textured glitter placement, so it doesn’t feel rough or bumpy to the touch.
Styling tip: Dab fine glitter pieces onto the tip with a silicone-tipped tool rather than your fingers for more even, controlled placement.
Best for: Rounded shape, any skin tone, holiday parties and year-end events.
6. Liquid Gold Chrome for Everyday Shine
There’s something quietly powerful about metallic finishes on a short nail. This soft gold chrome look feels modern rather than flashy — almost like jewelry for your hands, where the finish does all the visual work instead of a busy design.
The smooth, reflective surface is what makes short nails look particularly neat and intentional in this style, since chrome finishes tend to highlight clean shaping and even length. It’s a strong example of how a single well-executed finish can outperform a far more detailed design.
This look transitions easily from day to night because the gold undertone pairs with both casual and dressier outfits without needing to change anything else about the nail. It’s one of the more versatile options here for someone who doesn’t want to think about color matching.
Styling tip: Apply the chrome powder over a no-wipe top coat while it’s still slightly tacky, then seal everything with a high-gloss top coat to lock in the glassy finish.
Best for: Squoval shape, warm undertones, day-to-night versatility.
7. Soft Blue Gloss With Abstract Accent
This manicure feels instantly calming. The cool blue base is fresh and airy on its own, while a single abstract swirl accent nail adds just enough personality to keep the set from feeling flat.
It sits in that sweet spot between simple and creative — a full set of solid color would feel a little safe, but this one accent nail gives it a custom, hand-painted quality without requiring detailed art on every finger. That balance is part of why abstract accents keep trending across multiple nail lengths and shapes this year.
Because only one nail carries the pattern, this design is genuinely achievable at home even without much freehand experience, which is a big part of its appeal for anyone recreating looks outside a salon.
Styling tip: Use a thin brush and slow, deliberate movements for the swirl — the abstract shape looks better a little imperfect than overly controlled.
Best for: Almond shape, cooler undertones, warm-weather and transitional-season wear.
8. Milky Pink With Clean White Panels
This look feels delicate and grown up. A soft pink base paired with crisp white panels creates structure without heaviness, giving a refined, modern spin on the classic French shape.
The clean geometric lines are what set this apart from a standard French tip — instead of following the natural nail curve, the white panel sits as a distinct block, which reads as more contemporary and a little more editorial. It’s a design that photographs especially well against a plain, minimalist outfit.
On a squared shape, the panel lines stay crisp and intentional, making the whole set feel considered rather than accidental. It’s a strong pick for anyone building a collection of timeless, low-maintenance manicure ideas.
Styling tip: Apply the sheer pink base thinly, then use a flat brush (not a liner) for the white panel to keep the edges sharp and geometric.
Best for: Squared shape, any skin tone, minimalist everyday styling.
9. Candy Stripe Red for Cozy Seasons
This design leans playful without feeling childish. Red and white diagonal stripes bring instant warmth and a touch of nostalgia, making it a natural pick for colder months well beyond any single holiday.
Its appeal comes from how easily it bridges festive and everyday — the stripe pattern reads as seasonal without locking you into a strictly Christmas-only aesthetic, so it stays relevant through the whole winter stretch. That flexibility is exactly why candy-stripe patterns keep resurfacing every cold season.
Even spacing matters more than perfect precision here — the stripes don’t need to be flawless to look intentional, which makes this one of the more forgiving detailed designs on this list for at-home application.
Styling tip: Start with a nude or sheer base, then layer red shimmer gel and white striping gel using a fine liner brush, prioritizing even spacing over perfection.
Best for: Rounded square shape, all skin tones, winter through early spring.
10. Pink Polka Pop With a Playful Twist
This manicure mixes bold pink solids with a soft blush base and polka dots, creating a cheerful, youthful vibe that still feels wearable and clean rather than overdone.
The contrast between the saturated pink and the softer blush undertone is what keeps this design from feeling one-note. It’s proof that a “fun” nail can still look put-together, which is exactly the balance a lot of people are chasing in short nail designs 2026 right now.
This style works equally well in gel or acrylic, and holds up nicely on shorter lengths since the polka dot pattern doesn’t rely on extra surface area to read clearly.
Styling tip: Use a dotting tool for consistent dot size, and keep the blush base sheer so the bold pink accents stand out clearly against it.
Best for: Almond shape, warm undertones, casual daytime wear.
11. Soft Blush Sparkle With a Cozy Glow
This manicure feels like a quiet moment wrapped in warmth. A gentle blush base paired with soft glitter accents creates a look that’s romantic without being overly sweet, using shine sparingly and thoughtfully rather than all over.
The short length keeps everything grounded here — a longer nail with this much softness could start to feel fussy, but on a shorter set it reads as effortlessly polished. It’s the kind of manicure that photographs well without needing a special occasion to justify it.
Applying glitter only to select nails, rather than the whole set, is what keeps this design from tipping into visual overload. That restraint is a theme across several of the most successful short nail designs 2026 has produced so far.
Styling tip: Use a fine rose-gold glitter topper on just two or three accent nails rather than the whole hand, keeping the rest glossy and clean.
Best for: Oval shape, cooler undertones, date nights and soft everyday glam.
12. Sage Green and Silver With Clean Graphic Details
This design feels fresh and structured. Muted sage nails paired with silver glitter and clean white accents give off a calm, intentional vibe that leans modern without chasing every passing trend.
Green tones have been steadily gaining ground in nail color this year, and this particular sage shade works because it’s muted enough to feel neutral rather than novelty. Paired with silver, it reads as cool and considered instead of overly seasonal.
Crisp lines matter a lot here, especially on a squared shape where structure is part of the appeal. A shaky line can undercut the whole graphic effect, so this is one of the designs worth practicing on a spare nail tip first.
Styling tip: Use a fine striping gel for the graphic lines and steady your hand against the table edge for straighter results.
Best for: Squared shape, any skin tone, spring transitional wear.
13. Cool Blue Snowflake Minimalism
There’s something instantly comforting about cool blue tones on short nails. Paired with delicate snowflake details, this manicure feels seasonal without being overdone, striking a balance between festive and genuinely wearable day to day.
It’s the kind of look that pairs naturally with winter mornings, soft knitwear, and low-key styling, which is part of why it keeps resurfacing every cold season without feeling repetitive. The dusty blue base does a lot of the work on its own, so the snowflake detail only needs to appear on one or two nails.
This design proves that short nail art can be festive, calm, and grown up all at once — a combination that’s harder to pull off than it looks.
Styling tip: Use white snowflake decals or hand-painted details with a fine liner brush over the dusty blue base, then seal everything with a glossy top coat.
Best for: Rounded shape, cooler undertones, winter holiday season.
14. Glossy Pink With Soft Glitter Accents
This manicure leans into softness and shine. A classic pink base paired with subtle glitter accents feels familiar yet refreshed, which is exactly why it keeps appearing across seasons rather than fading out after one trend cycle.
The key to this look is balance — most nails stay glossy and clean, while sparkle plays a supporting role on just one or two accent nails. That restraint keeps the whole set feeling polished instead of overly busy.
It’s genuinely flattering and endlessly wearable, which explains why this kind of pink manicure has stayed relevant across multiple nail trend cycles rather than being a single-season fad.
Styling tip: Layer a fine glitter gel only on accent nails, keeping the rest of the set in a clean, medium pink gloss.
Best for: Almond shape, all skin tones, everyday versatile wear.
15. Delicate Pink Patterns With a Playful Finish
Soft pink tones mixed with minimal patterns and dots create a playful but polished look. It’s a fresh take on short nails with small details, where creativity stays subtle and intentional rather than crowding the whole nail.
This design works especially well for anyone easing into nail art for the first time, since the patterns stay small and low-pressure — a dotting tool and a steady hand are really all you need to pull it off convincingly.
It’s an easy, effortless option when you want a little personality without much commitment, which is a big part of the direction short nail designs 2026 continue to move toward.
Styling tip: Use a pale pink gel base and a dotting tool or thin brush, keeping the pattern confined to just one or two nails for balance.
Best for: Oval shape, warm undertones, casual everyday styling.
16. Pastel Confetti Mix for a Soft Everyday Mood
This manicure feels like a quiet celebration. Pastel blue, blush pink, and creamy ivory come together with a subtle speckled finish that adds texture without visual noise, working well when you want variety but still crave balance.
The short length keeps the color mix feeling intentional rather than chaotic — spread across longer nails, this same palette could start to feel scattered, but on shorter nails it reads as a cohesive, considered set.
It’s an easy pick when you want color without full commitment to one shade, since the pastel mix gives you variety while still reading as one unified look from a distance.
Styling tip: Choose pastel gel polishes with a fine shimmer or confetti effect already built in, and apply thin layers so the texture doesn’t get muddy.
Best for: Squoval shape, all skin tones, spring and early summer.
17. Lilac Shine With Glittered Tips
Lilac continues to hold its place in short nail designs 2026, and this version feels especially refined. A glossy lavender base paired with soft glitter concentrated at the tips creates depth without overpowering the nail.
This is a design that understands restraint — rather than covering the whole nail in glitter, concentrating it at just the tip keeps the sparkle controlled and clean, letting the lavender base carry most of the visual weight.
It reads as quietly confident rather than loud, which is exactly the tone a lot of the most successful short nail looks are striking this year — festive enough to notice, polished enough to wear anywhere.
Styling tip: Press fine glitter into just the tip area before sealing with a glossy top coat, rather than blending it across the whole nail.
Best for: Almond shape, cooler undertones, evening and special occasions.
18. Soft Pink Play With Minimal Graphic Accents
There’s something endlessly charming about soft pink nails with tiny graphic details. Gentle pink tones meet small dots, stripes, and a single heart accent, creating a look that feels playful but not childish.
Keeping the patterns small is what makes this design work on shorter nails specifically — anything larger would start to overwhelm the limited canvas, but tiny details stay proportional and legible even at a glance.
This is the kind of manicure that feels personal and warm, which is a big part of why it keeps showing up in mood boards built around soft, feminine nail inspiration.
Styling tip: Add details using a dotting tool and thin liner brush, keeping every pattern small and confined to one or two accent nails.
Best for: Oval shape, warm undertones, everyday feminine styling.
19. Hot Pink French With a Modern Curve
This design proves that French tips are far from boring. A sheer nude base paired with a bright pink curved tip feels bold, fresh, and current — a strong update on the traditional white French tip.
The curved shape, rather than a straight line, is what gives this design its modern feel. It photographs beautifully and works well on a squared shape especially, where the curve creates a nice contrast against the straighter nail edge.
This feels like a genuine power manicure — confident, a little unexpected, and surprisingly versatile for both casual days and dressed-up occasions.
Styling tip: Use a builder gel base with a vibrant pink gel applied via a fine brush to control the curve precisely.
Best for: Squared shape, all skin tones, both casual and dressy occasions.
20. Rose Pink Shimmer With Clean Line Detail
Ending on something soft yet luminous, a rose pink shimmer base paired with a single clean white line accent creates a look that’s feminine, calm, and polished without extra detail competing for attention.
Keeping the accent minimal allows the natural shimmer in the base to stay the visual focus, rather than getting lost behind additional pattern work. That single-line restraint is a hallmark of the most timeless designs on this list.
This manicure feels reassuring in the best way — elegant, simple, and proof that manicure ideas don’t need complexity to feel complete.
Styling tip: Choose a fine shimmer pink gel and add just one clean white liner accent rather than multiple lines or patterns.
Best for: Almond shape, all skin tones, everyday polished wear.
How to Choose Your Short Nail Design for 2026
Start with your nail shape, since it affects how every design above will actually read on your hand. A soft square holds crisp lines and French edges especially well, while a rounded square or oval is more forgiving for anyone doing their own line work at home. From there, think honestly about maintenance — a solid glossy color needs almost no touch-up skill, while stripes, dots, and gradients ask for a steadier hand and a little more patience between fills.
It also helps to think seasonally without locking yourself into one theme. Several of the designs above — like the candy stripe red or the snowflake minimalism — work through an entire season rather than a single event, which gets you more wear out of the same set. If you’re newer to nail art, start with a design that isolates detail to just one or two accent nails, since that’s the easiest way to add personality without risking a look that feels cluttered.
Frequently Asked Questions About Short Nail Designs 2026
What are the most popular short nail designs 2026 is seeing right now? Soft neutrals, glossy chrome finishes, and updated French tips with color or curved lines are among the most requested short nail designs 2026 has produced so far, largely because they photograph well and hold up through daily wear.
Do short nail designs 2026 work for acrylic as well as gel? Yes — most of the designs above, including the polka dot and pink pop looks, adapt easily to acrylic short sets since the techniques rely on polish application and detail work rather than length.
How long do short gel nail designs typically last? A well-applied gel manicure on short nails generally lasts two to three weeks before needing a fill, and shorter length actually tends to reduce chipping since there’s less nail surface exposed to daily impact.
Are short nail designs 2026 suitable for the workplace? Many of the looks above, particularly the milky pink panels, lavender French, and glossy pink options, are specifically designed to read as polished and professional, making them easy choices for office settings.
What nail shape works best with short nail designs 2026? Squared and rounded square shapes tend to showcase graphic lines and French details most cleanly, while almond and oval shapes suit softer, more rounded patterns like polka dots and abstract swirls.
Can I recreate these short nail designs 2026 looks at home without salon tools? Most of the designs above only require a dotting tool, a fine liner brush, and basic gel polish or acrylic products, making them realistic to attempt at home even without professional equipment.
Final Thoughts on Short Nail Designs 2026
From icy blue frost to warm cranberry stripes, short nail designs 2026 make one thing clear: length was never really the point. Shape, color pairing, and a few well-placed details do all the work, which means almost any of the looks above can become your new everyday go-to with minimal upkeep. Pick one shape you love, one color family for the season, and build outward from there.
📌 Pin this post so you can come back to these short nail designs 2026 anytime you need fresh inspiration before your next appointment.
Autumn has a quality that no other season possesses — the specific combination of warmth, richness, and quiet beauty that makes everything feel more considered and intentional. Your nails should feel exactly the same way. The fall nail ideas 2026 has produced are genuinely some of the most beautiful in recent memory, spanning warm earthy palette manicures, intricate botanical leaf art, cozy plaid patterns, dramatic ombré gradients, and playful seasonal motifs that capture everything people love about the season.
What makes fall nail ideas 2026 so satisfying is how completely the designs reflect the season’s character. Rich chocolate browns, burnt oranges, deep burgundies, mustard yellows, and earthy taupes form the color foundation — then layer over them the textures, patterns, and art details that make autumn nail design genuinely exciting. Whether you want something minimal and sophisticated or bold and season-defining, this collection has a fall nail design made exactly for your aesthetic.
1. Warm Tones with Maple Leaf Accent
The most iconic fall nail ideas 2026 begins with the season’s most beloved symbol — a detailed maple leaf painted on an accent nail against a background of warm autumn colors alternating across the remaining nails. Rich brown and vibrant orange gel alternate across the set, with the standout accent nail painted in creamy beige and decorated with a meticulously rendered maple leaf in shades of rusty red and orange.
The maple leaf detail is the design’s entire emotional center. Painted with fine brush technique that captures the leaf’s distinctive lobed shape and surface veining, it reads simultaneously as botanical illustration and seasonal celebration — the kind of nail art that makes people stop mid-conversation to look more closely. The glossy finish across all nails amplifies the depth of the autumn palette, making the warm hues glow with the quality of light that defines October afternoons.
This design works with virtually every fall wardrobe element — warm knits, camel coats, burgundy scarves — because its palette is drawn directly from the season rather than from a fashion trend.
Styling tip: The maple leaf accent reads most beautifully on the ring finger rather than the thumb, where it sits most visibly when the hand rests naturally. Ask your tech to paint the leaf with a slightly raised detail technique — adding the veining lines after the base leaf color cures produces a more three-dimensional, lifelike result than painting everything wet-on-wet.
Best for: All nail lengths, warm skin tones, the most seasonally iconic design in this collection
2. Butterfly Wings with Golden Vein Accents
Nature-inspired artistry defines one of the most sophisticated fall nail ideas 2026 — a design that layers multiple botanical references across a single set in warm autumn hues. Rich brown and amber gel create the primary palette, while two accent nails carry intricate butterfly wing patterns outlined in fine black lines with delicate white dot details that reference the actual surface markings of real autumn butterflies.
A third accent nail features a molten gold pattern over a neutral taupe background that mimics the cellular structure of a leaf surface — the gold veining catching light with the same quality as actual autumn leaves in afternoon sun. One nail in a green-to-orange gradient mirrors the specific color transition that deciduous trees undergo in September and October, making this set a genuine visual study of autumn’s botanical world.
The combination of butterfly wings, leaf veining, and natural color gradients creates a set where every nail has visual interest without any single element dominating the others — a difficult balance to achieve that makes this one of the most technically impressive fall nail ideas 2026.
Styling tip: Request that the butterfly wing pattern uses a fine liner brush rather than stamps or transfers — hand-painted wing patterns capture the organic asymmetry of real butterfly wings, while stamped patterns produce a uniformity that makes them look manufactured rather than artisanal.
Best for: Medium to long almond nails, warm and neutral skin tones, creative and artistic occasions
3. Metallic Copper Leaf on Matte Canvas
Matte finish meets metallic accent in one of the most visually sophisticated fall nail ideas 2026 has produced. Warm chocolate brown, creamy beige, and terracotta alternate across the nails in a matte gel finish that creates a velvety, rich surface — the autumn palette feeling genuinely luxurious in its matte form rather than flat or dull. Against this matte foundation, delicate copper metallic leaf motifs are placed with precision — their fine cutout detailing and high-shine surface creating a dramatic contrast against the surrounding matte tones.
The copper leaf details are the critical element that elevates this from a beautiful neutral fall manicure to a genuinely special design. The metallic finish of the copper catches and reflects light in a way the matte base completely absorbs — the interplay between light-absorbing matte and light-reflecting metallic creates a design that looks different in every lighting environment you encounter throughout the day.
Styling tip: Metallic leaf decals on matte gel require a specific application sequence — cure the matte base fully before applying the metallic element, then seal with a gel top coat applied only over the metallic accent rather than the entire nail, which would eliminate the matte finish on the surrounding surface.
Best for: All nail lengths, warm and olive skin tones, professional settings and formal autumn occasions
4. Neutral Nude with Autumn Leaf Details
Minimalist sophistication defines this entry in fall nail ideas 2026 — a soft beige glossy base across all nails, with delicate autumn leaf motifs in rust, burnt orange, and golden brown placed thoughtfully on select nail surfaces. The leaves are rendered with genuine botanical detail — irregular edges, surface veining, and natural color variation within each leaf that makes them read as individual leaves rather than repeated decorations.
The minimalist approach of this design is what gives it such broad appeal. It suits every occasion from office environments where elaborate nail art would be inappropriate to autumn weddings where understated elegance is the priority. The nude base keeps the hand looking polished and professional while the leaf details add enough seasonal personality to make the design genuinely interesting.
Styling tip: For the most naturalistic leaf placement, ask your tech to position the leaves at slightly varying angles rather than all pointing in the same direction — natural leaves fall and rest in organic, non-uniform orientations, and this variety in positioning is exactly what makes painted leaf details look like genuine botanical art rather than decorative stamps.
Best for: Short to medium oval or almond nails, all skin tones, the most wearable minimalist fall design
5. Modern Plaid Meets Glossy Brown
Plaid is one of the most quintessentially autumnal patterns in existence, and its application to fall nail ideas 2026 produces results that are simultaneously cozy and thoroughly modern. Deep, glossy chocolate brown on most nails alternates with a carefully rendered plaid pattern on the accent nails — the plaid using warm beige and brown tones with clean diagonal and horizontal lines that create the look of actual woven fabric at miniature scale.
The contrast between the deep, glossy brown nails and the more detailed plaid pattern creates a visual rhythm across the hand that reads as considered and styled rather than randomly varied. The chocolate brown provides grounding depth that prevents the plaid from feeling busy, while the plaid accent prevents the solid color nails from reading as plain.
This design captures the aesthetic of fall’s most beloved wardrobe elements — the cozy plaid scarf, the warm flannel shirt, the classic tartan pattern — and translates them directly onto the nails in a way that feels completely fashionable rather than costume-like.
Styling tip: Plaid nail art requires precise tape masking for the grid lines — the uniformity of the plaid pattern depends entirely on consistent line spacing and width. Ask your tech to use nail art tape for the horizontal and diagonal lines and to remove the tape immediately after applying each color before curing for the cleanest possible grid edge.
Best for: All nail lengths, warm skin tones, fashion-forward fall occasions
6. Autumn Swirls in Forest Green and Burnt Orange
Abstract swirl nail art in autumn’s most dramatic color combination is one of the most artistically satisfying fall nail ideas 2026 has produced. Deep forest green, burnt orange, and shimmering copper swirl together across almond-shaped nails in organic, flowing patterns that create a sense of movement — as though the autumn colors are caught in a gentle wind across the nail surface.
The metallic copper shimmer woven through the swirls is the element that elevates this from a simple color design to genuine nail art. The copper catches light with the specific quality of autumn leaves in afternoon sun — warm, golden, and slightly reflective — while the forest green and burnt orange provide the cool-warm tension that makes the color combination so compelling.
The swirl technique requires a nail artist with genuine freehand skill — the organic quality of the patterns comes from confident, continuous brush strokes rather than careful, deliberate ones. Rushed or hesitant swirl application produces inconsistent line weight that undermines the fluid quality the design depends on.
Styling tip: Swirl designs in autumn palette look most beautiful on almond or oval nail shapes where the curved nail edge echoes the flowing quality of the swirl pattern. Square or coffin shapes impose a geometric structure that works against the organic movement of swirl art.
Best for: Medium to long almond or oval nails, warm and olive skin tones, creative occasions
7. Sunflower Bliss on Chocolate Brown
Sunflower nail art is one of the most joyful fall nail ideas 2026 — a design that brings the season’s most optimistic floral symbol into the autumn palette with genuinely beautiful results. Deep, glossy chocolate brown alternates with intricate sunflower art nails across the set — the sunflowers painted with vibrant golden-yellow petals radiating from earthy brown centers, the flower details rendered with enough precision to read as genuinely botanical.
The contrast between the dark chocolate base nails and the bright sunflower art creates a visual tension that is both striking and completely harmonious — the warm yellow of the sunflowers references the same autumn palette as the chocolate brown rather than contrasting against it. The result is a design that feels celebratory without being garish, bright without being loud.
Sunflowers specifically suit autumn because they are genuinely a late-season flower — their peak bloom coincides with early fall, making them one of the most seasonally accurate botanical references available in fall nail ideas 2026 rather than a seasonal approximation.
Styling tip: Sunflower petals look most realistic when painted in two shades of yellow rather than one — a deeper golden-yellow for the petal bases where they meet the center, and a brighter lemon-yellow at the petal tips. This tonal variation within each petal mimics the actual color graduation of real sunflower petals and adds depth that flat single-color petals cannot achieve.
Best for: Short to medium nails, warm skin tones, outdoor fall occasions and everyday wear
8. Spooky Season Minimalism
Halloween-adjacent nail art in its most wearable and sophisticated form makes this one of the most charming fall nail ideas 2026 for October specifically. A matte nude base provides a soft, sophisticated foundation that prevents the spooky elements from reading as costume-like. Select nails carry playful black spiders and delicate spiderweb details, one nail features a mummy wrap pattern in white bandage-like stripes with two tiny expressive black eyes, and solid matte black nails provide bold contrast that anchors the set.
The matte finish across every nail — including the black accent nails — is the styling decision that keeps this design feeling chic rather than festive. Glossy Halloween nail art can look cartoonish; matte finishes give the same imagery a graphic, editorial quality that reads as intentional design rather than seasonal decoration.
Styling tip: Spiderweb nail art reads most cleanly when drawn with a very fine liner brush starting from a central point and working outward in radiating lines, then connecting the radiating lines with curved cross-bridges of decreasing size from center to edge. This structural approach produces the geometric quality that makes spiderwebs recognizable even at small nail scale.
Best for: Short to medium nails, all skin tones, October and Halloween occasions
9. Deep Maroon with 3D Floral Accents
Rich maroon is one of the most powerful colors in all fall nail ideas 2026, and this design pairs it with dimensional white floral accents that create a stunning contrast between the deep, moody base and the delicate botanical art. Almond-shaped nails alternate between solid deep maroon and a soft translucent pink base, with the accent nails carrying 3D white floral designs featuring petals accented with subtle maroon and gold details that tie them back to the primary palette.
The 3D flowers are sculpted from gel and adhere to the nail surface with genuine dimensional depth — when light strikes them from the side, the petals cast small shadows that emphasize their physical three-dimensionality. This quality is impossible to replicate with flat painted floral art and is what makes this design genuinely special among nail designs that simply use painted flowers.
Small gold embellishments on the surrounding maroon nails add a luxe quality that connects the overall set to the opulence of autumn’s deepest color palette.
Styling tip: 3D gel flowers on maroon bases require a final sealing step where builder gel is applied around the base of each sculpted element — this creates a smooth transition between the dimensional flower and the flat nail surface below it, eliminating the visible gap that can make 3D elements look applied rather than grown from the nail.
Best for: Medium to long almond nails, all skin tones, formal fall occasions and evening events
10. Dancing Leaves on Short Nude Nails
Delicate leaf patterns on a sheer nude base is one of the most genuinely beautiful fall nail ideas 2026 for women who want something wearable every day without sacrificing seasonal personality. Amber, mustard yellow, and deep rust leaves are placed thoughtfully across each nail in compositions that feel organic rather than patterned — some nails carry single prominent leaves, others have two or three smaller leaves overlapping, and tiny gold accent dots scattered throughout reference sunlight filtering through autumn foliage.
The short oval nail shape is particularly well-suited to this design because the compact surface area constrains the leaf placement in a way that focuses the composition — each nail tells a small, complete botanical story rather than sprawling across too much space where the design could become unfocused. The sheer nude base allows the natural warmth of the nail bed to show through, warming the autumn leaf colors from beneath.
Styling tip: Gold accent dots surrounding the leaf designs are most effective when applied with varying sizes — larger dots immediately adjacent to the leaves and progressively smaller dots extending outward create a gradient of sparkle that reads as genuinely light-like rather than simply decorative.
Best for: Short oval nails, all skin tones, everyday wear and professional environments
11. Mustard and Chocolate with Ivory Leaf Accent
Two of autumn’s most essential colors — mustard yellow and deep chocolate brown — form the foundation of this matte fall nail ideas 2026 design that achieves sophistication through careful palette construction rather than complex art. The matte finish across both the mustard and chocolate nails gives them a velvety richness that glossy versions of the same shades cannot produce — the autumn colors become deeper and more complex in matte form.
The accent nail in soft ivory provides a pause in the warm color story — a lighter, cooler tone that makes the mustard and chocolate surrounding it appear richer by contrast. This ivory accent nail carries falling leaves in golden yellow and burnt orange with subtle dotted details, the composition rendered with the delicacy of fine botanical illustration.
The matte finish is the decision that makes this design genuinely special among fall nail ideas 2026 — it transforms a warm-toned color scheme that could read as ordinary into something that feels considered and elevated.
Styling tip: Matte mustard yellow and matte chocolate brown on adjacent nails benefit from a slight variation in the matte top coat thickness — a thinner matte coat on the mustard nails maintains more of the color’s natural brightness, while a thicker matte coat on the chocolate nails deepens the brown further. This subtle variation in finish depth adds dimension to an otherwise monolithic matte set.
Best for: Short to medium almond nails, warm skin tones, November and late fall occasions
12. Burgundy with Cascade Leaf Tips
Two glossy burgundy nails anchor this design among fall nail ideas 2026 while the remaining nails wear a soft nude base with delicate fall leaves cascading down from the nail tips in shades of orange, yellow, and deep red. The leaf details at the tips create a design that reads like autumn foliage is actually falling across the nail surface — organic, directional, and deeply seasonal.
Burgundy is one of fall’s most essential and enduring colors, and using it on just two accent nails rather than the full set allows it to read as a color accent rather than the dominant design element. The nude base nails give it the space to make its full impact while keeping the overall design light enough for everyday wear.
Styling tip: Leaf cascade designs at the nail tip look most beautiful when the leaves overlap slightly in their positioning — some partially behind others, some at different angles — rather than sitting as isolated, non-overlapping elements. The overlapping creates the depth of an actual pile of fallen leaves rather than a flat arrangement of individual specimens.
Best for: All nail lengths, cool to neutral skin tones, fall occasions through early winter
13. Terracotta, Olive, and Mustard Autumn Set
Four distinct autumn shades working together in one cohesive set — this is one of the most color-rich fall nail ideas 2026 and one of the most satisfying to wear because the palette captures the full complexity of the season rather than a single aspect of it. Terracotta, olive green with black specks, creamy beige, and golden mustard alternate across the nails, with delicate orange and red leaves painted on the beige and mustard nail surfaces connecting the solid colors to the botanical theme.
The olive green with scattered black specks references the texture of aged leaves and forest floor materials — it is an unusual nail color that reads as completely appropriate for the season while remaining genuinely distinctive. The terracotta and golden mustard bring the warmth, the beige provides the rest, and the olive anchors everything with an earthy complexity.
Styling tip: When using four distinct colors in a single nail set, establish the color sequence before beginning and stick to it consistently — changing the alternation mid-application produces an unplanned result that reads as chaotic rather than considered. Map the sequence across both hands before your tech begins.
Best for: All nail lengths, warm and olive skin tones, the most complex and complete fall palette design
14. Cascading Leaf Tips on Nude Base
This design is a fall nail ideas 2026 that achieves maximum seasonal impact with minimum color complexity — a glossy nude base on all nails with miniature leaf patterns in mustard yellow, burnt orange, deep maroon, and metallic gold arranged at the nail tips in cascading, overlapping compositions that look like leaves settling at the base of a tree.
The tip placement is what gives this design its particular elegance — rather than distributing leaf art across the full nail surface, the leaves gather at the tips where they create a concentrated seasonal statement that reads as compositionally complete from every viewing angle. The glossy nude base allows the full warmth of the leaf colors to register clearly without competition.
Styling tip: A cascade leaf tip design looks most natural when the leaves at the very tip of the nail are the smallest and most numerous, with slightly larger individual leaves appearing as they extend up the nail body. This scale progression mirrors the actual behavior of leaves accumulating — smaller pieces drift furthest, larger leaves catch earlier.
Best for: All nail lengths, all skin tones, the most versatile and universally wearable fall design
15. Warm Autumn Ombré Gradient
A chic, minimalist ombré gradient in the season’s warmest tones is one of the most purely satisfying fall nail ideas 2026 — no art, no embellishment, no complexity beyond the color gradient itself, which transitions from deep chocolate brown at the cuticle through soft caramel mid-nail to pumpkin orange at the tips. The gradient tells the entire autumn color story in a single sweep across each nail.
The glossy finish on this design amplifies the richness of all three gradient colors simultaneously — the glossy chocolate looks deeper, the glossy caramel looks warmer, and the glossy pumpkin orange glows with the quality of candlelight. Almond-shaped nails give the gradient its most elegant context, the tapered tip drawing the eye upward through the color progression.
This is one of the fall nail ideas 2026 most suited to women who want a strong seasonal design without committing to detailed nail art — the gradient is technically impressive and visually striking while remaining completely manageable as an everyday manicure.
Styling tip: A three-color ombré gradient is most seamless when the middle caramel tone is applied most generously — it creates the transitional zone between the dark chocolate and bright orange that prevents the gradient from appearing as two colors meeting rather than three flowing together. The caramel should occupy approximately forty percent of the nail surface to perform its blending function correctly.
Best for: Almond and oval nails, warm skin tones, everyday fall through formal occasions
16. Chocolate and Nude with Playful Details
Deep chocolate brown and soft nude create the perfect autumnal contrast in this design that adds whimsical detail elements to what could otherwise be a simple two-color set. The chocolate and nude nails alternate across the hand — the brown providing warmth and depth, the nude providing lightness and rest — while delicate bow accents on one nude nail and subtle cross-stitch-like embroidery patterns on another add a playful, handcrafted quality to the sophisticated palette.
The bow and cross-stitch details reference autumn’s textile associations — the cozy sweaters, the embroidered details, the handcrafted quality of the season’s fashion aesthetic — translated into nail art with charming accuracy. These details are small enough to read as texture rather than decoration from a distance, revealing their specific character only on close inspection.
Styling tip: Bow nail art reads most elegantly when the bow is rendered with thin, precise ribbon lines rather than thick, filled shapes — a thin outline bow in soft gold or white against the nude base has a delicate, jewelry-like quality that a thick, opaque bow cannot achieve.
Best for: Short to medium almond nails, all skin tones, casual and creative fall occasions
17. Rusty Orange with Plaid Accent
Rusty orange is one of the most vivid and energetic colors in all fall nail ideas 2026, and this design uses it as the primary color across most nails while introducing a plaid accent design that adds seasonal texture without diluting the orange’s impact. The plaid pattern on the accent nail uses a creamy beige base with crisp white and burnt orange grid lines — the white lines adding brightness, the orange lines tying the plaid back to the dominant nail color.
The orange and plaid combination is distinctly autumnal in the most satisfying way — it references the season’s most characteristic elements simultaneously, from the color of falling leaves to the texture of cozy flannel shirts. The almond nail shape keeps the vivid orange from reading as aggressive, softening the overall impression through the graceful taper of the nail silhouette.
Styling tip: Burnt orange gel in high-saturation formulas can sometimes appear slightly different under salon lighting compared to natural daylight — the warmth of the orange intensifies in natural light and can appear slightly more yellow-toned under cool fluorescent lighting. View the color in multiple lighting conditions before application to ensure it reads as the intended rusty orange in your typical environments.
Best for: All nail lengths, warm and medium skin tones, casual fall occasions
18. Fox and Paw Print Woodland Theme
Playful woodland animal nail art takes fall nail ideas 2026 in its most charming and whimsical direction. Bright, glossy orange dominates three nails while two accent nails carry the design’s most memorable elements — one featuring a cartoonish fox face with large expressive eyes on a soft gray background, the other decorated with tiny orange paw prints scattered in a playful, loose pattern. The fox and paw print combination creates a woodland narrative across the hand that is uniquely seasonally appropriate.
Fox nail art works as a fall design because the animal’s characteristic burnt orange coloring references the autumn palette directly — the fox is the woodland creature that matches the season’s color story most precisely. The cartoon rendering style keeps the design feeling fun and approachable rather than overly realistic or demanding.
Styling tip: Cartoon animal face nail art requires consistent proportions for the features to read as the intended animal from a viewing distance. Ask your tech to sketch the proportions lightly in clear gel before committing to the feature colors — this planning step prevents the face from becoming too large or small for the nail surface, which is the most common issue in miniature animal portrait nail art.
Best for: Short almond or coffin nails, all skin tones, creative and playful fall occasions
19. Neutral Matte Almond with Gold Bar
Understated elegance defines this fall nail ideas 2026 entry that achieves genuine sophistication through the precision of its restraint. Deep cocoa brown and soft taupe in a consistent matte finish alternate across the hand — the two neutral tones so complementary that the alternation reads as a tonal gradient rather than a color-block pattern. A single white accent nail carries a sleek vertical gold bar that provides the only point of genuine contrast in an otherwise completely unified neutral palette.
The gold bar is the decision that makes this design exceptional. Its vertical orientation draws the eye upward in a way that elongates the finger, its high-shine finish contrasts dramatically against the surrounding matte surfaces, and its simple geometric form reads as modern and architectural against the earthy neutral palette. It is a detail that says everything without saying very much.
Styling tip: The vertical gold bar’s proportions relative to the nail are critical — it should occupy approximately sixty to seventy percent of the nail’s vertical length and sit centered both horizontally and vertically on the nail surface. A bar that is too thin disappears visually, too thick reads as clunky rather than sophisticated.
Best for: Almond nails, all skin tones, the most professionally appropriate and universally wearable fall design
20. Burnt Orange, Burgundy, and Gilded Leaves
The most complete and seasonally comprehensive of all fall nail ideas 2026 — a design that uses burnt orange, rich burgundy, and soft almond beige across the nail set with gilded leaf motifs on accent nails that tie every color in the palette together through their autumn tones. The accent nails carry delicate leaf designs in merlot and orange against the beige background, while subtle gold glitter accents scattered across certain nails add a twilight quality — the shimmer of late afternoon autumn light on fallen leaves.
Each nail in this design tells a specific part of the autumn story: the vibrant orange references the brilliance of deciduous foliage at peak color, the deep burgundy evokes the cozy richness of autumn evenings, the beige provides the season’s characteristic quietness, and the gilded leaf accents celebrate the golden quality that makes autumn sunlight so distinctive. Together they create a set that is genuinely autumn-complete.
Follow DailyJuggar on Pinterest for daily fall nail inspiration throughout the season, and join the community on Facebook where we share the latest nail designs every week.
Styling tip: Gold glitter accents in a design with multiple warm base colors should use a fine, iridescent gold rather than a chunky or opaque gold glitter — fine iridescent gold catches light in a more complex, multitonal way that complements the complexity of the surrounding palette, while chunky gold reads as a separate added element rather than an integrated design component.
Best for: All nail lengths, warm skin tones, harvest celebrations and all fall occasions
The Essential Fall Nail Color Palette for 2026
Every fall nail ideas 2026 design draws from the same rich, warm color foundation: deep chocolate brown that anchors the palette, burnt orange that provides the season’s signature warmth, mustard yellow that brings the golden quality of autumn light, deep burgundy and maroon that carry the season’s richness and depth, terracotta and rust that reference the earth after summer, creamy beige and soft nude that provide visual rest, and metallic copper and gold accents that capture the quality of autumn sunlight. Understanding this palette means every color decision within a fall nail design will feel seasonally coherent rather than coincidental.
How to Choose Your Fall Nail Idea for 2026
For everyday professional wear: The neutral matte almond with gold bar, neutral nude with autumn leaf details, and cascade leaf tip on nude base designs deliver genuine fall character without any element that would read as inappropriate in most professional environments.
For creative expression: Autumn swirls in forest green and burnt orange, the earthy butterfly wings design, and the terracotta-olive-mustard four-color set offer the most artistic and distinctive fall nail options.
For seasonal celebration: The maple leaf accent, sunflower on chocolate brown, fox and paw print woodland design, and the burnt orange-burgundy-gilded leaf design all deliver maximum autumnal joy for occasions where seasonal expression is the priority.
For Halloween: The spooky season matte design is perfectly calibrated for October — festive enough to feel celebratory, sophisticated enough to wear anywhere.
Frequently Asked Questions: Fall Nail Ideas 2026
What are the most popular fall nail ideas in 2026? The most requested fall nail ideas 2026 in salons include autumn leaf accent designs on nude or warm bases, warm ombré gradients in brown-to-orange transitions, deep burgundy and maroon solid designs, plaid accent nails, and metallic copper leaf art on matte backgrounds. The season’s palette is dominated by chocolate brown, burnt orange, mustard yellow, deep burgundy, and earthy terracotta.
What nail colors are trending for fall 2026? Deep chocolate brown, burnt orange, mustard yellow, burgundy, maroon, terracotta, rust, earthy olive, and metallic copper are the defining colors across all fall nail ideas 2026. These warm, rich tones reflect the season’s characteristic visual quality and pair beautifully with autumn’s fashion palette.
Which fall nail designs last the longest? Solid gel designs in fall colors, simple matte two-color alternating sets, and the warm ombré gradient designs consistently show the best durability. Designs with 3D floral elements, rhinestones, or metallic leaf decals benefit most from double top coat application to extend the pristine appearance of embellishments.
Are leaf nail designs difficult to do at home? Simple, abstract leaf shapes applied with a dotting tool or liner brush in autumn colors are achievable at home with practice. Detailed, botanically accurate leaf art with veining and natural color variation requires professional technique and appropriate nail art brushes for genuinely beautiful results.
Which fall nail ideas 2026 work best for short nails? The neutral nude with leaf details, dancing leaves on nude base, cascade leaf tips, mustard and chocolate matte design, and the neutral matte almond with gold bar all work beautifully on shorter nail lengths. Short nails in fall colors are fully embraced in 2026 as a practical and completely stylish choice.
Final Thoughts
The fall nail ideas 2026 collection captures something genuinely special about the season — its warmth, its richness, its combination of cozy comfort and visual drama, and its quality of beauty that comes from endings rather than beginnings. Whether you choose the quiet sophistication of a matte neutral set with a single gold bar accent or the full botanical celebration of the maple leaf and warm tone design, your autumn nails can reflect everything the season makes you feel.
Save the designs that resonate most from this collection, bring multiple reference images to your next appointment, and let your nail tech help you find the version that works perfectly for your nail shape, skin tone, and fall lifestyle.
📌 Save these fall nail ideas 2026 to your Pinterest boards before your next salon appointment!